Adobe Photoshop is a very popular tool among professional graphic designers. It is capable of produce raster graphics with lots of comprehensive user-friendly tools. With the modern advancement of photography, especially with digital cameras most of the photographers are using adobe Photoshop to edit their photographs by color correcting, cropping and with many other techniques. In the context of photography identify conditions and configuration of the camera in the shooting time is essential parameters when it comes to editing. Normally Adobe Photoshop doesn’t identify the camera configuration, only the image data. If you want to solve this problem and edit your images accurately considering camera configuration you need a plug-in. The plug-in you need is Adobe Camera RAW which also comes built-in with Adobe Photoshop CS5. If you are using previous version of Photoshop you will have to download and install the plug-in before you go from here. With the aid of this plug-in you can edit your digital images which are in RAW formats accurately and non-destructively.

What are RAW Files?
Normally point and shoot type digital cameras produces JPEG files which can be open in any personal computer. But when the camera converts its images sensor data in to JPEG file, it has to reduce significant amount of data to fit in to its compression. Further if camera applies any color correction to JPEG file, it’s irreversible. It’s ok to use day to day photography, but not good enough to get a professional quality result. Professionals need what the image sensor actually captures without any data loss or correction. At the same time they need the camera configuration also to be saved with the file for accurate editing. Therefore most of the professional and semi-professional cameras allow shooting in RAW formats.
RAW file is the collection of data which captured by the image sensor in the camera, without any data loss. This is also called as pixel dump. Some cameras provide feature to use uncompress, lossless compressed and compressed raw files. In above three types first two are containing total amount of data captured by the image sensor and compressed format reduce details of image according to the configuration. Other than the pixel dump, a RAW file will contain lots of information about the shooting conditions including the type of camera, type of lens, focal length, ISO, aperture, shutter speed. If camera is configure to automatically apply any color correction to image like white balancing, selective color or saturation that information also will be attached to the RAW file as parameters in a non-destructive way.
Most of the camera manufactures have their own RAW file formats specially designed to cater the specific features and functionalities of each camera types. Below list contain some of the camera manufactures and their RAW file types.
- Nikon: .NEF
- Canon: .CRW
- Kodak: .CDK
- Epson: .ERF
- Olympus: .ORF
- Pentax: .PRF
- Samsung: .SRW
.DNG also called a Digital negative format could be identified as a universal RAW format those there are no international agreement saying everyone should comply with that. So when you shoot in different cameras you will still get different file formats. In Camera RAW there will be separate profiles to handle camera types and their different lenses.
Getting Started
Once you figure out that you need to use Camera RAW and install it successfully, you have to do some configuration in Photoshop to make it work well. To do that configuration you should follow the below path in Photoshop menu
Edit -> Preferences -> Camera RAW
This will give you below window.
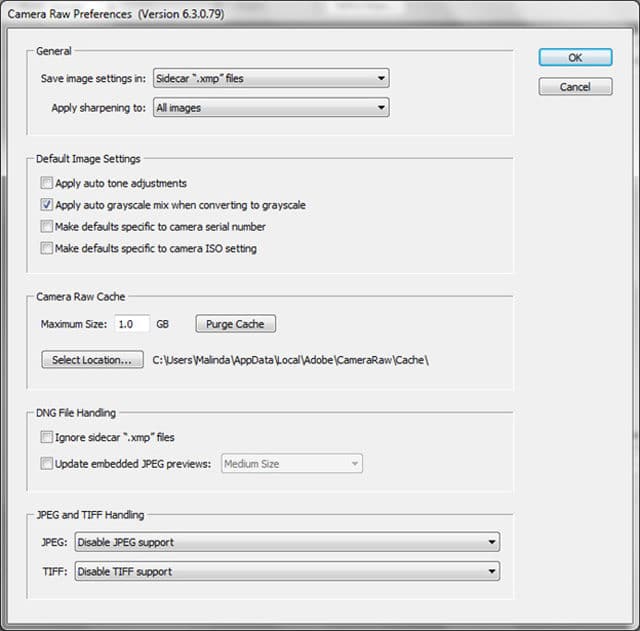
Adobe Camera RAW – Preferences
Generally you need not to do any changes in here. In general section you can change the ‘save images settings in’ to camera raw database. In that case the entire configuration will be saved in centralized database. With this setting ‘sidecar .xmp files’ it will create a configuration file where the original image is, which could be the best configuration. Camera RAW allows you to edit JPEG and TIFF files as well. If you need Camera RAW to be open when you open such a file you can change the setting in the section ‘JPED and TIFF handing’.
Main Window
After you install and configure the Camera RAW plug-in you can open RAW file in Photoshop, you may drag and drop the file in to Photoshop window. Once you do that it will open the below window.
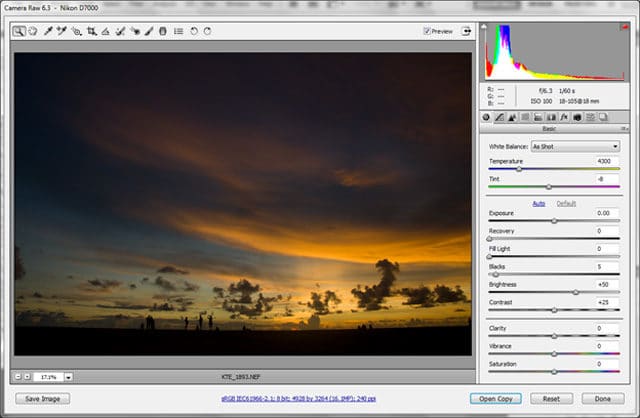
Adobe Camera RAW – Main Window
This is the Camera RAW main window. At the top of the window it provides you basic image manipulation tools like white balance, crop, straighten, spot removal, red eye reduction etc. If you tick ‘Preview’ it will reflect the changes that you will be doing to the image real-time. There is a button to make the window full screen too.
Right below the manipulation tools, you can see the preview of the image inserted. You can select the amount of zoom below the image. I prefer ‘Fit in view’. There is a button for you to save the edited RAW image as a JPEG or any other common image format. The blue color link will take you to work flow options which contain color space and other details.
In the right hand side you have variety of controllers to edit your image. At the top you can see the color histogram separated in to color channels. It will reflect the changes you will do with the controller real time. In the histogram there are two arrow heads in both ends. You can use them to identify detail loss in black areas and detail loss in white areas due to over expose. Below the histogram you can see the shooting configuration of the image automatically identified by Camera RAW by reading Meta data in RAW file.
Below that there is a tabbed pane where you can access the image editing controllers. The detailed explanation of each part will be there in the next section.
Image Editing Tools
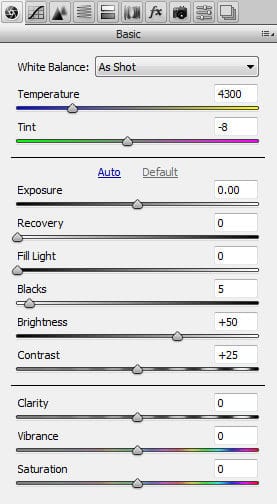
Adobe Camera RAW – Basic
The first section ‘Basics’ allow you to do an accurate light correction to your image. First 2 sliders are for white balancing. If you have set your camera to auto white balancing, those configuration will be reflected with the values of slides, yet totally reversible. Then you can change the Exposure which controls the amount of whites as you need. You can use Recovery slider to re gain the details of over exposed areas up to certain level. If you feel like your image background is too dark using Fill light slider you can increase it. Blacks slider controls the black area and it’s commonly used to remove the haze in images. Brightness and contrast works the usual way. If you need to blur or sharpen your photo, you can use the Clarity slider for that. Finally you can enhance the color levels of photo using Vibrance and Saturation.
If you have done a good job with the camera, this basic controller would be enough for you come up with exceptional photograph.
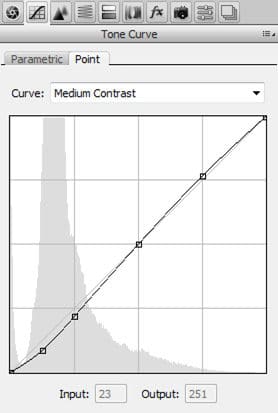
Adobe Camera RAW – Tone Curve
In this section you can alter the color curve and change the light of the photo. Parametric curve could be changed using different sliders and Point curve could be change using any number of points that you can introduce to the curve using mouse click on it. If you are using parametric curve it will be same as Exposure, Recovery, Fill light and Blacks in the ‘Basic’ section. If you are using point curve you have fine control over different rage of light with much flexibility.
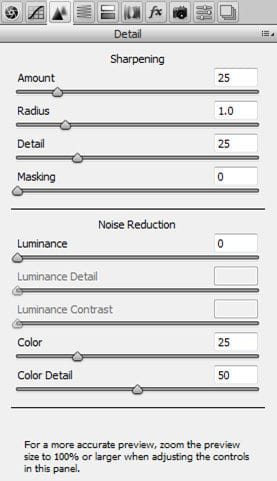
Adobe Camera RAW – Detail
Using this section you can manipulate you image to make to little bit blur or sharp. In order to get this done you can use the sliders in the Sharpening section. After controlling, radius, detail and Masking levels you can blend the effect with the image with the amount slider.
If your digital camera is producing noisy images, especially in low light conditions, using Noise reduction section you can remove noise in to certain level. Mainly there are two options, luminance and color. In order to see the actual change will happen to the image you have to set the preview size to 100% and this message is displayed there in the window.
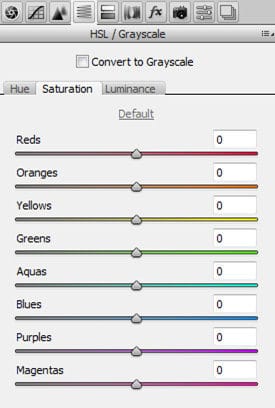
Adobe Camera RAW – HSL/Grascale
If you need to change the characteristic of each color channel you can do that in this section. There are you three main section, hue, saturation and Luminance. You can change the each attribute for each color channel using the given slider.
There can be creative usage in this section. You may de saturate one color, or de saturates all the colors, except one to make out standing photographs.
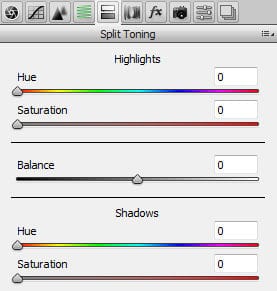
Adobe Camera RAW – Split Toning
This section allows you to change the hue and saturation separately in highlights and shadows. To define the difference between shadow and highlight you can use the balance slider. I have rarely used this section, yet there can be creative usage depending on your photograph.
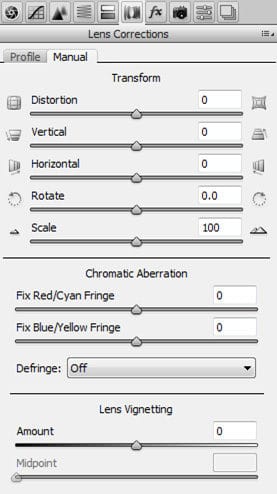
Adobe Camera RAW – Lens Correction
This is a very important section in Camera RAW. Sometimes, when you are shooting with different lenses, they cause problems to your photograph. If your lens profile is there in Camera RAW, it will automatically fix those errors that come from the lens. If camera RAW doesn’t have your lens profile you can always use the manual controllers.
Transform section deal with the different tilting of images in all direction. Distortion slider could be use to control the effect of fish eye lenses and sometime you may use to make a image looks like fish eye using that.
If you have different unusual color chrome around the edges of your images, you can use chromatic aberration to correct those.
Lens vignetting is very important especially when you dealing with high power telephoto lenses. They might make the corners of your images slightly darker. You can correct those errors using amount and midpoint sliders.
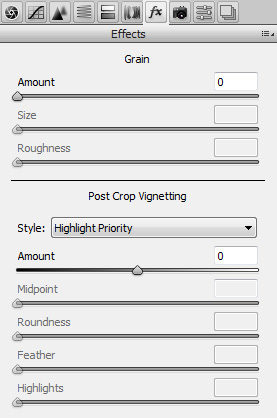
Adobe Camera RAW – Effects
In this section you can introduce grain to you photograph to give it a old look and feel. At the same time you can add different effects to corners of the photo using post crop vignetting. I have rarely used this section as well. Never feel like using it for my photographs.
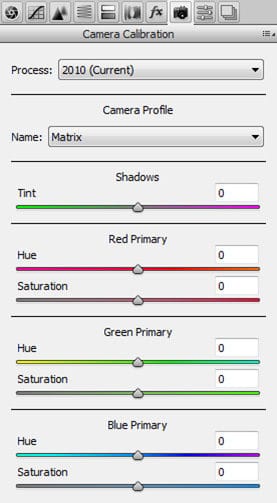
Adobe Camera RAW – Camera Collaboration
This section fine tunes the color interpretation of Camera RAW for different types of cameras. However, most of the cases default configuration will work. If default configuration is not good enough you can calibrate your camera manually using this panel. If you required manual calibration you can use color calibration chart. Here you can find specific instruction to calibrate your camera with camera RAW.
Special Tips
Configure Camera to Shoot RAW
Most of the latest digital SLR cameras support RAW file formats, yet they have their own proprietary version as I mentioned below. When you shoot with the camera you should capture the image with maximum possible quality. As the first step you should change the file format in your camera to RAW. Then the camera will offer you options as below.
- Uncompressed RAW
- Lossless compress RAW
- Compressed RAW
Down the list quality will get reduced. However out of first two options both will hold the same quality, so you may go for 2nd option to save the space. If your camera offers bit depth to select go for the highest. Additionally your camera may offer you to save a JPEG file also as a preview.
Handle RAW file in Windows Platform
Once you copy pasted your RAW file in to windows PC you have no way to open it in any application before you drag and drop in to Camera RAW in PS. This will give you problem of previewing and take lots of time to get the actually image you needed. As a solution, above mentioned JPEG preview could be use, which will be placed next to the RAW file, yet it consumes more storage space. The best solution I came up for this is install a RAW file encoder in to your Windows PC, then it will be able to handle RAW files same as any common image format. There are several RAW encoders and none comes for free. Depending on your requirement you may purchase one.
Finalizing
After you have done with your editing in Camera RAW you have two options. You can open the image in Photoshop to continue with further manipulation. For that you can just click on ‘Open Image’ button. If you have many images, first you can select the desired images and click ‘open images’. By pressing ‘delete’ you can remove the unwanted images.
If you are happy with the edit you can simply save the RAW file in ant common file format By clicking on ‘Save image button’ without going in to Photoshop.
Tags: #Adobe
