How to Control Android Smartphone via Web Browser?

When you are at office working in front of your computer you have no time to even touch your Smartphone. It will probably rest in your pant pocket or charging dock. If you are getting many calls you might be using a Bluetooth headset. But what if you get a SMS? Or you came across with a nice song you need to copy to your phone?

In that case you have no option. You have to get the phone out of your pocket, handbag or charging dock and do what’s required. This is not really smooth. I want to do all those stuff without even touching my phone. If you are a busy professional I’m pretty sure you are looking for such a solution as well.

There is a free application in Google Play, AirDroid which solves the entire above problem and more. Let’s go a take a closer look.

how-to-control-your-android-smartphone-via-web-browser-8253816

Setting up the Environment for AirDroid

On Android Smartphone

  • Go to Google Play and install AirDroid.
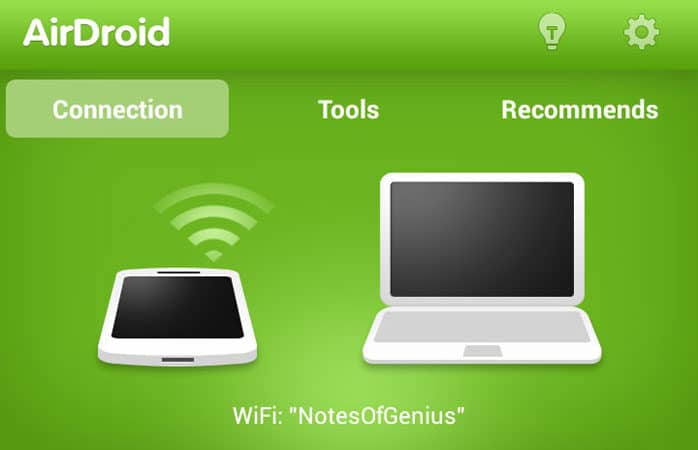
  • Open the application and it will take you to main dashboard.
airdroid-android-dashboard-4544183

  • This app is letting you to connect to your phone through your browser and do many things with it.
  • There are two ways to connect. Via Wi-Fi or AirDroid web. You will be able see those 2 options in app dashboard.
airdroid-android-open-web-address-7386755

  • Rest of the stuff will continue in your browser.

On Computer

  • Install a latest version of Chrome or Firefox. I’m using Chrome for testing purpose.
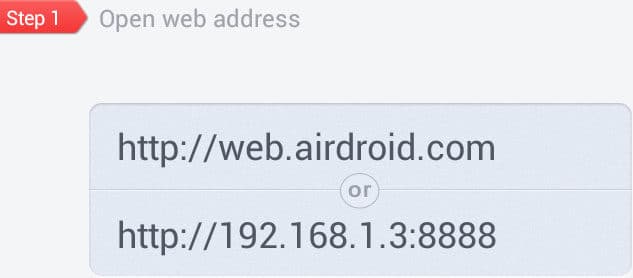
  • If you like to use web access, go to the URL web.airdroid.com. It’s displayed in app dashboard.
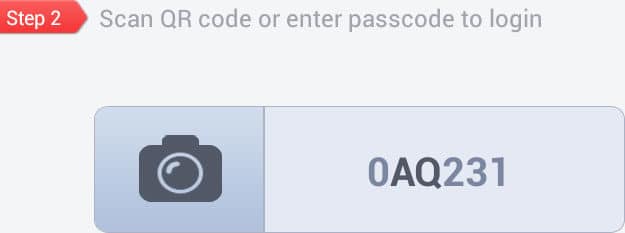
  • There you can enter the pass code which you can find in app dashboard or scan the QR code.
airdroid-android-qr-pass-code-8609749

  • Within few seconds it will open web control panel for your phone.
  • For Wi-Fi you have to enter the given IP address and port. Same as web you have to enter the pass code. There you don’t have the QR code option
  • Once you open the AirDroid web control panel you can put your phone away and control it in your browser.

Tip: If you are using AirDroid web it will consume data in your Smartphone as well as in computer. So try to use Wi-Fi access as far as possible.

Getting Started With AirDroid

  • At the top of web control panel you can find search box. There you can find and install apps on your Smartphone.

airdroid-web-search-box-5230187

  • There you have options to view multiple desktops, send message, upload file etc.
  • In the message section you have full access to SMS on your phone. Now you don’t have to touch your phone to send, receive and manage SMS on it.
  • In the contact section you have full access to your phone book. There you can create SMS for any contact, see info, browse call logs, create new contact, delete them etc.
  • Call log section gives you access to whole call log in your phone.

airdroid-web-message-contact-call-log-6572206

  • If you want to upload file to your phone maybe music, ringtone, photo, video etc. you can do all those right there.
  • In the app section you can install new apps as well as remove existing.

airdroid-web-files-apps-1318605

  • In top right corner you can see details about your connected device.
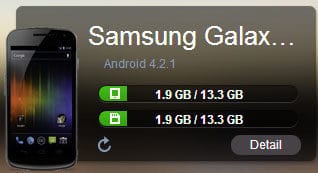
airdroid-web-device-details-9032460

  • Below that you have a box where you can enter a web URL and automatically open in your phone.

airdroid-web-url-push-4044613

  • Down there you can find a note pad. You can write some text there and push it to phone clipboard. Once you go to phone you can paste that text anywhere you need.
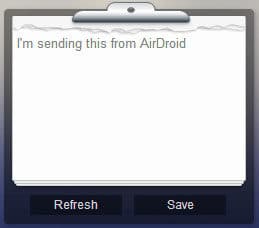
airdroid-web-clipboard-push-3856636

  • At the bottom right you will find status of Wi-Fi connectivity, Mobile signal and battery status in your phone.

Advanced Usage

  • If your phone is rooted you can capture a screenshot of your phone via AirDroid
  • If you have given permission to install application from unknown sources, you can push APK files to your phone to install via AirDroid.
  • Make AirDroid a desktop application with Chrome application shortcuts. It will definitely improve the user experience.
  • DesktopHardware: Intel Core i5 2nd Gen // 4GB DDR2
  • Desktop OS: Windows 7 Home Premium // 64 Bit
  • Desktop Browser: Google Chrome Version 23.0.1271.91 m
  • Mobile Device: Samsung Galaxy Nexus
  • Mobile OS: Android Jelly Bean 4.2.1
  • Mobile Browser: Google Chrome Version 18.0.1025469

Wrapping Up

AirDroid is a complete solution for you to control Smartphone right in your browser without even touching it. When I’m working I keep the phone in charging dock, plug the Bluetooth headset and open AirDroid in a browser tab. It’s a perfect setup and I’m pretty sure it will save lots of time in your busy office life.

One major thing I missed in AirDroid is there is no way to make phone call or get incoming call notification. It would be great if AirDroid developers could come up with a feature to initiate a call right in the browser and continue it with a Bluetooth headset. It will make this app complete.

That’s about AirDroid! It’s a great must-try application in your phone. Install it right now and it will change your life style for sure. Never forget to share what you think about this app as a comment below. Subscribe to our email list and stay connected.

Tags: #Android #Browser

Roadmap to High Performance WordPress Blog [Hosting]

You have already optimized software infrastructure in WordPress blog to maximize performance. Now all you have left to do is optimize hardware infrastructure, in other words hosting environment. This plays an important role to make your WordPress blog highly performance optimized.

Hosting server is doing lots of work to present your blog to its readers. It executes PHP scripts, prepare HTML files, link images and push the web page to browser. In order to make this process faster there are few factors you have to pay attention to.

Web hosting server is a very powerful computer running specific software. Same as any other computer, for faster operations it should have faster and bigger Processor, RAM and Hard Disk Drive. But in practical situation, it’s not that simple

Roadmap

roadmap-to-high-performance-wordpress-blog-hosting-5504411

Types of Web Hosting

Web hosting is money making business. Most of the hosting service providers are trying to host as many as web sites in one server. The way you share your hosting server with others decide how much you pay and what sort of service you would get.

Shared Hosting

Here you are getting a control panel to manage your websites in hosting server. You will get specific amount of disk space and bandwidth. In some cases they are unlimited. However, you have no control over processing power and it’s shared with all the websites hosted in same sever.

Generally hosting service providers are hosting many number or web sites in one shared server. The number could be as high as many hundreds. Lesser the number is better.

Most of the bloggers would like to go for shared hosting plan considering cost factor. When you purchase a shared hosting plan, you have to pay attention to uptime, number of sites you can host, disk space and bandwidth. Other than that, security is also an important factor.

Tip: Reading reviews for different shared hosting plan is not a good idea. Most of them are biased and sponsored by different hosting service providers. I am on HostGator and its working fine for me.

Virtual Private Server

If you need more power and control, to handle large web traffic, you need to move to a virtual private server. Here most of the factors are same as shared hosting. But your plan guarantee you a specific amount of processing power and RAM.

Dedicated Server

Here you are getting your own separate web server. You are free to do anything with it. All the computer resources are guaranteed and dedicated. You will need this if you are using advanced web technologies in your web site and handling large web traffic.

What Is The Best Hosting Plan For A WordPress Blog?

There is no single answer for this question. You have to find your own way. In most of the cases shared hosting plan would be enough for a blogger till you get a significantly large traffic. Make sure your hosting service provider is giving you unlimited disk space and bandwidth, or it will be a problem for your growth.

You have to pay attention to number of SQL databases you can have, number of FTP accounts and email facilities. Make sure they are adequate for your requirements. When you are getting a large traffic you might have to move to a VPS (Virtual Private Server). Very few bloggers will need a dedicated server.

Make sure your server is having lesser ping time and near 100% up time. If your server is less responsive, no point of doing all the software optimization we discussed so far. If your site is frequently going down, it will be very bad for your reputation and search engines also will punish you for that.

I believe now you have a clear picture about how to select a good web hosting service provider for your WordPress Blog. However, having a very powerful server in one location is not enough to have a high performance WordPress blog.

All your users around the world will have to access the same server. Of course it will be a performance bottleneck. In order to solve this problem you have to distribute your static content worldwide and deliver only dynamic content from the server. It’s coming up next.

Contact me @MalindaOnline to claim your Free Website Performance Review. I’m giving you a detailed report with identified performance bottlenecks and optimum cost effective solution.

Subscribe to my FeedBurner to get latest articles right in to your inbox, follow us @NotesOfGenius to get latest updates in NOG. Stay tuned!

Tags: #Blog #Performance #SEO

Roadmap to High Performance WordPress Blog [Database]

So far you have taken all the primary steps to make your WordPress blog rocket speedy. Your theme is optimized, images and videos are in good shape, CSS/JS compressed and loading fast, finally we enabled browser caching, so your browser is not bothering server for each and every content.

By now you must be experiencing at least 5 times better performance in your WordPress blog. Very importantly, we were trying to do each and every step manually, so you know it in and out. At the same time I gave you the relevant plug-ins to automate it as well.

Today we are trying to optimize MySQL database in your WordPress blog. This is a very important part in WordPress blog. But most of the bloggers have never even seen it. That’s where your blog save all the data including, posts, pages, comments and configuration.

Roadmap

roadmap-to-high-performance-wordpress-blog-database-3124935

What are The Reasons for Laggy WordPress Database?

WordPress database is carefully engineered for maximum performance following appropriate database design principles. So you don’t have to worry about its structure. But you have to pay attention to data that gets stored in it. More data leads it to lesser performance in operations. So you have to make sure it’s not storing unwanted and irrelevant data.

You might ask “How come irrelevant data go in to my WordPress Database?” actually there are no totally irrelevant data. This is how it happens. When you are writing a post, WordPress engine is saving periodic revisions. So you can go back to previous version if you want to. And you could save your post as drafts and sometimes it’s happening automatically. When you have spam comments and unapproved comments, still they are getting saved in database. All of those add new records to database and you rarely use them. They are just making your database slower and bigger.

How to Remove Unwanted Record from Database?

First I’ll tell you the manual way. Go to hosting control panel and then go to PHP MyAdmin. There you can see your wordpress database. Open it and see the tables there. Before we go to next step make sure you back up database.

Go to wp_posts and see records there. See the posts status and you will find values such as published, draft, auto-draft, inherit and revision. Delete everything except the records with post status published and inherit. And you have to do the same in wp_comments table. You have to remove unapproved comments. However this will require some SQL knowledge and it’s not that common. This could be a risk as well, since you could accidently remove good records.

So here my recommendation is to use a plug-in. The best and simple plug-in I have ever come across with is wp-optimize. Once you install the plugin, it will give you new main menu item. There you can check things you need to clean up including revisions, drafts and spam comments then remove those with one click.

Ok, now your database is also optimized, having lesser records and smaller. If you have taken care of the entire previous aspects, now you are an owner of a high performance WordPress blog.

You can test the speed of your blog using YSlow browser plugin, Google Page Speed online or Pingdom full page test.

However, to complete the picture you have to pay attention to hosting environment and its hardware as well. It’s coming up in next article.

Contact me @MalindaOnline to claim your Free Website Performance Review. I’m giving you a detailed report with identified performance bottlenecks and optimum cost effective solution.

Subscribe to my FeedBurner to get latest articles right in to your inbox, follow us @NotesOfGenius to get latest updates in NOG. Stay tuned!

Tags: #Blog #Database #Performance #SEO

Roadmap to High Performance WordPress Blog [CSS/JS]

We are walking down the road to make your WordPress blog super speedy. So far we selected good looking as well as high performance themes and optimized images and videos. This will make your page size smaller and of course it will lead to better performance.

If you have already taken those steps, you must be already experiencing better page load time and smooth navigations. Today we are trying to take it further by optimizing JavaScript and CSS.

Every WordPress theme would be using JS and CSS to style it. With time JS and CSS has improved to give lots of styling options. So you can reduce the usage of images drastically. In a general situation CSS add style to HTML and JS add behavior.

Roadmap

roadmap-to-high-performance-wordpress-blog-css-js-8399191

Writing JS and CSS

When you are writing CSS and JS you have several best practices to follow. It will ensure maximum performance and better browser compatibility.

  • Comment your code
  • Make it organized with proper indentation
  • Use consistent and meaningful naming
  • Limit line length and lines of code
  • Organize CSS properties in alphabetical order

Check your WordPress theme’s JS and CSS file whether they meet above requirements. If not, go to Dreamweaver, access your site through FTP and do necessary changes. As a result you will get optimum and smallest JS and CSS file.

Linking JS and CSS

Using inline and internal JS/CSS is not a very good practice. You have to include all of them in an external file and link them to required HTML file. The objective is better organization and ultimate separation of data and style.

If you have separate CSS/JS files, move all the code to one file and save it in your server. Then link CSS file in html head. Styles need to be loaded before HTML, if not during the page load time all your design will be out of place.

Your JS file needs to go as the last thing before HTML tag. If you link JS in you whole page loading will be blocked till JS file loads. However if you have JS image slideshow in your page, you have no option but link JS in tag.

This will minimize HTTP request you page will make. Lesser the HTTP request, higher the performance. And file size of CSS and JS should be lesser, because of the steps we have taken. As a result everything will load super speedy.

Minify and Compress

After writing JS/CSS and you are completely happy with it, make a back up and compress the deployed JS/CSS files. That means you have to remove all the spaces and line brakes. It will reduce the file size further since line breaks and spaces consuming. You can minify your HTML code too. Make sure you make a back up before you minify them, or it will be very difficult to edit minified code.

Finally you have to compress your JS/CSS and even HTML code. The best way to do this is by editing .htaccess. Go to Dreamweaver, access remote website, open .htaccess. Then put the below code there.

# BEGIN GZip

AddOutputFilterByType DEFLATE text/plain
AddOutputFilterByType DEFLATE text/html
AddOutputFilterByType DEFLATE text/xml
AddOutputFilterByType DEFLATE text/css
AddOutputFilterByType DEFLATE application/xml
AddOutputFilterByType DEFLATE application/xhtml+xml
AddOutputFilterByType DEFLATE application/rss+xml
AddOutputFilterByType DEFLATE application/javascript
AddOutputFilterByType DEFLATE application/x-javascript

# END GZip

Checklist

  • JS/CSS code is well written following best practices
  • You have one external CSS file and once JS file
  • Inline or internal JS/CSS not used
  • CSS file is linked in Header.
  • JS file is linked in footer.
  • JS/CSS/HTML files are minified and compressed.

Now you have highly optimized JS and CSS files in your WordPress themes. If you try to compare the size and number of JS/CSS files before and after you will see the difference.

If you don’t want total control and if you like to automate the process you can install wp-minfy plug-in. It will automatically do all the below work for you. Manual full controlled way or plugin, choice is up to you.

Our next step is browser caching which is letting the browser to load static content from local cache without making request to server.

Contact me @MalindaOnline to claim your Free Website Performance Review. I’m giving you a detailed report with identified performance bottlenecks and optimum cost effective solution.

Subscribe to my FeedBurner to get latest articles right in to your inbox, follow us @NotesOfGenius to get latest updates in NOG. Stay tuned!

Tags: #Blog #Performance #SEO

Roadmap to High Performance WordPress Blog [Caching]

Now we have done lots of thing for your high performance WordPress blog. You must be already experiencing the difference. You have optimized theme, smaller yet well designed images and video and finally highly optimized and compressed JS/CSS files.

Now your page size would be very smaller due to compression, its making lesser HTTP requests to server and consuming lesser bandwidth. This all fuel the rocket to fly faster. Today we are about to take another important step towards high performance WordPress blog. It’s browser caching.

Roadmap

roadmap-to-high-performance-wordpress-blog-caching-4980833

What Is Browser Caching?

When you are loading your blog page, if you take a closer look, you will figure out that most of the content are static. This means they are not changing over time. But when a visitor comes again and again, he will have to load them every time.

If browser cache is enabled in the initial visit, browser will save static content in visitor’s computer. If he comes back to the website, the static content will be loaded from cache, not from server. Obviously it will be many times faster.

Most of the modern browsers are automatically doing it. What you can do is instruct browser to do it properly in an optimum way. There are several ways to get it done. However, none of below will work if visitor has disabled browser caching in his browser.

How to Enable Browser Caching?

In order to get this done we have to use .htaccess again. Go to Dreamweaver, access the remote site you have configure through FTP and open .htaccess file. Then put the below code there.

# BEGIN Cache Control

ExpiresActive On
ExpiresDefault A31556926
ExpiresByType text/html A3600

# END Cache Control

Now your server is instructing all visiting browsers to cache entire static content for one year. (31556926 is one year in seconds). However I’m caching HTML content only for one hour since it’s subject to frequent changes.

Now you are almost there to have a high performance WordPress blog. Generally you are now in a good shape. But if you like to go the extra mile, there are few things to do. Optimizing the database is coming up next.

Contact me @MalindaOnline to claim your Free Website Performance Review. I’m giving you a detailed report with identified performance bottlenecks and optimum cost effective solution.

Subscribe to my FeedBurner to get latest articles right in to your inbox, follow us @NotesOfGenius to get latest updates in NOG. Stay tuned!

Tags: #Blog #Performance #SEO

Nexus 5 – A Super powered Pahablet in to Nexus Family

Back ion November 2012 Google completed the whole Nexus family by introducing Nexus 4 the Smartphone, improved version of Nexus 7 the mini tablet and Nexus 10 the full size tablet. But there is one missing link to complete a family of mobile devices.

Few years ago Samsung Introduced the Galaxy Note. It was too big to be a Smartphone and too Small to be a mini tablet. So people started calling it a Phablet introducing a new mobile device category.

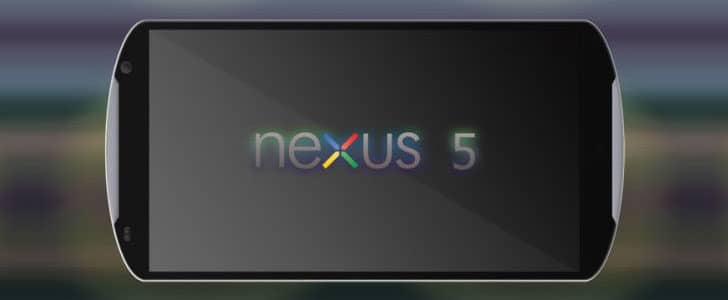
So far there is no Phablet in nexus family. In past week there were tons of rumors about Nexus 5, a phablet for Nexus family. That’s something worth taking a closer look at.

nexus-5-a-super-powered-pahablet-in-to-nexus-family-8519541

Rumored Spec and Features of Nexus 5

Design: Expected to be same as Nexus 4 // Front facing stereo speakers

Display: 5.2 Inches // OLED // 1080x1920px // 423ppi // Gorilla Glass 3

Processor: Qualcomm Snapdragon 800 // 2.3 GHz // Quad Core // Krait 400 // Adreno 330

Storage: 3 GB LPDDR3 // 32 GB // non-expandable

Camera: (Primary)13 MP // HDR // 4K@30fps // 1080p@60fps (Front) 2.1 MP // 1080p@30fps

OS: Android, a version of Key Lime Pie

Connectivity: 2G // HSDPA // Wi-Fi // GPS // BT // microUSB 2.0

Battery: Li-Po // 3300mAh

By the first look you will figure out that Nexus 5 going to have many hardware improvements we have never seen before.

We have already seen the power of Snapdragon 600 processor with HTC One and Snapdragon 800 is expected to be 50% faster. Adreno 330 GPU has twice the power as Adreno 320. You need no more details to picture this beastly power.

The camera is expected to be manufactured by Nikon a leading professional DSLR manufacturer. For the first time we are going to have 4K videos in a mobile device. That’s what you can do utilizing the power of Snapdragon 800 processor. You will be able to record near Hollywood quality videos just with your Phablet.

The battery is also pretty big, so you can expect a decent battery life out of this device with OLED display and Snapdragon Processor.

Rumors say that this is expected to be realized in last quarter of 2013 and that would be a perfect time. I have a gut feeling that this will be one of the most rumored Android devices. I’ll update this post as new information flows in.

Stay connected with Note Of Genius!

Tags: #Android #Google #Nexus #Smartphone #Tablet

Smart Screen ON – Android App to Save Power Button

Generally Android Smartphone are using power button to lock the screen. You must be pressing this button many times every day. It locks the screen as well as shut down the display. This is a good power saving strategy. If you take a look at power consumption report in your phone, display is the one which drains the battery out so fast.

However, power button is a valuable piece of hardware in your Android Smartphone. Using it many hundreds of times every day is not a good idea. It’s OK to use it to switch the phone on and off. But it’s better to have some other way to lock and unlock the screen. You can always set a screen lock time, but not a perfect solution.

The best solution out of bunch of apps I tried so far is Smart Screen ON. It uses a truly smart way to lock and unlock the screen. Let’s take a closer look in to this great piece of app.

smart-screen-on-android-app-to-save-power-button-3611937

Getting Started with Smart Screen ON

  • Go to Google Play and find Smart Screen ON app.
  • There are two versions of app, you may try the free version first.
  • Download and install the app. It will add icon to your home screen as always.
  • Launch the app and access its configuration dashboard.

smart-screen-on-android-app-configuration-3903293

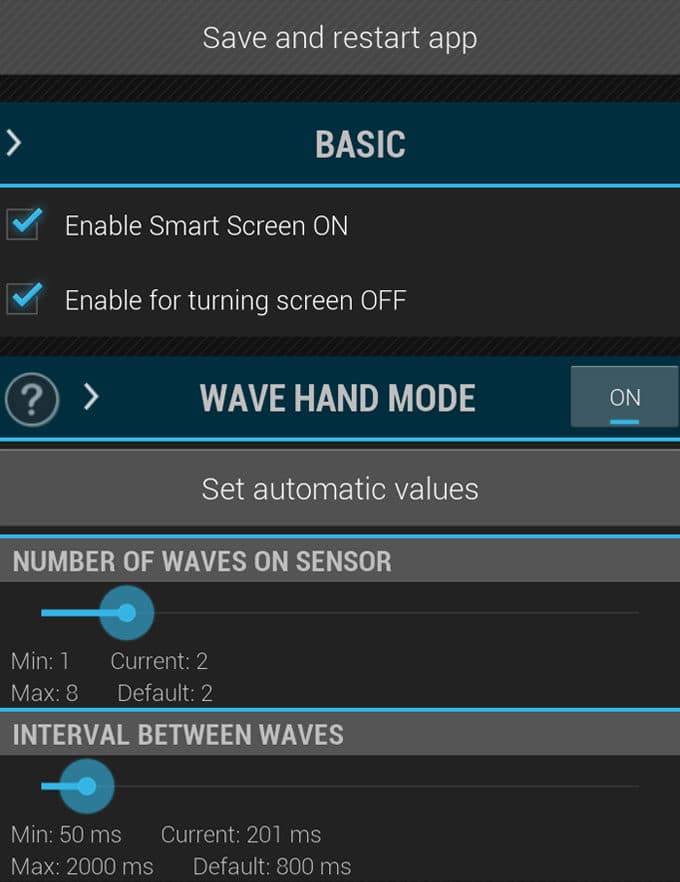
  • In Basic section enable both smart screen ON and OFF.
  • Then comes the magic. In the below basic section you will be able to find Wave Hand Mode section.
  • The app uses Proximity Sensor and Hand Gestures to lock and unlock screen. All you have to do is Wave in front of proximity sensor.
  • There you can set Number of Waves and Interval between Waves.
  • 2 Waves and 200ms would be a good configuration for most people. You can always experiment with different values.
  • In Statistics section you can see how many times this app has saved your power button. After few days the number will surprise you for sure.

Now all the configurations are done. Finally click on save and restart app. It will add item to notification area. It indicates that application is running. You can always access the app by tapping on notification. Now all you have to do is wave twice (according to above configuration) to proximity sensor to lock and unlock screen. If the proximity sensor in your phone is less sensitive, tap on it twice.

If you like to use unique gesture, in the app go to Set automatic values. Then wave to proximity sensor the way you want, app will select optimum configuration for you. Tap on ‘I like these values’ to set them. Make sure you tap on Save and restart app after every change you make.

The free version of app doesn’t have start on boot and tap and swipe mode. Further it’s not capable of hiding the icon in notification bar. If you like those features purchase the PRO version.

This is a must use app on every Android Smartphone and gives you long term benefits by saving power button. According to my experience power consumption of the app is negligible. Best thing about Smart Screen ON is, it will make you look like a Wizard!

Tags: #Android

Twitter On Android – Organize Timeline with Slices

You must have tried many applications to access twitter on your Android Smartphone. Twitter is having their official application as well. But I have seen many people using third party application to enjoy better twitter experience.

One major thing you will like to have in Twitter on Android is timeline management. There are millions of tweets and it’s very difficult to manage them. At the same time it’s very difficult to find out relevant people who you want to follow. Providing a solution to those major timeline management issues, there is a cool Android app for twitter called ‘Slices’. Today I’m going to take a closer look in this app and find out what it can do.

twitter-on-android-organize-timeline-with-slices-5097903

Getting Started with Slices

  • Go to Google play and install Slices on your Smartphone.
  • In initial launch you have to provide username and password to authorize app to use your twitter account.
  • It will take you to your time line. There you will be able to see very clear design with appropriate usage of colors.
  • By clicking slice icon at left top corner you can go to application dashboard.
  • There you can access all the application features.
  • Go to settings and set display, notification and services the way you want.
  • Now you are good to go and explore features in Slices.

Major Attractions in Slices

Timeline Design

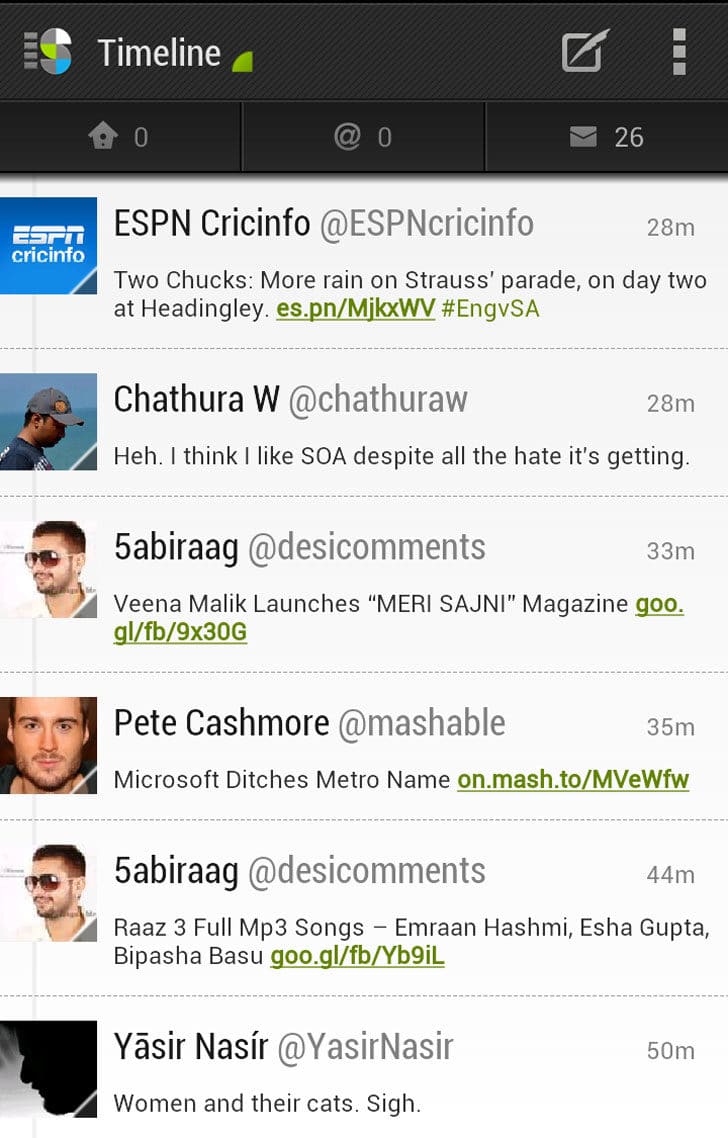
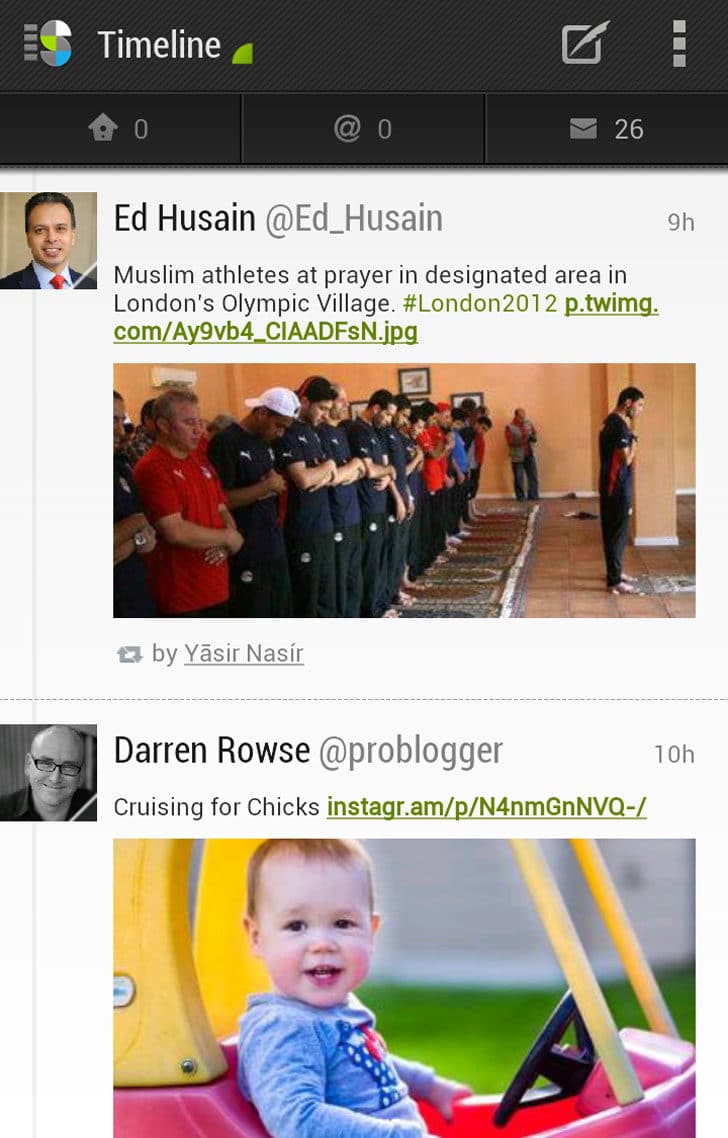
The major attraction of timeline in Slice is its clean design. You can see replies to you highlighted with green line and your re-tweets with green and brown line. In your tweets your avatar will be displayed at right side.

twitter-on-android-slices-timeline-3934735

By tapping on a tweet you can access detailed view. There you can follow its links, reply, re-tweet star or Zip it (tell you later). If there is an image you will be able to see a preview. If there is a link app will display you a button to go there.

Slices

Slice is a sub-set of tweets in your timeline. It will display tweets from selected tweetps when you create it. In Manage slices you can create new slice, give it a name then add tweeps who you want to be there. If you want to add or remove tweeps from an existing slice, go to manage slices, tap in the slice then go to choose people. In the list already added tweeps will be highlighted.

There is a drop-down menu in top toolbar. There you can select your slices as well as photos and videos stream in your time line. It’s a cool feature that I can filter out tweets with multimedia content.

twitter-on-android-slices-multimedia-stream-1135130

Statistics

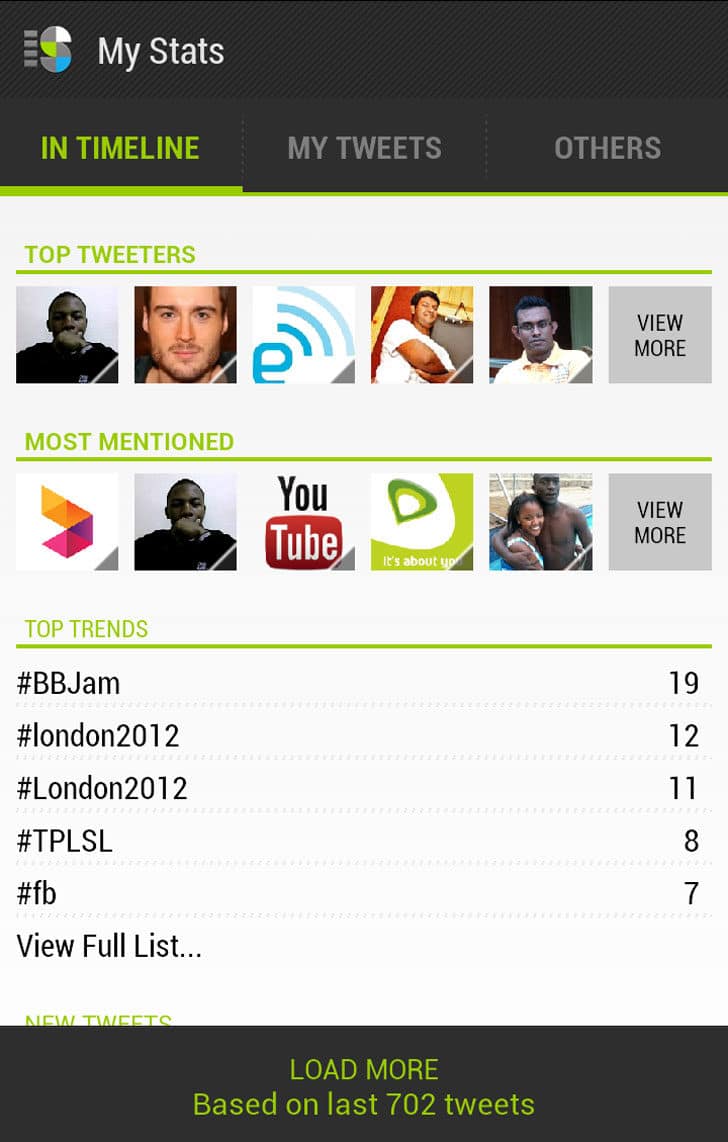
In app dashboard, there is a section named My Stats. There you can see statistical data about your twitter behavior such as tweets per day, most mentioned tweeps, top tweeps and trends in timeline and many more information.

twitter-on-android-slices-my-stats-5064301

Search and Explore

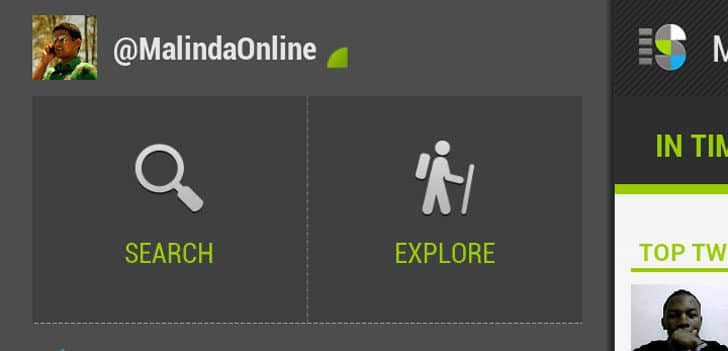
There is a search button in app dashboard. There you carry out very comprehensive search in twitter with many filleting criteria. You can search for people, lists and tweets with filters such as in your time line, mentions and even based on geographical location.

twitter-on-android-slices-search-explore-9329414

Explore options is another major attraction in Slices app. There you can find hash tags, people and tweets in different categories suggested by the app. There you can see categories such as trending, featured, news music etc.

Zip it

This is very interesting feature and adds ultimate control over your twitter timeline. If you want to temporarily hide tweets form a specific tweep, trend or keyword you can Zip it up. When you go to detailed view of tweet, in the tool bar you can see the Zip icon.

twitter-on-android-slices-zip-toolbar-3444523

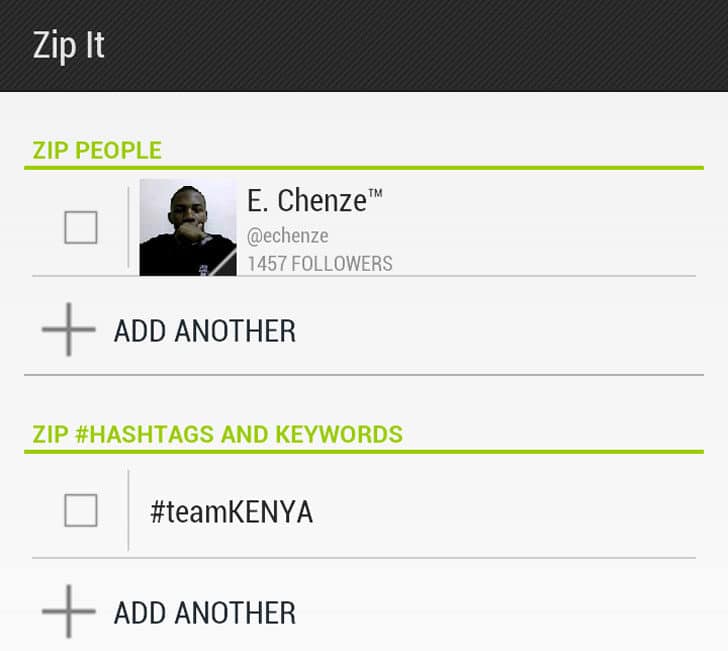
By tapping on it you can access its options. If it’s a tweet will give you options to Zip creator, its mentions or re-tweeter. If you feel like adding more people to Zip you have those options as well.

If there is a hash tag in selected tweet you can Zip that as well. Then you won’t get any tweet in your timeline with that hash tag. There is an option for you to add a specific keyword as well. You can control over all Zipped items at Manage Zipped in app dashboard.

twitter-on-android-slices-zip-options-3032119

Wrapping Up

Slice is a great app which you can use to access twitter on android. UI is very carefully engineered to give the maximum user friendliness and clarity. Colors are appropriately used to give more information to the user. Detailed view of tweet is also designed nicely to handle external links and multimedia.

I like the concept of Slices or Mini feed to manage timeline and pay attention to what I really need. The UI is also nicely designed to switch between different Slices and Multimedia streams. Accessing direct messages and mentions is also easy like never before. Search, explore and Zip is also very powerful and unique design you can use to clear up your cluttered twitter timeline.

When I was continuously using Slice app it got crashed once in every few hours. Sometimes soft keys in My Galaxy Nexus go nonresponsive till I restart the application. Switching between slices is taking longer time in some occurrences. Slices developer team should pay their close attention to solve those problems down the development process.

Tags: #Android #Twitter

How to Integrate Facebook Notification with Chrome?

Facebook has become the most popular website, the social network and more than everything a versatile communication tool. Lots of people around the world getting connected and communicate with each other thanks to Facebook.

Facebook is generating notification for your friends’ activities. You can find them in FB notification menu as well as in your email inbox if you have enabled email notification. What if you need better and even faster way to get FB notification?

If you are using a Android Smartphone or a iPhone it’s giving you real time notifications as you configured. Is there any way for us to get such a notification in a desktop browser? The most popular web browser, Google Chrome is offering you a solution. Let’s take a closer look.

how-to-integrate-facebook-notification-with-chrome-8837192

Getting Started with Chrome Facebook Notifications

  • Go to Chrome Web Store and install Facebook Notification extension.
  • It will add new icon next to your address bar.

facebook-notification-chrome-icon-2478589

  • Click on the icon and it will show you a drop down menu.
  • If you are not logged in to FB, it will ask you to log in.
  • Once you log in it will show you your FB notification stream.
  • There you have an option to see FB inbox as well.
  • Once a new notification comes it will be displayed in pop-up windows even when browser is minimized.
  • New notification also will be highlighted in address bar icon.
  • Once click it will take you to related post or message.
  • Hardware: Intel Core i5 2nd Gen // 4GB DDR2
  • OS: Windows 7 Home Premium // 64 Bit
  • Browser: Google Chrome Version 23.0.1271.91 m

With this Chrome extension you will never be late to respond to FB activities even when you are away from FB and browsing other sites. It’s simple, easy to use and performance optimized. It’s not asking for permission to access your personal data in FB. Try this extension, get FB notification right in Chrome and tell us how you feel about this as a comment below.

Tags: #Browser #Chrome #Facebook #Google #Social Networks

Android Power Management Widget – Power Controls

Power management in your android phone is one of the major challenges you will face. Most of them are having super power multi core CPUs and large display with HD resolution. All together will drain its battery within less than one day. Previously I was talking about few android power management techniques using apps as well as using manual power controls and common sense.

Quick Catch-up

Today I’m going to introduce you an Android power management widget. This will give you more space for customization and more switches than previous powerful control widget. This widget is Power Controls and you can download it at Google Play for free.

android-power-management-widget-power-controls-5318057

Android Power Management with Power Control Widget

After installation you will be able to see power control icon in one of your home screen. Through that you can control behavior of widget. Same as Powerful control you can place the widget in home screen as well as in notification tray.

How to Use Home Screen Widget?

  • Go to Application drawer -> Widget.
  • There you will be able to find power control widget. Drag and drop it in to one of your home screen.
  • It will give you the customization windows.
  • By tapping on widget button you can move it around using the slider or delete it by pressing the delete icon.
  • You can set background tint and set button color down there.
  • By pressing add toggle you can add new buttons to widget.
  • There you have wide array of options going beyond traditional power control switches. You can add multimedia options and you can even add an app shortcut.
  • One widget support up to 8 buttons and you are free to add several widgets.
  • In power control app you can find icon to customize home screen widgets. There you can customize widgets even after adding them to home screen.

How to Use Notification Tray Widget?

  • Go to power control app.
  • There you can see a large button for notification widget. Check it in to enable.
  • Press the settings button. There you customize it and it will work same as home screen widget.
  • There you can select Notification icon as well as its color

This is a pretty neat widget which will give you lots of UI customizations as well as wide options of buttons. You may like to replace Powerful control with this new widget Power Control for Android power management like a Boss. Never forget to share your experience here with us.

Tags: #Android