When you are in academic world, you will have to write lots of reports and research papers may be as a student or as an Academician. No matter what, you have to follow a set of standard rules when you produce such a document. Mainly it must not be plagiarized and should include references.
Most of the cases what you would do is insert references according to the guidelines manually. Of course you can do that for “In-text referencing”. But at the end of the document you have to include “Bibliography” which contains further details of in-text references. There you will run in to a problem unless you manually maintain a list of references that you mentioned as in-text references.
To solve all of the above problems you can use the most used document editing software “Microsoft Word”. There you can totally automate referencing and their standard formatting, with no hassle and much lesser effort.
Steps to Follow
In Text Reference
- Open a New Microsoft Word document
- Finish writing the paragraph after referring the original source.
- Collect the relevant information of original source
- Move the cursor to the position where you need in text references
- Go to References in ribbon
- Citation and Bibliography -> Insert Citation -> Add new Source
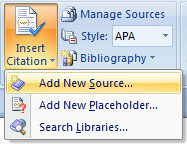
- Select Type of Source and fill the relevant fields
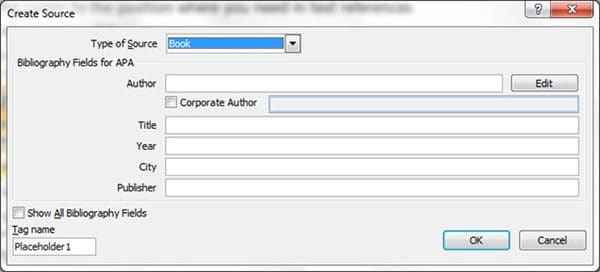
- Click OK to add in text reference
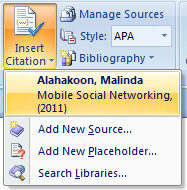
- If you want to add an Existing source, it will be appear in “Insert Citation” drop down menu
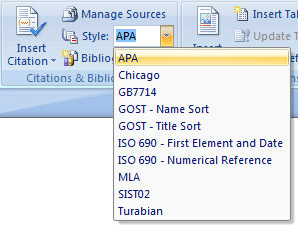
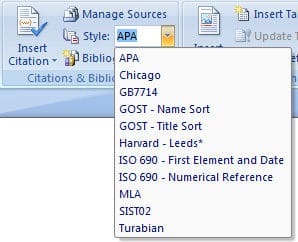
- To change the referencing Style use the “Style” drop-down menu.
Bibliography
- After you completing your document go to end of document where you should include Bibliography
- Go to References->Insert Citation and Bibliography -> Bibliography -> Select a suitable style
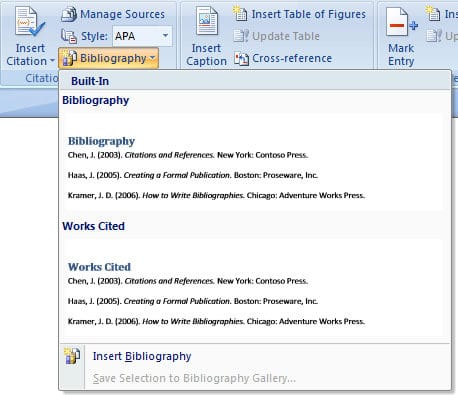
- Bibliography will be auto generated based on in text references you have used in document.
- If you add “in text reference” after adding “Bibliography” you can right click on Bibliography section and Update Fields.
- Hardware: Intel Core i5 2nd Gen // 4GB DDR2
- OS: Windows 7 Home Premium // 64 Bit
- Microsoft Office: 2007
Tips
Manage Sources
All the sources you add in your computer will be go in to a master file where it keep entire set of sources you have ever used. You can access the source master list by following below path
References -> Insert Citation and Bibliography -> Manage Sources
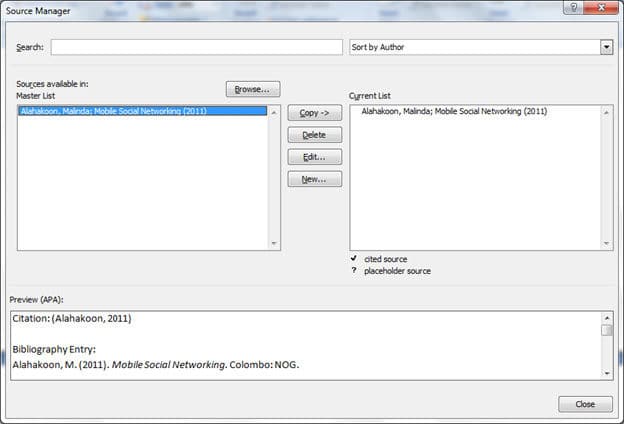
If you have any frequently using sources, you can get them to current list from mater list without re entering all the details. In the same window you can add a new source as well. All the sources will be saved as a XML file in below folder.
C:Users{Your User Name}AppDataRoamingMicrosoftBibliography
If you need to keep your sources even after you format your PC, you can manually back up them in another safe location.
Where is Harvard Referencing?
Most of the academic institute asks their students to follow Harvard Referencing. But it’s not there in References -> Style. Still you can add Harvard referencing style to Microsoft Word by following below steps.
- Download this file
- Unzip the file. In there you will be able to find lots of referencing style files (.XSL files).
- There are few Harvard referencing styles as well. I have used “HarvardLeeds.XSL” in here. However according to your institutional standards you may select the suitable one.
- Move the selected referencing style file to C:Program FilesMicrosoft OfficeOffice12BibliographyStyle
- Restart Microsoft Word. Then you will be able to see Harvard referencing (Or any other you selected) in Style drop-down menu.
I hope this will be a big time saver for most of the academic students as well as professionals. If you know more about Referencing in Microsoft Word please share it here.
Tags: #Microsoft
