As a blogger or a webmaster, sometimes it’s really important for you to screen capture content of a web page and share it with others. Here what you really need is not only a screen capturing tool. There are plenty of them out there. But if it has options to highlight, draw things, redact area or add text etc after capturing the web screenshot, that’s the exact tool you should go for.
When I was stumbling across the WWW I came across with a very simple tool that works like magic. It’s a Chrome extension you can find on Chrome Web Store. The tool is Screen capture developed by Google itself. Let’s take a closer look.

Getting Started with Screen Capture
- Go to Chrome web store and add Screen capture.
- It will add an icon to chrome address bar.
- Click on that and take a look at options before you start using it.
- There you can set file format, default save location, auto save, and keyboard shortcuts.
- Now you are good to go and screen capture a web page.
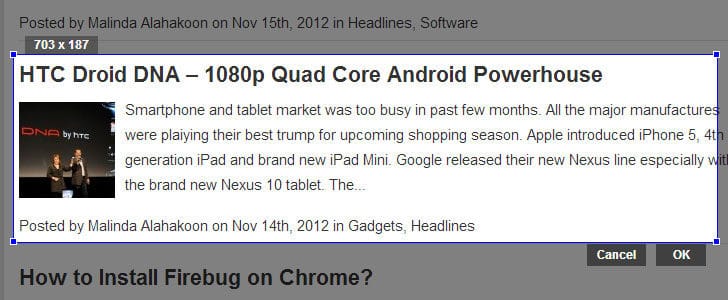
- If you select capture page region, you will get a box on page content. There you can see its size in pixel. Move it, resize it and click ok.
- Then it will take you to the captured image. There you have several editing options such as highlight, redact, add text and draw line.

- Finally you can save it on your HDD or share it.

- Drop down menu gives you options to copy or print.
- Capture visible content, capture while page and capture screen region has the same set of editing options.
- If you like to go pro, start using shortcut keys.
- Hardware: Intel Core i5 2nd Gen // 4GB DDR2
- OS: Windows 7 Home Premium // 64 Bit
- Browser: Google Chrome Version 23.0.1271.91 m
If you are a non techy blogger, this would be a great tool for you to work with your web developer. You can capture screen, draw on it, write on it and send it to your web developer. I’m using this tool a lot and it saved me a lot of time.
Try this out and let me know how you feel about this. If you know any other cool tips about this please share those with us as a comment below.
Tags: #Chrome
