Kaspersky Antivirus 2011 – The Best Anti-Virus of All Time

Until fairly recently, many ordinary PC users may never have heard of Kaspersky Lab. The company has been around since the late nineties. It employs nearly two thousand staff around the world and produces some of the most highly rated and effective anti-malware software on the market. In the last few years, the name Kaspersky has shot to the fore in end-user PC security, because of outstanding reports in the professional press about its newest products.

The latest of these, Anti-Virus 2011, is taking the industry press by storm. The reasons are easy to understand. In performance-tests conducted by independent experts, who assessed it side by side with its rivals, the innovative Kaspersky product excelled in virtually every feature.

kaspersky-antivirus-2011-7801396

This 2011 upgrade is an improvement on the previous product, Anti-Virus 2010 that, in its own right, was well ahead in its class. For those not too familiar with the 2010 version here are the main features. (The 2011 upgrade incorporates all these, plus more.)

  • Small signature files with hourly updates
  • Real-time proactive protection
  • Negligible impact on system operating speed
  • Unique screen keyboard for inputting sensitive data
  • Detection of threats other anti-malware software misses
  • Exceptional technical support

Anti-Virus 2011, just on the shelves, offers all the above features with significant improvements. These include:

  • Improved scanning for malware and malicious code from all sources
  • Improved permanent digital identity protection
  • Enhanced technology that enables anti-malware installation even on infected PCs
  • Heuristic analyser technology that blocks suspected and even unknown threats
  • Desktop gadget for quick and easy access to settings
  • Better system performance through built-in computer tune-up

Kaspersky Anti-Virus 2011 surpasses the best competition in features and support. In terms of cost, it offers excellent value for money. One current offer states: “if you buy 3 licenses of Kaspersky Antivirus 2011 we will give you one more license for free! The best offer!” For such exceptional anti-malware software, why would anyone think twice about grabbing a great deal like that?

About The Writer

Henrik Larsson owner of a new application that enables users to install additional Facebook Emoticons writes. Emoinstaller enables users to use additional Facebook chat emoticons.

Tags: #Antivirus

How to Remove Scrapbook Photos Album in Android?

In order to make your Android Smartphone even smarter, you must have enabled the data syncing. The feature comes in-built with the OS and as long as you have a Google account you can enable it with few taps.

Once you enable, almost all your data will be stored in Google Account. Even if you move to another phone you will never have to go through the trouble of data migration. When it comes to syncing albums, once it’s enabled you can see a reflection of your Google+ albums in your phone gallery.

One strange thing many of the Android users faced is there is an album called “Scrapbook Photos” in Gallery and annoyingly you can’t even delete it. When you go to Google+ photo stream you can find it there also.

Here is how to remove this mystery folder from your phone gallery.

how-to-remove-scrapbook-photos-album-in-android-3890539

It’s Coming from Google Picasa

Before the time of Google+, the Google had image sharing and editing application called Picasa. It’s still there, but integrated with Google+. Scrapbook Photos is the default album you can find once you create a Picasa account and it won’t be displayed in your Google+ photos stream. Android OS sync images with its original source, which is Picasa, not from Google+ this is the underlying reason for mystery folder in your phone.

In order to remove it, follow the below simple steps.

  • Go to Picasa Web. You can log in to this using your Google ID.
  • There you can see a list of albums you have. This will contain your Google+ albums.
  • There you will be able to find this Scrapbook Photos album.
  • Click on that and go to actions -> Delete album.
  • No go to your phone and sync data. The mystery album won’t be there anymore.
  • Hardware: Samsung Galaxy Nexus
  • OS: Android ICS 4.0

Tags: #Android

Torque – OBD Android App

Your Smartphone, a little device that stays always with you all the time and let you connect to the world. But it can be much more than that. You will be surprised to hear that most of the Smartphone in the market are having way powerful processors than Apollo 11 which flew to moon with few men.

So it’s a shame to use it to make few calls, send SMS, go on Facebook or browse web pages. You should do much bigger things with it. Today I’m going to explain you how to access the on board computer in your car via OBD II connector and display status of engine in an Android app.

You might say its repair technician’s geeky stuff and not my cup of tea. But after reading this article you will figure out how easy it is and how important it is to know your ride better.

torque-obd-android-app-9235122

What is On Board Diagnostic (OBD)?

Most of the modern automobiles are equipped with on board computer system. It controls most of the engine activities and keeps records about them. In order to collect data about engine status there are array of sensors in different parts of engine.

When you take your vehicle for repair to a technician, you might have seen that he plugs a computer like device to a port under the steering wheel. What actually happens there is the OBD scanner access the car computer via OBD II connector and gets all the information about the car which are collected by above mentioned sensors.

Using them, the technician can get clear picture about the status of engine and its systems. If there is a known error in engine, OBD scanner will receive a standard error code through OBD connector. Then you can fix it straight away.

We don’t have expensive OBD scanners to do the same at home. But your Android phone is a way powerful device. All you need is the right application. However there has to be some way to plug your phone to OBD II connector. Easiest way is OBD Bluetooth dongle which you can buy for about $10 in eBay.

Getting Started with On Board Diagnostic with Torque

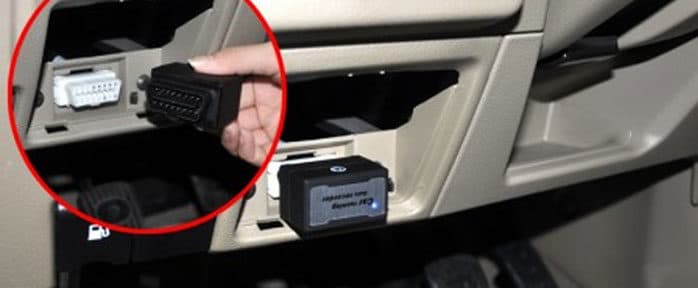
  • As the first step purchase an ODB Bluetooth dongle and plug it in to OBD II connector, which you can usually find under steering wheel.

obd-ii-connctor-and-dongle-8034146

  • Once you plug it, the status will be notified by different colored LEDs.
  • Now go to Google play, install Torque app. For the initial setup free version would be enough.
  • Now you are in good shape. Switch on Bluetooth in your phone, search and pair OBD connector. You can find relevant information about that in your OBD connector manual.
  • Now open Torque app in your Android Smartphone.
  • It will ask you to enable GPS, go ahead with that. Torque needs GPS to accurately measure vehicle speed and trip distance.
  • Within few seconds Torque will connect to car computer via Bluetooth. You will be able to see all the details about connectivity in status bar.

connecting-to-obd-via-bt-6228558

  • In order to get more accurate details from Torque you have to set vehicle engine displacement and weight. For that go to options -> More -> Settings. There you can set measuring units as well.
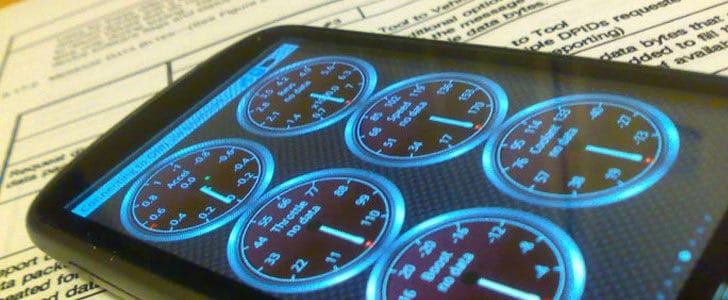
  • Now you are geared up! By default Torque screen is having several dials and displays. Tap and hold them to access menu. There you can delete, move or add new.

torque-obd-android-displays-9121042

  • There you have 7 screens. Make sure you add all the required displays, dials and graphs to get all the information you need to know about the engine and systems. There is a wide array of displays, dials and graphs.

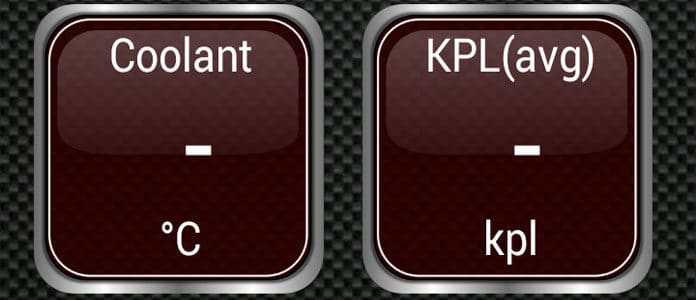
Now it’s all set. Fire up the engine and have a ride around your neighborhood. The status of engine will be displayed in Torque real time. In my Torque dashboard I have Displays for revs, engine load, speed, trip distance, coolant temperature, and fuel consumption etc.

You can always add or remove displays to capture exact set of information you need. There is a toggle logging feature to record all the error codes. When you go to options -> Actions you will be able to find all the relevant logging options. If you like more displays, dials and graphs with ad free dashboard, purchase Torque Pro.

Torque is a very useful Android app which is letting you do some serious work. Now you can know your ride better and do on board diagnostic by yourself using your Smartphone. Next time you visit your repair technician, you can tell him what’s wrong with your car straight away.

Tags: #Android

Gravitational Field For Future Transportation

Transportation is one of the major challenges in modern world. With the increasing population the quantitative demand of transportation has gone up exponentially. Due to that all the countries has upgraded their transportation infrastructure in past few decades. However this continuous expansion doesn’t provide solid solution for the problem of transportation. Even when it comes to the qualitative requirements there are many limitations to further improve, most importantly factors including speed and comfortability. It seems like time to ripe to put your thinking hat on and look for innovative transportation systems to expand the current boundaries of it.

General Behaviors Of Current Transportation Mechanism

Significant percentages of all the transportation systems are depending on 2 dimensional movements. Only exclusion is air craft which can move on all 3 dimensions. All the vehicles which are using the traditional infrastructure ‘road’ can only move on 2 dimensional surfaces. However when they are climbing hills there can be a 3 dimensional movement, but it’s only because of underlying infrastructure. The next common behavior is the entire transportation systems ‘pushing’ or ‘pulling’ the things that need to be transported to the desired direction. In other words they apply a one or two dimensional force to the object that has to be transported. As long as the object is three dimensional the applied force will be transmitted to its next dimension within the object. When you are sitting in a car you can feel the seat pushing you from back when it’s accelerating.  Things get worse when it comes to greater level of acceleration.

Limitations

According to the common behavior of current transportation systems there are main two limitations. First and the most important thing is less expandability. Due to the growing demand of transportation the New York City will have to dedicate its entire surface to roads. This problem demands a easily expandable transportation system most importantly to the third dimension. Then the air space can be utilized to cater the growing demand of transportation in future. The next limitation is comfortability. As mentioned above with the acceleration under a two dimensional energy force that will be transmitted within the object in order to move it. This will become a serious issue when it comes to the greater acceleration levels. Even now the astronauts have to take special steps to deal with these problems as long as space craft has grater acceleration. The world need a better transportation mechanism which is three dimensionally expandable and which can apply force to entire object at the same time.

Use Gravitational Fields

The energy field based transportation system will provide a appropriate solution for the above major problems in current transportation mechanism. It appears to be the Gravitational field will be the solution for this because it can move any known object. The most significant advantage of using gravitational field is it can be easily expanded to the third dimension to utilize the air space. Furthermore the any object will be able to transport using this even without container. As the next advantage gravitational field applies to each and individual practical in the object that has to be transported. Due to that there won’t be a power transmission inside the object like in current transportation mechanism. This will be useful to achieve greater acceleration even without giving and traveling sensation to the passenger.

Ex: Imagine a Box that contains a passenger which is a falling in the earth from outer space. The box hides the external environment from the passenger. In this scenario gravitational field is the force which is moving both the box and passenger. Most importantly it applies energy to each cell in passenger’s body and each atom in the box. So there won’t be any power transmission within the travelling objects. In other words passenger won’t feel that he is travelling which can be the ultimate comfortability. But in reality he is accelerating approximately 10 meter per second.

Normally the gravitational field pulls all the objects around in to the center of object which generates the gravitational field. (This is the general explanation and this will be different if you consider time-space model) because of that entire objects around are landed on the surface. If there is a way to control the direction of gravitational field, it will open another dimension of transportation.

Ex: Imagine the gravitational field has shifted by 90 degreed near the Burj Khalifa in Dubai.  If that be the case the tower will become the center of gravitational field so the passengers would be able to walk in to the top floor of the building.

gravitational-field-for-future-transportation-7051336

Challenges

The major challenge to use Gravitational fields for transpiration is the lack of knowledge and research about it. Human civilization has lots of knowledge about other energy fields including magnetic and even human energy fields. But there are limited knowledge object we have about Gravitational fields. As far as we know it can’t be generated without a matter. When there is a collection of matter there will be force in to the center of collection. In order to control it shift it and use it as a transportation mechanism there are lots of underlying research has to be done. The major challenge for the research is prepare lab facility to carry out experiments. The only nearly good enough places would be a lab in a Space station where the effect of Gravitational field of planets is insignificant. In addition to that to gravitational field is a very weak energy field compared to other known energy fields. There has to be a huge amount of matter to generate noticeable gravitational field. However at this position there is no way to generate, destroy or manipulate gravitational fields using any technique.

Historical facts sometimes provide evidence of ancient air craft across the worlds in many civilizations. It appears to be some of them are working based on some kind of energy fields, possibly gravitational fields. Due to that digging deep with those historical facts might give hints to manipulate gravitational fields for future transportation. The invention of this kind of technology won’t be limited to general transportation but inter-planet transportation too.

References

Tags: #Gravitational Field #Traffic

Self Sustaining Smartphone with Transparent Solar Panel

Within a couple of years the cell phone evolved in to a Smartphone. Today it has become a day to day item for most of the people. Technological improvement made by lots of Smartphone manufactures such as Apple, HTC, Samsung and LG made this possible.

You may remember that, when you were using a cell phone you had to charge it may be once in few days. If you go back to time of Nokia 2G phones you had to charge them only once a week.

If you take a look at the Smartphone that you are using today, practically you have to charge it every day. If you are a heavy user you might have to charge it couple of times a day.

Most of the Smartphone batteries are in a technological dead-end. Therefore we have to look for alternative renewable energy sources for Smartphone.

Most probably we will be walking toward hybrid power sources. The ultimate objective in this kind of technological improvement would be manufacturing “Self Sustaining Smartphone” which you will never have to charge manually.

Quick Catch-up

Solar Panel

The idea of attaching a solar panel to Smartphone was around for a while. As it appears this is a practical idea. It’s already there in calculator and hybrid cars as well. But the big question is where to mount a solar panel in a Smartphone.

Large part of the surface in Smartphone is dominated by its massive touch screen. So the most practical area to mount a Solar panel would be back cover. But would it work?

When you are using a Smartphone you hold it face up, in other words display is facing the sky and back panel is facing down. So mounting a solar panel in back cover is not a good idea if you consider the efficiency.

Then only remaining option is front panel. But there is no way for you find a space for a solar panel there due to the large display. But have you ever heard of transparent solar panels?

Transparent Solar Panel

A conventional solar panel is having non transparent material and most of the time it’s having brownish surface. But couple of manufactures has already published details of their transparent and flexible solar panel.

  • Google Result for “Transparent Solar Panel”

However none of these products are not yet optimized to use in day to day applications. But speed of technology will take them there with in the next few years for sure.

This opens a new world of opportunities of “Self Sustaining Smartphone”. Now Smartphone manufactures can mount a transparent solar panel on top of display. This solves most of the problems I discussed earlier.

Practical Problems

It’s true that this will be innovative alternative energy source for future Smartphones. But just think, most of the time you will be using your Smartphone indoors where you have poor sunlight and rest of the time it will be in your pocket where it has no sunlight.

Due to the above reasons transparent solar panel alone won’t be enough to achieve the goal “Self Sustaining Smartphone” though it’s a good start. However it will be able to increase the battery life up to a certain level.

To achieve this objective “Self Sustaining Smartphone”, we will have to go beyond all the traditional lines and think about “Variable Magnetic Field Charging” and “Motion Charging”.

Stay tuned for my discussion on this regard which will be coming up on Notes of Genius within next few days.

Tags: #Smartphone

How to Customize Keyboard Shortcuts [Gmail Labs]

When you are using desktop application, to make operation efficient you could use keyboard shortcuts. You must have seen when professionals are using applications they hardly use mouse. You can trigger actions way faster with keyboard than mouse when you get use to it.

Not only desktop applications, web applications also let you to use keyboard shortcuts, especially rich internet applications. You most favorite webmail service, Gmail is also providing you that service. However in settings you won’t be able to find any way to customize keyboard shortcuts. You like it or not you have to stick with default keyboard shortcuts.

Previously we used several Gmail lab features to get features which are not there in Gmail by default. If you need to customize keyboard shortcuts, again Gmail labs comes to save your day.

how-to-customize-keyboard-shortcuts-in-gmail-5907787

Getting Started With Custom Keyboard Shortcuts

  • Go to Gmail -> Settings -> Labs -> Search and enable Custom Keyboard Shortcuts
  • It will refresh whole Gmail. Give it some time
  • After refreshing go to Settings and take a look at tabs
  • Now you can see a new tab named Keyboard shortcuts
  • There you can see a long list of operators and their keyboard shortcuts
  • You can change the keys in text boxes and assign alternative key as well
  • After setting all the keyboard shortcuts the way you want, save settings and go to inbox
  • Now you can use new customized keyboard shortcuts

This will solve one of the major problems in Gmail when you are using it in professional environment. It’s speedy almost same as installed desktop application. But it could not customize its keyboard shortcuts like other application. Now that problem is solved.

Always remember you are using a Lab feature in Gmail. It may give you some glitches in some operations. If you suffer any side effects, go to Settings -> Lab and disable it. If your Gmail got crashed due to a Lab feature, Click Here to start Gmail without any lab feature.

Tags: #Gmail #Google

How to Send Email In Background [Gmail Labs]

When you are using webmail system one problem you will face there is you can do only one task at a time. If you go to another page, all the processes in the previous page get terminated. That’s a major limitation in any web application. The most popular webmail service, Gmail has taken steps to avoid this as far as possible. But when you are sending email you have to be on the same page till “Sending..” notification goes away.

Most of the time, it will take less than one second. But things get difficult when you are sending heavy content and network is congested. In such a cases, you have to wait a long time till sending process is completed.

In order to solve this problem, there is a nice Gmail lab feature. It’s letting you send email in background. While email is sending you can go back to your inbox or do any other work in Gmail interface.

background-email-sending-in-gmail-4312839

How to Start Using Background Email Sending In Gmail?

  • Go to Settings -> Lab -> Search for Background Send and enable it. Save changes before you exit the page.
  • Now background sending feature is enabled. Let’s test it.
  • Compose an email, type recipient address and other details, and then hit Send.
  • Now you will see a different notification than before. It says “Sending in the background”.
  • You will notice another thing. Normally Gmail keep you in the compose window till the mail sending completed. Now it’s taking you to inbox instantly while it sending email in background.

I tested this feature with several types of emails in different environments and browsers. No Glitches so far. One sad note that this plug-in is not letting to navigate away from the compose page while attachment uploading is going on. However, it will streamline operations by sending email in background. In a general situation it will give you on a couple of seconds. But when you are working with a poor internet it will save you significant amount of time.

Tags: #Gmail #Google

How to Undo Send [Gmail Labs]

Most of NOG readers out there must be using the world’s most popular online email service, Gmail. In previous articles I was talking about add new features to Gmail using browser plug-ins such as scheduling, tracking and reminding. For that we use Boomerang and RightInbox browser plug-ins.

Quick Catch-up

Browser plug-in is not the only way or the best way to add new features to Gmail. If you go to another computer you won’t be able to use featured added by browser plug-ins. There is a way to add new features to Gmail using Gmail Labs. This is a common term from you if you are a Google power user. Using Labs you can add experimental new features in to Gmail in browser or platform independent way.

Today I’m going to introduce you a very useful Gmail Lab features you can use to Undo Send in Gmail. Using this you can reverse sending email even after it reaching recipient inbox. You can use this feature with full confident and I personally tested most of the possible operations with this.

undo-send-in-gmail-2682366

How to Use Undo Send in Gmail?

  • Go to Gmail Settings -> Labs -> Undo Send and enable it. Save changes before you exit.
  • This will refresh the whole Gmail page. Give it few seconds.
  • Now compose an email, type recipient email, subject and other details. For testing purpose you can give your own email address.
  • Finally click Send.
  • In sending notification you will find a new Cancel button. By clicking on it you can cancel sending before it happen.
  • After sending you will be able to see the default notification. There also you will be able to see an Undo button and it will be there for few seconds.
  • By pressing it you can Undo sending even after it reach recipient inbox. It will automatically delete it from his inbox.
  • In Settings -> General -> Undo Send you can Set the cancelation period.

If you can cancel sending before it happen it will not even reach the recipient inbox. Once thing to be noted, if you undo send after it happen, still recipient will be able to find the email in his trash folder. Either way you have few seconds to change your mind.

This is a great Lab feature to save your day by undoing accidental email sending. It worked perfectly undo while sending as well as after it. Always remember that this is a lab feature. You may not be able to guaranty its reliability. So try to minimize it’s usage as far as possible. If you suffer any side effects, simply disable it from Gmail labs.

Tags: #Gmail #Google

Enhanced DropBox Photo Gallery with Views.fm

DropBox is all time favorite cloud storage service for most of the people out there. Recently Google Drive came out and Microsoft SkyDrive got re launched. But still nothing could take DropBox users away from it by giving more features and comfort. It’s working great on web interface, with desktop client as well as Android app.

One thing many people love about DropBox is. It’s image sharing options. If you want to share a public photo album, all you have to do is put all the images in to a folder and simply drag and drop it in to Photos folder in DropBox. By right clicking on the folder you can get the public gallery link and share it anywhere.

It’s automatically creating a nice image gallery for public viewing, but unfortunately it’s no customizable. If you want customizable image gallery with DropBox hosted images, there is a great 3rd part application, views.fm. There you can link your DropBox image folder and create amazingly customizable image galleries and share them online. This works for folder listing and other multimedia types as well.

Quick Catch-up

enhance-dropbox-photo-gallery-with-views-fm_-5281529

  • Go to Views.fm home page
  • You can sign in with DropBox login or you can create account with email
  • It will take you to Views.fm dashboard
  • There you can see your activity feed and in the right hand side you can find my views, public, private and saved views
  • Still you don’t have any views or related activities, so it will be empty
  • Go to settings and there you can check your access details and set your avatar
  • You may like to change your login URL
  • Go to browse from main navigation bar to see DropBox folder listing
  • When you take your mouse over a folder, you will see a link to create new view. Click on that.
  • Fill the details, enable or disable comments and create it publicly or privately.
  • Views.fm will show you the view URL and you can share it anywhere.
  • You can see created views in my views section.
  • Go to Settings -> Design at the side bar.
  • There you can change text colors, background colors and set header logo.
  • Created design will be applied for all your views.

Your public views will be displayed in your profile and could be access by anyone. They will be listed in search engines as well. Your private views could be views only through URL. All the views will be themed as you set it before in settings.

View.fm, let you to share your DropBox files with Style. All the operations are extremely simply and take only few clicks and key strokes. Going beyond day to day use, this is a great way to share your professional work as well. You can create a great looking, customized and branded online portfolio. To update it all you have to do is put your new work in related DropBox folder.

Try Views.fm to present your Dropbox files in style. You may find more tips and trick in Views.fm. Never forget to share those here with NOG community.

Tags: #Cloud Storage #Dropbox