As the best online email service Gmail is continuing to offer lots of cool features for you. All those wrapped up in highly performance tuned internet application and power of Gmail made us say good bye to the installed mail client such as Microsoft Outlook and Mozilla Thunderbird.

Email filters are one of the amazing features that come with Gmail. It’s letting you filer email based on different criteria and separate them using labels. If you are handling hundreds of emails every day this is a ‘must use’ feature to save lots of time.
How to Create Filter?
- Go to Gmail and Sign in.
- Then go to Settings -> Filters
- Click on Create a new filter.
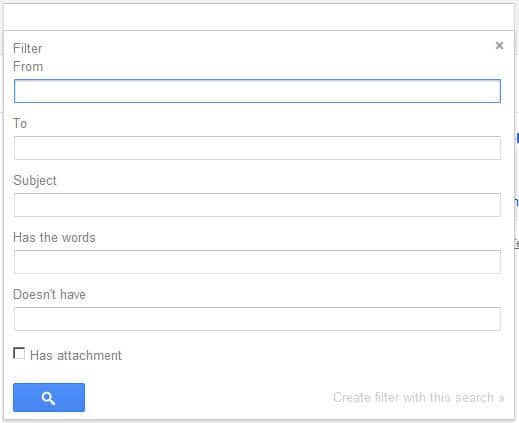
- If will open the below filtering panel.

- You can access the same panel by clicking on drop down menu in search box.
- Here you can define your filtering criteria providing various factors.
- After entering your filtering criteria you can press on the Search mail button to make sure its filtering desired emails.
- Then click on Create filter with this search.
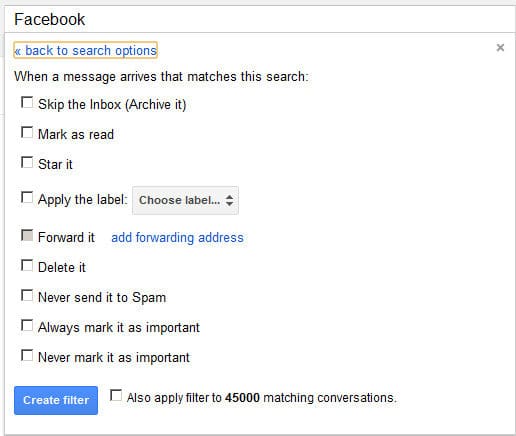
- It will take you to below panel.

- There you can see a list of actions you perform for given filtering criteria.
- If you want the action to be performed for entire matching email including past emails, check in Also apply filter to xxxx matching conversations.
- Finally click Create filter.
- Now Gmail will Automatically apply the filter for incoming emails and perform the given action on them.
- You will be able to see a list of created filters in Settings -> Filters. There you can Edit or Delete them.
Things You Can Do With Filters
Auto Apply a Label
If you are dealing with several people in a professional project you need a way to separate emails coming from each person. This is what you can do.
- Create a new filter.
- Set the senders email address to the box from.
- Next panel set action as apply the label.
- Create an appropriate label with meaningful name and apply it for this filter.
- Then create filter.
- Same way you can create filters to any number of people you work with.
- Once an email arrives from one of those people it will be automatically labeled.
- Now you can easily separate mails came from specific person through the label.
- Using Gmail new look, you make the label visible only when there is unread email. You can use this facility as well to make these operations smoother.
Clear Sent Items
For Spam and Trash email folders Gmail provide facililty to delete all. But it’s not there for sent mails. But with filters we can have a work around as below.
- Create a new filter.
- Set search to Sent mail using drop down menu.
- Leave all the other boxes empty.
- Then click on Create filter with these search.
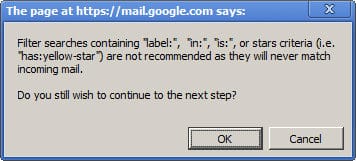
- Once you click it will give you pop up message as below.

- It says that this type of filtering won’t be applicable for incoming mail, but only for existing mail.
- Click ok and proceed to next panel.
- Check in Delete it as the action.
- Check in Apply filter to xxxx matching conversations.
- Click on create filter. Once you click it will start filtering your sent items and delete them all.
- You can periodically manually run this filter to empty your sent items.
- Give it few seconds and visit the Sent Mail folder. Now it’s empty.
There could be lot more other things that you can do with Filters in Gmail to make your life easier. Try different creative things with filters and share your experience with us.
« Previous Post
Next Post »
