Unified Remote – Control Your PC with Android Smartphone

Did you ever have the need to control your computer remotely? Yes you will need this so seriously when you are watching movies and listening to music. As a solution you might try a wireless keyboard, but it’s too bulky to carry around. Some laptops are coming with inbuilt remote controller, but with limited capabilities.

If none of that work for you, then you have to make up your mind to buy expensive hardware. But wait! There is a totally free solution. You can turn your android Smartphone to universal remote controller for your PC. This magic comes with little piece of Android application, Unified Remote. Let’s take a closer look in to this.

unified-remote-control-your-pc-with-android-smartphone-6695552

How to Use Unified Remote?

Setting Up the Server

Before you start using Unified remote you must have the server running on your computer. Android application gets access to your computer through the server. For this server could use Bluetooth or Wi-fi.

  • Visit the official download page
  • Go to on your computer section and download the setup file or zip file of the server, then install it.
  • If you don’t like to take the trouble of installing, get portable version. Personally I prefer portable vision.
  • Before you start running any version you must have .NET Framework 4. Download it from here.
  • Now run the server and it will place an icon in system tray.
  • Default settings would work for many people. If you want to change any setting right click on the system tray icon and go to settings.

Setting Up the Android Application

  • Go to Google play and Download Unified remote.
  • There are two versions and I gave you the link to free version. If you need extended features, get full version here.
  • Now you can open the application.
  • As the first thing you have to add the server to Smartphone application. Then only you can connect to computer and control it.
  • For that go to Servers in the main dashboard and click add, then select automatic.
  • Application will automatically list the available servers and your computer also will be listed there.
  • You can add it simply by taping on it. Now you are good to go.
  • Go to remotes and there you can find several remotes which you can use to control different actions of your computer.
  • For testing purpose, go to basic input. It will let you to move your mouse using Smartphone’s touch screen. If it’s working well, you can use any other remotes listed.
  • There are various different remotes which you can use to move mouse, type letters and numbers, control media files, manage power and there is one especially for PowerPoint presentations.
  • You can have more remotes, even custom remotes and voice commands in full version.

When installing server all the operations are highly simplified and any one can get it done with few clicks. If you get the portable version it’s even easier. Configuration is also minimum and most of the case you will never have to touch the configuration panel.

Installation of Android application is also easy as always, you can directly send it to your phone through Google Play. In initial running adding the PC server to application is just few taps away, no serious configurations. You can simply start using the applications with your computer. All the remotes are carefully designed to give the maximum conformability to any type of user.

When you go to application settings, you can change the theme and visible remote controllers list. There is an option for you to use the application full screen as well.

You can use the application with Wi-fi or Bluetooth. If you have a Wi-fi router you can simply connect to the compuer through that. If not you can make your computer a Wi-fi hotspot using a application such as Connectify. If none of those work you can use Bluetooth.

Try the application and I’m sure this will solve most of your remote controlling requirement totally for free. Never forget to share your experience with NOG community.

Tags: #Android #Smartphone #Wi-Fi

Symbian to Android Contact Migration

If you are a Nokia fan, you know how difficult to move to another platform. For years, those magical devices gave us a great service. But according to the today situation, you have no option but move to Android or may be iOS. When you are moving, one of the major problems you will face is how to move contact list.

In Symbian OS there was no universal way to sync your contact in cross platform version. True, you can sync them using PC suite, but it will work only with another Symbian device. There are several applications which is letting you to sync contact online, but none work for me in a smooth manner.

symbian-to-android-contact-migration-8402457

You can copy all your contact to SIM card and move them to new phone, but unfortunately there you can store limited number of contacts. Other than that it supports only phone numbers, not other related details.

Finally I tried very basic old school way or migrating contact from a Symbian phone to Android and it worked like magic. If you have the same problem, here is what you should do step by step.

Process of Contact Migration

  • Go to contacts in your Symbian phone.
  • Go to options and Mark all the contacts.
  • Then go to options -> Create backup -> Phone to memory card.
  • This will create vCard in your memory card one per contact.
  • You can find those vCards in others -> Contacts in your memory card.
  • Move the contact folder in to android phone memory card.
  • Then open People app in Android phone, go to options -> Import/export -> import from storage
  • It will search for vCards in your SD card and offer you three options to import one vCard, slected vCards or all vCards.
  • Click OK to proceed and all the contacts will be successfully imported to people widget.
  • You can see the same contact list when you open the phone application as well.

This process is simple and you don’t even have to install any application on your Android phone or Symbian phone. Once you import contact to your Android phone, I’m pretty sure that you will never have to face such a trouble to migrate contact since all of them are synced with your Google account. Even if you move to another Android phone you can easily get them from Google account. To be on the safe side, keep your contact folder as well with all the vCards in it.

Tags: #Android #Symbian

How to Save Gmail Attachment in Google Drive?

The magic in all Google products is they are interconnected. This inter-connectivity goes beyond online services. If you are using a Smartphone, tablet and a PC you can connect all of them together via Google services regardless of the software platform they use. This makes Google a complete product suite for everyone.

However they have some limitations as well. Here’s one example. You may be using Google Drive and Gmail. Just think you got an email with attachment, a huge one, when you are away from your PC. You need to store it in Google Drive to check it out later.

What you can do is download the attachment and upload it back to Google Drive. Buts it’s time and bandwidth consuming. Actually the file is already in Google server. All you need is to transfer it in to another service. There has to be a one click solution. Finally I found it, a Chrome extension called Gmail attachments to Drive. Let’s take a closer look.

how-to-save-gmail-attachment-in-google-drive-7378735

How to Use Google Attachment to Drive?

  • Add Gmail Attachment to Drive in Chrome App store.
  • As usual it will take couple of seconds and you will get notified once it done.
  • This extension won’t make any visible change to Chrome tool bar, not even a new button. Because it works behind the screen.
  • Now you are ready. Go to Gmail, sign in and open an email with an attachment.
  • Scroll down to attachments section and see the difference.
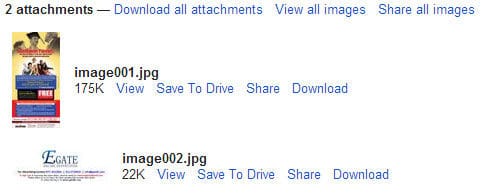
  • Normally you have view, share and download options. But now you have additional Save to Drive option as well.

save-to-drive-1724558

  • Once you click on Save to Drive it will open anther window. There you will be able to see the message that file has been added to Google Docs (Message is not yet updated. It’s supposed to mean Google Drive)
  • That it! No downloading and uploading. You just transferred Gmail attachment to Google Drive within couple of seconds.
  • Go to Google drive to see or download transferred files.

This is a good solution for you to save important email attachment in Google drive with one click and couple of seconds regardless of its size. I tried this with various different file types. They all worked perfectly. Google Drive can edit Microsoft office files and preview PDF and even ZIP files. It adds more value to this integration.

Tags: #Gmail #Google

Qualcomm Snapdragon S4 Dominates Mobile Computing

If you travel back few years, the most popular mobile computing hardware platform was Apple AX. It was there in iPhone, iPad as well as iPod Touch. Then Android started emerging and many manufactures came up with Android powered device.

Nvidia Tegra was a very popular platform for high end gaming devices and Samsung had their own Exynos platform. With the time and technology they came up with dual core and quad core architecture as well as high end multi core GPU.

When I was observing specs of latest Smartphone, especially Windows Phone 8 devices such as Nokia Lumia 920 and HTC 8X, the name of Qualcomm Snapdragon S4 continue to popup. It’s rumored to be in the next LG Nexus 4 as well.

This amazingly powerful mobile computing platform managed to dominate Smartphone and Tablet world in an exponential rate competing with others. Qualcomm Snapdragon S4 platform is under NOG spot light today.

qualcomm-snapdragon-s4-dominates-mobile-computing-9449615

Versions of Snapdragon S4

Play

This uses 45mm semiconductor technology and support up to 1.7GHz dual core ARM Cortex A5 CPU and Adreno 203 GPU capable of handling WVGA videos. Has in built 3G radio and good fit for average performance devices.

Plus

This is using 28mm semiconductor technology and support up to 1.7GHz dual core ARM Cortex A15 CPU, single channel RAM, and Adreno 305 GPU capable of handling 1080p videos. It has built in 3G and 4G radio as well as Bluetooth, Wi-Fi and GPS.

Pro

This is using 28mm semiconductor technology and support up to 1.7GHz quad core Cortex A15 CPU, dual channel RAM, and Adreno 320 GPU capable of handling 1080p videos. Same as in Plus, this has all the radios built in.

Prime

Entire specification is same as S4 Pro, yet this doesn’t have built in radios.

Advantages of Snapdragon S4 Pro Platform

Better Power Consumption

28mm fabrication and ARM Cortex A15 architecture is highly optimized to consume lesser power and do more work. And there is a special technique to under clock CPU cores when they are performing background tasks. This is something similar to NVidia 4-PLUS-1 technology, yet much better.

Maximum Processing Power

Snapdragon S4 platform support up to 1.7 GHz quad core processor and latest Adreno 320 GPU. This will turn any Smartphone in to powerhouse fit to perform heavy load of tasks, especially 1080p HD graphics.

Built in Radio

This platform has built in 2G, 3G, Wi-Fi, Bluetooth, NFC and LTE radios. This opens Snapdragon S4 powered devices to a whole lot of latest lightning speed data networks.

Wrapping Up

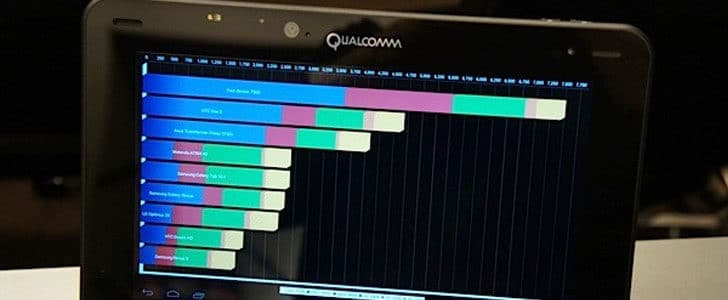
If you try to benchmark Qualcomm dual core platform with Nvidia Tegra 3 and Exynos Quad Core platform, of course Quad core would win, yet in some aspects of  Qualcomm will win. When you benchmark Qualcomm Snapdragon S4 quad core platform with other competitors, it will kick off everyone else.

qualcomm-snapdragon-s4-benchmarking-2076513

Here are some links to benchmark results.

  • GSMarena
  • Engadget
  • Slashgear

It’s a very powerful, energy efficient and secured platform which will define future mobile computing. Most of the high end devices are already using Snapdragon S4 platform and it’s going viral. I’m pretty sure this will be a huge challenge to famous Nvidia Tegra 3 and Samsung Exynos.

Tags: #Qualcomm #Smartphone #Tablet

Nexus 10 – Big Brother in Nexus Family

Around the world millions of Android lovers were waiting to witness a historical Nexus device launch scheduled to be on last October 29th. But you know it was canceled off due to extreme weather conditions. But they released 3 brand new Nexus devices online, making all the Android lovers happy. They will be available after 13th November in selected countries.

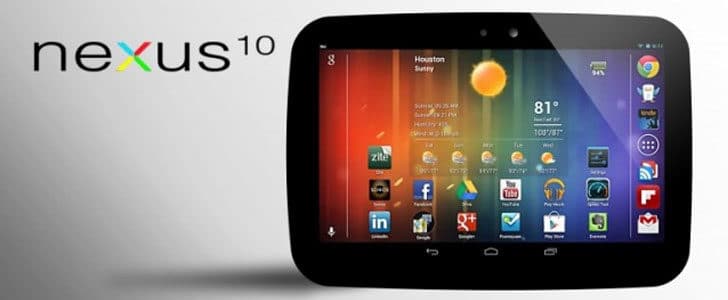
Out of those devices Nexus 10 took my attention. It’s the very first 10 inch tab in Nexus family. And it comes with greatest and latest hardware as well as Software. Definitely a tablet worth talking about and it’s under NOG spotlight today.

nexus-10-big-brother-in-nexus-family-6562392

Insight for Nexus 10

Design

Dimentions: 263.9 x 177.6 x 8.9 mm

Wight: 603g

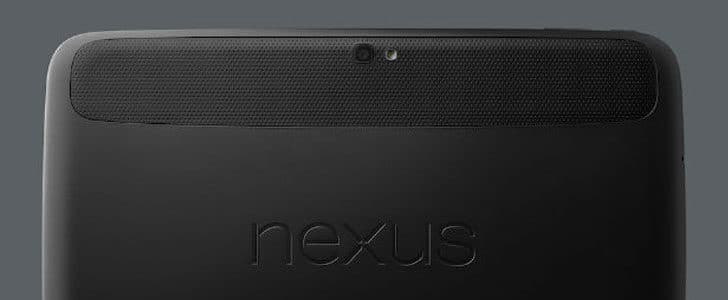
The design is pretty simple and clean. Only thing that disturbs me is the thick border around the display. All the edges are curved and back panel is designed to give the maximum grip. The thickness and weight is in a lower range compared to other 10 inch tablets.

The built quality is maintained at a greater level. I have tried few Samsung devices. Most of them had cheap plasticky built quality. It’s not the case with Nexus 10.True, it’s still plastic, but it looks a lot better. According to many hands-on reviews, it feels so good in hand and weight distribution is proportionate.

nexus-10-design-4271162

I love its two vertical front shooting stereo speakers. You will be able to have a great virtual surround sound experience with them for sure.

Display

Size: 10 inch

Protection: Corning Gorilla Glass 2

Technology: Super PLS TFT

Resolution: 2560x1600px

Sharpness: 300ppi

The display is the hook here. It’s the 10 inch display with maximum resolution and pixel density ever introduced to market. This would be great for HD videos playback, web browsing, eBook reading as well as gaming. At the same time it can hold 8 icons horizontally and provide bigger space for widgets.

nexus-10-display-4125773

The display technology used here is not so common. Super PLS (Plane Line Switching) is a Samsung’s developed technology to manufacture better displays which has wide viewing angles, improved image quality, high color saturation/brightness as well as lower production cost.

Processor and Storage

Chipset: Exynos 5250

CPU: 1.7GHz Dual Core Cortex A15

GPU: Mali T604

RAM: 2GB

Internal Storage: 16/32GB

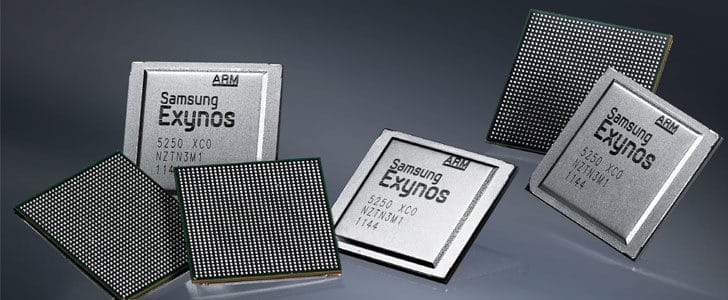
The display is not the only magic here. It’s Exynos 5250 or “Exynos 5 Dual” first appearance in a tablet. (It was there in latest Samsung Chromebook) This chipset support 12.8 GB/s RAM data transfer rate, USB 3.0, SATA 3.0 and WQXGA resolution (2560x1600px) display. Now you know why Nexus 10 could hold a legendary >2K display. Mali T604, a quad core GPU completes this package.

nexus-10-exynos-5250-7061144

Same as the chipset it’s the first appearance of Cortex A15 CPU in a tablet. It’s 40% faster than previous Cortex A9 and is energy efficient. No doubt that Nexus 10 is a powerhouse beyond your imagination and it will not be so power hungry as well.

2GB RAM is not so common among 10 inch tablets and definitely an  added value to it’s hardware system. internal storage is standard and unfortunately its non expandable.

Software

OS: Android 4.2 Jelly Bean

There are many Samsung tablets but this is the first one with pure Android. It comes with next increment of Android Jelly Bean (Not Key Lime Pie) with version number 4.2. There you will be able to enjoy cool features such as photo sphere camera, multi user support, gesture typing, quick settings panel and wireless HD display mirroring.

nexus-10-android-4-2-2719972

Camera

Primary: 5MP, LED Flash, 1080p@30fps

Front Facing: 1.9MP

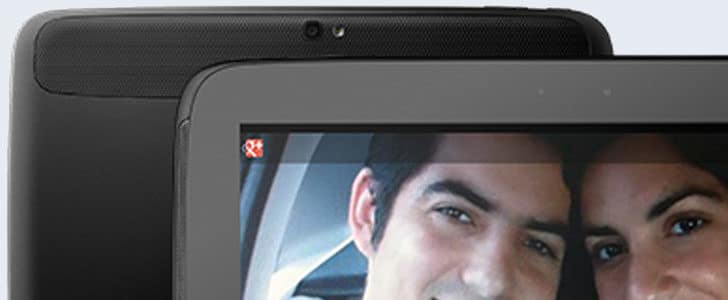
The camera is pretty much standard and I love the fact that they include a decent primary shooter with a LED flash. I can’t expect anymore in a tablet.

nexus-10-camera-2286667

Connectivity

Mobile Network: N/A

Wi-fi: WiFi 802.11 b/g/n (MIMO+HT40)

GPS: Yes

NFC: Yes, Dual Side

Bluetooth: Yes, 3.0

USB: microUSB 2.0

Wi-fi is the main connectivity technology used here and MIMO antenna will give you faster connectivity even with poor signals. It has dual side NFC and with this will be able to join the popular trend of NFC tags.

I will miss LTE or HSDPA. But considering all the other goodness I’ll be happy to tether with my Android phone whenever there is no Wi-fi. However I’d love another version with LTE or 3G radio in it.

Battery

Capacity: 9000mAh, Li-Ion

Battery Life: 10h Video Playback, 500h standby (not conformed)

The battery here is humungous. It will be able to power the device up for at least 10 hours of video playback. After all Cortex A15 CPU is also an energy saver.  Even with this huge battery Samsung managed to keep the device thickness and weight at a lower point. Hats off for that!

Wrapping Up

I have never seen or even imagined a pure Android in this level of powerhouse. I was waiting to buy a 10 inch tablet, but there was no clear choice. Nexus 10 turned the market upside down. Now the choice is obvious.

Hardware specification is great and you won’t be able to find any matching device in the market. Story is same with the software as well, it’s Android 4.2 greatness. The best part is, you don’t have to wait for months for system upgrades like in other Samsung tablets. You will get direct OTA update from Google itself.

The only word I could use to explain the price tag is “Unbelievable”. It’s $399 for 16GB model and $499 for 32GB model. Practically, this price point and amazing configuration kicked off all the other 10 inch tablets from the competition.

Tags: #Android #Nexus #Samsung #Tablet

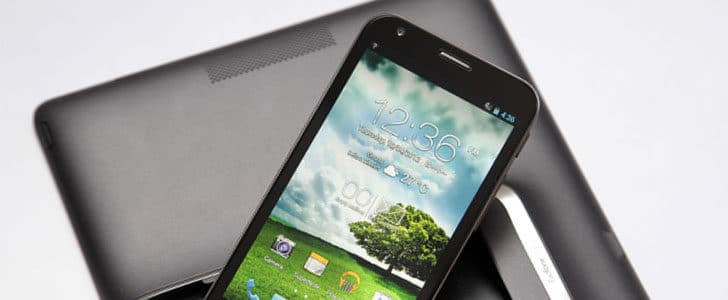
Asus PadFone 2 – Smartphone, Tablet and a Netbook

Asus is very popular for their unique hardware design in mobile computing. Previously they introduced Asus Transformer, an Android tablet which can transform into a Netbook. The success of manufacturing Android tablet gave them opportunity to be the hardware partner in Nexus 7.

Asus was not doing so good with Smartphone, yet there was one unique device they had. It’s Asus PadFone, an Android Smartphone which can transform in to tablet, then to a Netbook as well. Recently they announced Asus PadFone 2 and it’s under NOG spotlight today.

asus-padfone-2-2311487

Device Specification

Design

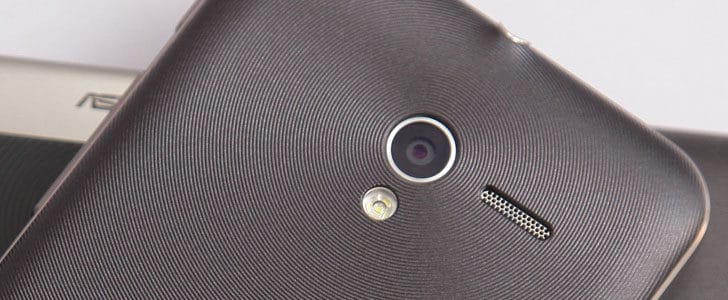
The phone has usual single block design with 9mm thickness and 135g weight. Front panel has display, sensors, camera and capacitive buttons. Back panel is populated with camera and its LED flash. Unusual design, yet power button and volume rocker both in right edge. 3.5mm audio out is placed on top edge.

Display

The display is 4.7 inch IPS panel with 720x1280px resolution and 312ppi of pixel density. For a display it’s the right technology, right size, good resolution and optimum sharpness with protection under Fit glass. And it’s a good upgrade compared to previous PadFone.

Docking station has 10.1 inch IPS panel with 1280x800px resolution and 149ppi of pixel density. It’s standard spec for 10 inch tablet and same as previous version as well.

asus-padfone-2-dispaly-4632803

Processor and Storage

This is one of the major upgrade in Asus PadFone 2. Now it’s Qualcomm Snapdragon 4S Pro (APQ8064) platform configured with 1.5 GHz Quad Core Krait CPU, Adreno 320 GPU. This will definitely give it enough power to be a good multimedia device as well as gaming station.

Operating System

The device originally comes with Android 4.0.1 Ice Cream Sandwich. UI is customized by Asus to cope up with device transformation. According to Asus, latest Android 4.1 JB is also coming soon.

Camera

This is another big improvement. The primary shooter is 13MP with 1080p @30fps / 720p @60fps video recording LED flash etc. Secondary camera is 1.2MP for video calling. 13MP camera is definitely a plus point for this device to stand out in tight competition.

asus-padfone-2-camera-4085717

Connectivity

The device has all the standard connectivity features such as 2G, 3G, HSDPA, Wi-fi, Bluetooth 4.0, NFC, GPS and microUSB 2.0. As a major upgrade it has LTE support.

Battery Life

Battery that comes with the phone is 2140mAh one which would give it 16h talk time according to official spec. With the battery in docking station it will go up to 36h. However with active usage, battery life would be same as previous version which is 6h only with phone and 16h with phone and dock.

Wrapping Up

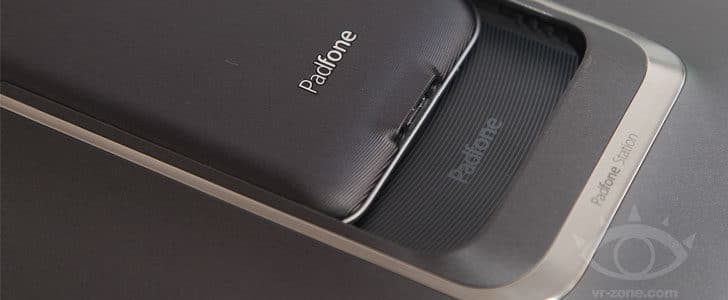
The concept is amazing! A phone which can transform in to tablet so that you will have to buy only one device, one data plan for all your mobile computing work. The design is greatly improved from previous PadFone. Now you don’t have to go through any trouble to dock the phone, it’s just one step and no hinge as well.

There is sad news as well. Previous PadFone had docking stations as well as supported keyboard dock with further extended battery. Seems that PadFone 2 doesn’t have supported keyboard dock.

asus-padfone-2-dock-2460898

The relevant software also appears to be optimized than the previous version. Dynamic display switching is working good and built in applications are working great with both display sizes. However, same as with the previous device, there could be issues with 3rd party apps.

If you need a good Smartphone and a tablet with big screen, yet don’t like to transfer and sync data between devices, here is the solution you were looking for. End of this year, during the shopping season you might be able to make this yours.

Tags: #Android #Asus #Qualcomm #Smartphone #Tablet

Amazon Kindle Fire – 7” Android Tablet Trend Setter

Amazon the biggest online book store previously introduced a revolutionary eBook reader, kindle with eInk display. The display is not backlit and not giving any strain to readers eye as same as real paper. It became a blast and became a day to day item for most eBook junkies.

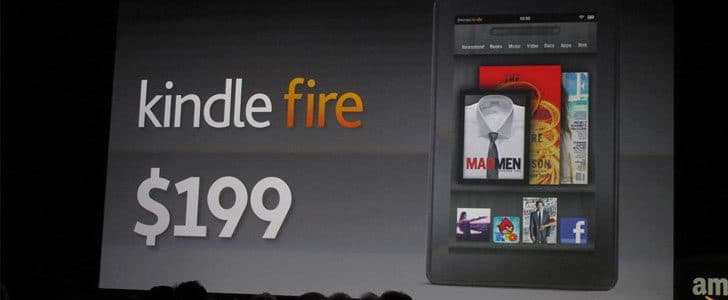
One of the best thing about Kindle is it came to the market for really affordable price. Following this trend Amazon introduced multimedia 7 inch Android tablet to the market. Back in 2011, it was the era of iPad, but Kindle Fire gained a significant popularity due to its great features that came for just $199.

amazon-kindle-fire-7e2809d-android-tablet-trend-setter-6277064

Recently Google released their very first Nexus branded 7 inch tab with latest Android Jelly Bean. But the originator of 7 inch tablet trend is Amazon Kindle Fire and it’s under NOG spotlight today.

Quick Catch-up

Device Configuration

Processor and Storage

Processor in this device is 1 GHz Dual Core Cortex A9 running on TI OMAP 4430 chipset with PowerVR SGX540 GPU. RAM is 512 MB and internal storage is 8 GB non expandable.

Operating System

The original operating system that comes with the device is Android 2.3 Ginger Bread. This is highly customized by Amazon and embedded many of their own features in to OS itself. However, if you are willing to take the risk you can root the device and install 3rd party ROM such as Cyanogenmod.

Display

Display is 7 inch IPS panel with resolution 1024 x 600 pixels which will give you 170 ppi of pixel density. The pixels density here is greater than most of the other 10 inch tablets and make a good platform to display sharp textual contents.

Connectivity and Interfaces

This device keeps its connectivity and interfaces at a minimum level probably having the objective of keeping the price low. To connect to internet you can use built in Wi-Fi and for further content transfer there is a USB port as well. Interestingly there is a FM radio built in.

There is no GPS, Bluetooth and HSDPA connectivity built in. So for the data connectivity you have to totally rely on Wi-Fi.

Battery Life

The battery in this device is Li-Ion 4400 mAh. Practically this will give you 8 hours of time with general usage.

Wrapping Up

If you do a research on sales stats of Kindle Fire you will be surprised. It was holding more than 50% of Android tablet market share in year 2012. No other tablet could go viral like this in Android world. Even if you take a look at sales stats of popular Samsung Galaxy Tab series, they are having nearly 15% of market share. Kindle Fire is the one who made 7 inch Android tablet popular and made the way for many other 7 inch tablets.

amazon-kindle-fire-launch-5264736

No doubt that Kindle Fire is a great Android tablet for great price. Its features are not the best but good fit for many people and their general work. Now in the market it’s having a tight competition like never before. Google has introduced Nexus 7 tablet which is way powerful than Kindle Fire in every way, but costs the same. Time is ripe to Amazon to do a major paradigm shift in their future development.

Tags: #Amazon #Android #Tablet

How to Convert Images to Text?

When you are browsing on social networks you might have come across with special patterns of characters which produce an image. It’s a very interesting thing to do specially in a place where you can’t use actual images.

Have you ever tried to produce an image with text? Once I tried to do it manually and ended up in a total disaster. I wouldn’t say it’s impossible but it takes forever. When I was stumbling across the white fire grid, I came across with an online tool which is letting you convert images to text with just one click. Let’s take a closer look in to Text-Image.com.

how-to-convert-images-to-text-6893026

How to Use Text-Image.Com?

  • Go to convert page in Text-Image.com.
  • There you have 3 options, HTML, ASCII and Matrix.
  • HTML mode will create image with 1 and 0 with different colors.
  • ASCII mode is creating image with plain text format.
  • Matrix more is giving you results as a text matrix in a image.
  • In every mode you can upload and image and set few parameter to optimize the output. Proceed with that.
  • It will take some time to upload the image. Once it’s done, within matter of seconds it will convert it to text.

If you selected ASCII mode you can easily copy paste the generated text anywhere. In Matrix mode, all you have to do is download image and share it with your friends. The most detailed and beautiful mode is HTML. In order to copy generated HTML code, there is no proper way.

How to Copy HTML Output?

If you want to include it in a blog post, usual copy past will work. But I’ll be happy if I can get the actual HTML code. For that easiest way is dig in to HTML code with code explorer and get a copy.

Most of the modern browsers have built in HTML code explorer. I’ll tell you how to do it in Chrome. It’s almost same in Firefox. First, complete image to text conversion in HTML mode. Then right click on output and go to inspect element. There you have to copy whole HTML code between and . For that you can right click on HTML element and use copy as HTML.

I converted NOG logo and here is how it came out.

1111100110110111011010001000101011010000011111110000001111110010011100111110110000111110011110000010111000001110011010010101101010
0010010011011011011010111001000011101011110000011010011010000111010100101110010110010001101110100111000101101001101101101111111010
0000111100010111001110010010110001001001110001111011110000101111011000111011101001001001110010101111000101111000010100101001000000
0000000001010011010001000010010010011010000011000011100110101000010010000101000101011000000110001000001000111110100000101011001100
1111100111000100101100010000111010111100111000101111000010001000111101011111001100001111111011010100110101000110000000010001111100
0100100001110110111011101000101001101000011000011111111101010000001111010010010000011000111100010111110111111100011010100101101011
0001000011111010000111101100100011111100100001110001011111100111001100111001011110101011101001110001010001111100110000101011011001
0000111100001111101000011101110010001000100110010011111010110111000110111001000001011100001111000010010001111010111000010010111010
0110110100010111101001000111010111001100101100011101100010000010110000011111010100010001100110011101110100010100110010110011001001
1111110011011010010001001010100110110110110000000011101000110110101011010011000110010000011010110110001101001000010101001110011101
1100100011110101001010010101111111100101001101101101000001100111110010010101110100110001111011001001101100011001011110000101100011
1100000011011100010000101010000110010100010001110010100000101111101011100111001001001001001000111011100110100101110100000100010001
0010010000010100100111111111101011111010000100010101010100000110111000001101000001100101010101010100000101110000101111110001001000
1101000110000010000101000101101101010011010111011100001110110001011000111010011111111110100011101010010111101011101100011001110001
0010110001011011100000110010100101001111011110011011001000101101101000000100110111100100110101100011110110111011000110100010010001
0110101101101001111110110110000010110110100110100110001000110010010001101110110011101010101100010101110010101101011011111111000111
0101101001000100000100001000100100011011011110001110110111001100000001101000101001111011100000001001100100110000001111110011110111
0111100000001110001011111111100001100001110011000100010010100111110001010100110011000110001101111000100001111111100010111100001001
0110111000111001100110000110101011110100010010110000000011111100000010111011110111100000110000101010001111100111001100110100011111

That’s how it works, only need few clicks get it done. Enjoy the tool and tell us the cool things you did with it as a comment below.

Tags: #Online Tools

How To Know When A Website Is Down?

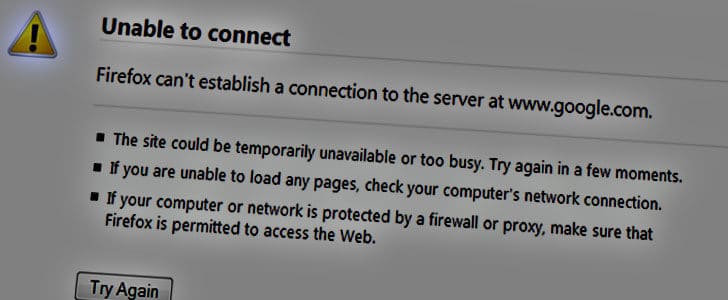
There must have been many times where some websites didn’t work on your browser. In such case the first thing you would do is to check whether the internet connection is working properly. If not your next guess would be whether the particular website is down.

So today I’m going to introduce you a very simple online tool to check whether a website is down. That tool is DownForEveryoneOrJustMe.com.

Even though the name sounds long it will easily find out whether a site is ‘Down for Everyone ’ or ‘Just Me’.

main-3628108

How to Use

This is an amazingly simple, single-paged website.

Here are some results I have got for couple of searches.

example01-2616152

example02-4634954

IsUp.me

This is the short URL for the website as most people find the original name hard to type. Still this URL will also be redirected to the same service.

How It Works

As I believe, this website is pinging the particular web server from a random IP address and checks whether it receives a response. Based on the response it will give us the result accordingly. However I don’t think it pings and gets the responses from multiple IP addresses therefore the reliability of the result you get will not be 100% accurate. So it is better to check the same site a couple of times to be quite sure.

Interesting Fact

As I mentioned earlier, DownForEveryoneOrJustMe.com and IsUp.me both will take you to the same website. One interesting fact I found when playing around with this tool is that, when I type ‘IsUp.me’ on DownForeveryoneOrJustMe.com, it says that the site is ‘Down for Everyone’. And the same happens when the vice versa is done with IsUp.me.

So, next time when you want to find out if a site is down or whether it’s blocked for you, make use of this tool to make things easier. Also I would like to invite you to share your ideas about this tool with us here at the NOG community.

Tags: #Performance #Web

Google Maps and Bing Maps Under One Hood

If it’s about searching for locations, you must be aware of Google Maps. Why Google Maps is popular is because of its highly detailed 2D map. You will be amazed to see that Google is wise enough to display even the less important roads. Another popular feature of Google Maps is its detailed Street View. It shows quite accurate details in a 360 degrees angle.

Another popular Map service provider in the game is Bing. Most people prefer the Bing Areal view (Bird’s eye view) over Google Maps satellite view as it is highly detailed.

So if I want to get highly accurate details about a certain location what I would do is search for the location in Google Maps, view the 2D map then go to Bing and search for the satellite view of the same. Doing so is not as convenient as it sounds. There are many times I wish there was some ‘Super Map’ which brings together the strengths of both these amazing services.

google-maps-and-bing-maps-under-one-hood-1049029

Much to my amazement, I found out such a service! Dual Maps is the name that brings together Google Maps and Bing Maps together under one hood. Let’s take a deeper look in to this service.

What is Dual Maps?

Dual Maps is one of the web services offered by MapChannels.com – an organization that lets users embed different sorts of maps into their websites and blogs. There are many services offered by them but Dual Maps is what caught my eye. Let’s see how to use this service.

How to Use Dual Map?

  • Go to MapChannels.com
  • In the page you will be able to see lots of news and other details about the service.
  • In Get Started section visit the page Tools.
  • There you can see a list of map service they offer.
  • Choose the very first one which is Dual Maps.
  • It will take you to a preview of Dual maps.
  • There you will be able to three panels with Google 2D map, Street view and Bing Map.
  • You can Enable or disable street view using the check box below.
  • Next to the Street view check box you can find links to go full screen and reset.
  • In Google map you can find all the standard views such as Map, Satellite, terrain etc.
  • Even in Bing maps you can switch between views such as Road, areal and Bird’s eye view.
  • When you are moving the Google Map, Bing map also getting located to the same place in real time.

How Embed This Map In Your Website?

  • First move the map to desired location.
  • Scroll Down the page to see advanced customization
  • There you can alter entire set of standard features in Google Map and Bing Maps.
  • You can set the size of Map in Pixel.
  • One of the most interesting feature, you can set the icon for Google Street view such as Pegnam (default), car or panda.
  • After setting all the functions the way you want click on the button Create.
  • Right below the map preview you will be able to find Embed code as well as direct link to the created map.
  • You can easily embed it in your web page or direct your users to created map.

Here is a Dual Map I created.

Here is the Direct link to this map.

This will be a great tool for web developers especially when they are creating websites for businesses. In the context of business, adding this kind of highly detailed interactive map to your website would be an extra color as well as a competitive advantage.

Tags: #Bing #Google