Asus Web Storage

In last couple of months there Cloud storage war was at its peak. The early member DropBox, SkyDrive and new entrant Google drive was offering lots of competitive packages to the users. Most of them are having free entry package and upgradable pro packages with expanded storage.

When it comes to storage and value SkyDrive is the best and if you consider features and user friendliness DropBox is the best. Google drive also offering advanced online document editing features which was there in previous Google Docs.

Quick catch-up

  • Dropbox – Backup and Share Files
  • Getting Started With Google Drive

Today I’m going to talk about another cloud storage service provide who didn’t make much noise in Cloud storage war. Regardless of the silence it’s offering lots of competitive and unique features to it’s users. Today Asus Web Storage is under Notes Of Genius Spot light.

asus-web-storage-7120480

How to Use Asus Web Storage?

There are several options if you want to use Asus web storage. For a Windows, Mac or Linux user the best and easiest way is Sync Agent. This is working almost the same was as DropBox or any other cloud syncing applications.

If you want to access Asus web storage using your Smartphone you can install the application which is ready for Android, iOS and Windows phone.

In the case you need more advanced integration you can go for Suite which is having features such as server back-up and control panel data back-up.

You can download all those application in Asus Official Download page.

Here I’m going to tell you how to use Sync Agent on Windows Platform.

  • Download Sync agent and save it in a known location in your computer.
  • Run the installation wizard and complete the installation process.
  • After the installation it will ask you to run the Sync agent. Proceed with that.
  • There will be a step by step Initial configuration wizard.
  • There you will have to create an Asus account using your existing email address and providing secured password.
  • They will send you an email verification code. You can verify your email address by clicking on that.
  • Now your account is ready to use. Open Sync agent and sign in using your email address and given password.
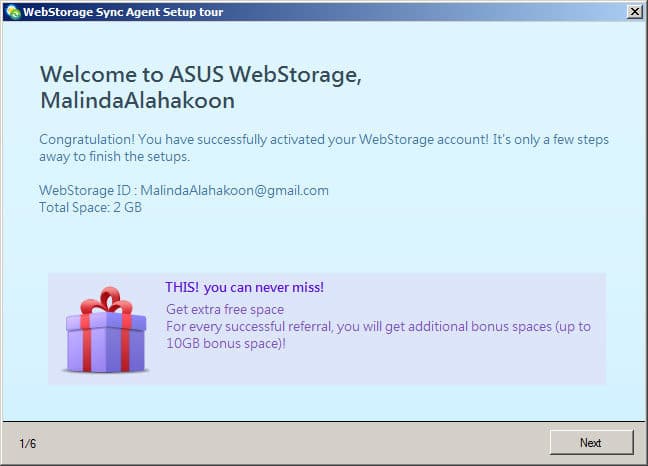
  • Once you login there will be a welcome message as shown below.
welcome-message-8733981

  • In welcome message, click next to set up the MySyncFolder where you put the files which need to be synced with Asus web storage.
  • One you set the MySyncFolder location it will take you through few steps where you can find an features overview and finally you are done!
  • You will be able to see the Asus Web Storage icon in system tray.
  • By double clicking on that you can access the MySyncFolder and right clicking on that you can access its configuration options.
  • Drag and drop the files which you need to be synced to sync folder and they will get uploaded automatically.

Good Things about Asus Web Storage

Automated Syncing

If you are already using some cloud storage service this would never be new thing for you. If you want to sync files all you have to do is just drag and drop the files to synced folder. The sync agent will automatically upload the files behind the screen.

If you need to pause syncing process you can easily get it done in right click menu in system tray icon. Once you go to preferences you can see the syncing status and set upload speed limit as well. This will be useful for you to manage your bandwidth and share it properly with other applications.

Easy Sharing

Most of the cloud storage service doesn’t offer this except DropBox. For me this is an essential feature. I don’t like to visit web interface to get everything done with my cloud storage. I need to right click on file do relevant simple tasks.

There is a plus point for Asus web storage here. It’s having a right click menu where you can access sharing options. However, same as with DropBox you can’t complete the sharing options without accessing web interface.

Storage Expansion

Asus web storage is giving you only 2GB in free version. But you can invite more people to Asus web storage and get space up to 10GB. For each referral you will get 512MB. If you have used DropBox you know how this works.

If you need further expanded storage for business usage there are several packages which you can find here. The marked prices are not that competitive compared to other cloud storage providers such as SkyDrive and Google Drive.

Wrapping Up

Asus Web Storage is a great service and you can start using it for free. It’s providing lots of features to general computer users such as automated syncing and easy sharing. Best thing about Asus web Storage is it’s going beyond general usage and reaches its capability to server environment and mobile environment as well.

I am a existing DropBox user and still I haven’t seen other service which is offering promising features take me away. It’s still the same with Asus Web Storage. It’s good but not good enough to take me away from DropBox.

Try this tool on your PC, mobile, may be on server and share your experience with Notes of Genius community.

Tags: #Asus #Cloud Storage

Smush.it – Compress Images without Losing Quality

In web development, the page load time has become a very important factor like never before. Previous to the era of social media most of the web sites were pretty much simple and presenting relatively less complex data. Therefore performance optimization was not so difficult task.

Today most of the websites are presenting very complex dynamic data and worst part is that a large amount of data is uploaded by users and has very less control for the webmaster. No matter how complex the data is, no matter how advanced the web technology is, there is one major performance bottleneck in any website where you have to pay very close attention.

smushit-compress-images-without-losing-quality-6718962

Images consume a significant persontage of bandwidth in your server and large images slow down the page load speed making the user experience very unpleasant. As the webmaster what you can do is make the page size smaller as much as possible to solve this problem.

Quick Catch-up

  • Website Performance Optimization
  • Google Page Speed Online

But how far can you compress the images without compromising its quality? You can always go to Photoshop and reduce the image quality to make the web page size smaller. Of course this will reduce the page load time, but pixelated images will again deliver a bad user experience.

The solution for this problem is a lossless image compression tool which can reduce the image size without compromising its quality. Most of the great web page optimization tools come from Yahoo and this solution also comes from them with the name Smush.it.

How to Use Smush.it?

  • Go to SmushIt home page.
  • There you can find two image uploading options.
  • You can use the uploader to upload local images or you can use URL to compress online images.
  • If you use the uploader it will show you the uploading status.
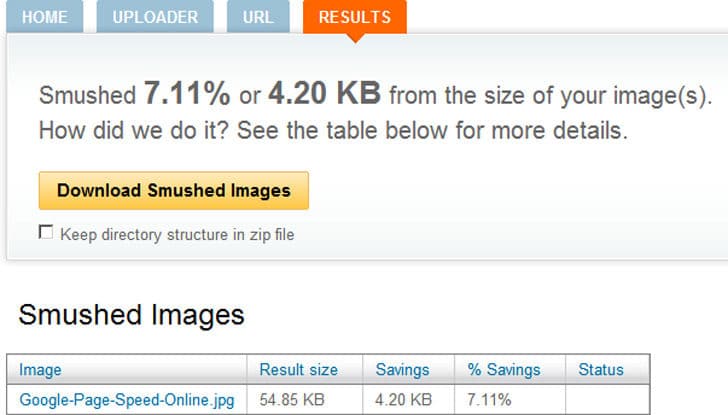
  • After the upload process it will automatically start compressing images.
  • Finally it will give you another tab named results.
  • There you can download the compress images one by one using the list down there or download entire set of images as a ZIP file.

smushit-result-2536692

You can use this tool to optimize static images of your website, which probably you have used to make the interface looks good. SmushIt will remove all the unnecessary data in the image to make its size smaller very carefully without affecting the visual quality.

However, there is no public API available to compress your dynamic content without manual uploading. Soon I’ll meet you with a good API which you can use in a development environment to compress images.

Tags: #Performance #Web

Acer Iconia with Windows 8

Microsoft’s next big thing released its first consumer preview back in last February. Then after it became hot news in tech community and went viral in social media. It introduced many brand new concepts to computer operating systems including its famous Metro UI.

Quick Catch-up

  • Windows 8 Consumer Preview – Defining a New OS Dimension

When I was trying the consumer preview I always had a feeling that a conventional PC is not a suitable device to run Windows 8. Keyboard and mouse is not the way to control a Metro UI. It needs a tablet with multi-touch display.

By that time Microsoft has officially announced that they are releasing a separate version for Tablets called Windows RT. But still it’s not that same as PC version and it supports only Metro Apps.

The best device to get the maximum experience in Windows 8 Metro UI is a slate computer with hardware configuration of desktop PC. If that’s your requirement there were very few options and none of them were specially designed for Widows 8. Even if you find one the price you have to pay is off the roof.

acer-iconia-with-windows-8-8179348

There is good news for you from CompuTex international information technology show held in Taipei this year. Acer has introduced brand new slates for their Iconia family which are specially designed to run with Windows 8. They are under Notes of Genius spot light today.

Acer Iconia W510

Iconia W510 is the younger brother and it’s having 10.1 inches 1920 X 1080 full HD IPS display. There is a capacitive screen supporting up to 10 fingers multi-touch. Details about the process is not unveiled yet by Acer, but stated that it’s powered by Intel Ivy bridge processor.

acer-iconia-w510-4041471

The device is having optional keyboard dock and on top of that it looks like a NetBook. There is a extra battery power in keyboard dock and all together it will be having 18 hours of battery life. This setup reminds me of Asus Transformer Series.

Quick Catch-up

When it docked the display can rotate around 295 degrees and once it detached it will looks like any other tablet.

There are no official specification released about RAM and storage. They will be released soon with the devices marked price.

Acer Iconia W700

Iconia W700 is the big brother having 11.6 inches 1920 x 1080 full HD IPS panel. It’s same as younger brother except the physical size. This device also comes with 10 finger multi-touch and Intel Ivy bridge processor.

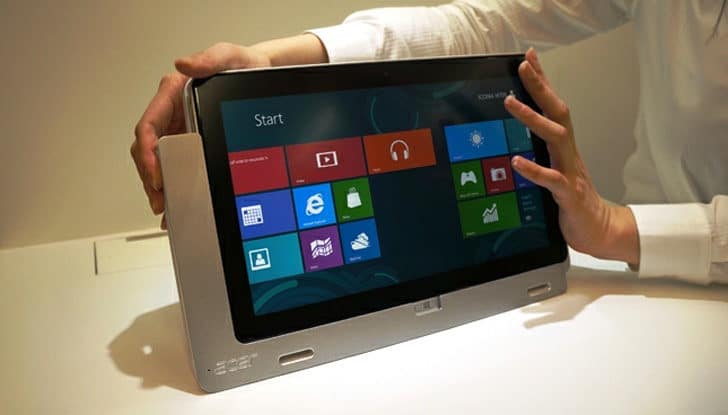
This is not coupled with conventional keyboard dock. Instead it’s having a cradle where you can dock the device when you are using it as a desktop. It’s having two different position, one with 20 degrees angle to use the multi-touch screen and 70 degrees position for viewing.

acer-iconia-w700-3451090

This device taking its next step as a multimedia station with the power of in built Dolby sound and HDMI port for video streaming. For faster data transferring it’s having USB 3.0 port and Thunderbolt port as well.

Wrapping Up

Once you take a look at the released specification you can figure out that these devices are having hardware configuration as good as a desktop or even more, only the design is different. Multi-touch sensitive full HD display and all together they make perfect companion for forthcoming Microsoft Windows 8.

Though the official pricing are not yet been released there are some rumors saying that they will be marked between $799 – $999. However depending on hardware configuration there is a high chance to be the mark price even higher.

Tags: #Acer #Tablet #Windows

Snooze Your Email with Hit Me Later

An average person receives approximately 50 emails per day. Depending on your life style this may increase up to 150 maybe. In early morning when alarm clock rings, you can snooze it for 15 minute and sleep little more. When you are in front of computer, mainly when you are at work, emails keep coming and rings alarms for various work. Is there any way for you to snooze them?

The worst part is you can’t just ignore them, sooner or later you must read them. If you left them at inbox, for sure they will be missing in action with tons of other emails. What is you can receive them back as a new mail after given certain period of time, just same as Snoozing alarm. Hit Me Later has made it possible for you. Let’s see how it works.

snooze-your-email-with-hit-me-later-5427513

How Hit Me Later Works?

All the operations in Hit Me Later is magically simple. Absolutely no registration and sign in required. All you have to do is forward to Hit Me Later when you receive apparently important email which you need to snooze. Here are the email addresses you should send the mail.

You can find more specific instruction in their Official guide.

Wrapping Up

Someone might say that “Hey look, I can add a star to my email, label them and put them in different folders. So I will never miss them”. True, but what if you forget to look at stars, labels and folders. With Hit Me Later, email comes back, or Snooze to your inbox as a fresh email, so you will never miss it.

The free version of Hit Me Later only support up to 24 hours of email snoozing. If you need longer time upgrade it to a Pro or Exec account.

Note to Developers

Big thank for developing this great and simple solution to make our day easier. Though of sharing a drawback I notice what I was using Hit Me Later. When I snooze email for 5 minutes, sometimes it’s taking longer than 5 minutes to come back to my inbox.

Once I snooze it for 5 minutes it took 19 minutes once and when I snooze for 1 minute it took 18 minutes. You may take a close look in to this issue and take steps to make your service perfect by solving it.

Try this great service, to never to miss any important email you receive and never forget to share your experience here with NOG community.

Tags: #Email

Getting Started With Google Drive

In past few weeks Cloud Storage War reached its peak. Lots of services came in to picture with lots of attractive offers. Most of the services increased their free storage allowance and drastically reduced the pricing for extra storage.

Google, the internet giant also joined the cloud Storage war with their long awaited Google Drive. Their service is pretty much similar to the most popular Cloud storage service “DropBox”. If you are already a DropBox user you will find this quite familiar.

google-drive-3236371

Quick Catch-up

However, Google Drive is offering lots of flexible features through it’s web interface rather than conventional locally installed file syncing client.

Here we are trying to take a closer look in to overall functionality of Google Drive.

Create an Account

Creating an Account with Google Drive is easy as any other Google service. If you don’t have a Google account, create it by visiting Google Home page. Then you are few steps away from Google Drive.

After creating a Google account, visit Google Drive by clicking Here. Then it will take you through the configuration step by step and finally take you to a familiar interface like Gmail.

Left hand side you will be able to see general online file folders and top navigation bar is giving you relevant control depending on selected items. If you switch to Grid View it would almost look like a local file folder.

If you were using Google Docs, you will see that those documents are also integrated with Google Drive. You can edit them same as before, right there with online interface. You can create a new supported document by clicking on the Create Button.

If you need to upload your files to Google Drive you can do it with the Upload button next to create button. But there is a Better way, read the next section.

Install and Configure File Sync Client

Uploading Files with web interface is not safe as well as not efficient. Therefore, same as DropBox, Google Drive is also giving you a File Sync client. You can download it from Here.

It’s an online installation same as Google Chrome. Once entire installation files get downloaded it will automatically get installed.

Once the installation is done it will ask you to sign in and this support 2 Step Verification, so you don’t have to create application specific password.

Quick Catch-up

  • Google 2 Step Verification

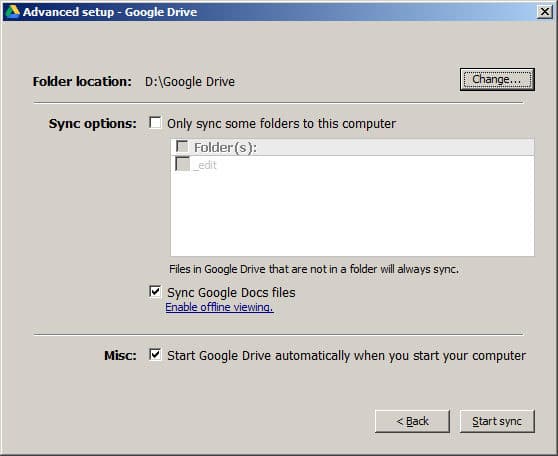
After sign in it will take you through getting started steps. In step 2 make sure you go to advanced setup and change the folder location to some other disk partition.

google-drive-advanced-settings-5175762

After this configuration, it will automatically start with windows. Whenever you want to add files to Google Drive all you have to do is Drag and Drop files or folders in to Google Drive folder. They will get synchronized automatically behind the screen. Synched files will be marked with green tick.

Google Drive file syncing client does not provide sharing functionality locally. For that you must visit the web interface. I’ll see you soon in another article about Privacy and Sharing in Google Drive.

Tags: #Cloud Storage #Google

Add Scheduling to Gmail with Boomerang

Recently I was talking a lot about Gmail and of course there are more. Today I’m going to talk about how to enable scheduled and Bounce back features for Gmail. This comes with the name Boomerang, a plug in to your browser and it supports Google Chrome, Mozilla Firefox and Safari. After successful installation you will get a new controls in Gmail which let you to configure scheduling and bounce back.

add-scheduling-to-gmail-with-boomerang-2160957

Steps to Configure

  • Go to Boomerang home page.
  • There you will be able to see a button labeled “Install Boomerang”. Click on that.
  • It will automatically detect your browser and start downloading appropriate plug-in.
  • All the instruction you need is there in download page.
  • After the installation restart your browser and go to Gmail.
  • There you will be able to see step by step guide for boomerang since you using it for the first time.
  • That will give you clear picture about how to use Boomerang.

What You Can Do With Boomerang?

The main thing that you can do with Boomerang is schedule an email. After installing boomerang there will be a new button in Gmail text editor as shown below.

schedule-2158766

This button is having a drop down menu and there you can schedule the email the way you want with lots of options.

If you are sending many number of emails everyday you have no way to track whether you are getting reply to all those. In the case you seriously need a reply for a specific email you can mark it with boomerang. Then it will remind you if you won’t get a reply for that email in a given period of time. To get thing done there is another new check box is there in email editor.

boomerang-4579725

Before you start using this feature you have to authenticate it. This authentication page comes as a pop up and most of the browsers will block it. Therefore you have to enable pop ups from Gmail to authenticate this application. After successful authentication you can start using Boomerang feature. It will boomerang the email on given condition.

Wrapping Up

Boomerang plug in is very carefully design to work with Gmail and it’s perfectly blending with its interfaces. Entire functionalities are working just fine and so far I didn’t come across with any bugs. Boomerang completes Gmail adding scheduling and bounce back features. The best part this works with Gmail in Google apps as well.

Enjoy using Boomerang for Gmail and never forget to share what you experienced with Notes of Genius community.

Tags: #Gmail #Google

Chrome to Phone

Imagine when you are browsing a very interesting web page in your favorite web browser Google Chrome, you got an urgent message and you had to leave at once. Now what you are going to do for the web page you were browsing? Of course you can bookmark it. Thanks to Chrome sync you can access the bookmark anywhere, may be in another Chrome browser in a different computer.

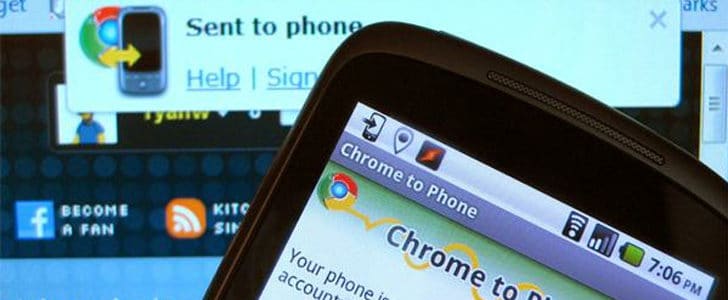
But for that you have to wait till you go to another computer. Not so impressive. But there is a tool you can use to push the web page to your android phone and even open it automatically in android browser. There you can browse the page on the go without interruption. This comes with the name Chrome to Phone and developed by Google itself.

In order to activate this facility you have to install “Chrome to Phone” extension for your browser and install Android application in your Smartphone.

chrome-to-phone-1812612

How to Setup Chrome to Phone?

On Your Browser

  • Go to Chrome to Phone page in Chrome web store.
  • Click on add to chrome and complete the installation process.
  • Then you will be able to see Chrome to phone icon in Browser toolbar.
  • Click on that and click Sign in.
  • Then you have to grant necessary permission to the extension to access your Google account.
  • Now it’s all set. You have to install the Android app to compete the setup.

On Your Android Phone

  • Go to Chrome to Phone page in Google play and Install the application on your Smartphone.
  • Open the application and setup wizard will take you on a step by step tour to configure it properly.
  • You have to select the Google account to work with and grant required permissions.
  • Then you will be having two options. Automatically launch links and Let me launch links manually. First one would be the optimum one for most of the people.
  • Finally click finish and you are done.

Since all the configurations are done you are just one click away. When you are browsing a web page and you want to push that to your android phone, click on Chrome to Phone icon in browser tool bar. The page will be automatically opened on your android phone with default browser.

If you haven’t selected the option ‘automatically launch links’, a notification will be displayed in notification area. By clicking on that you can visit the web page. Every time you push a web page to android phone it will notify you with default sound.

With Chrome to Phone you will be able to have uninterrupted web experience even if you have to move away from your computer. This will come in handy for many people who are spending busy lives. Configure Chrome to Phone in your browsing environment, feel the magic and share your experience with NOG community.

Tags: #Android #Chrome #Google #Smartphone

Google Maps Offline for Android

If I ask you the question what is the most popular online Map service, your quick response would be Google Maps. Of course there are many other map services but so far nothing is offering you detailed maps and comprehensive features as Google Maps.

Smartphone users know that it’s more fun to use Google Maps on mobile rather than on web interface. There is a specially designed Smartphone application for Google maps for different mobile platforms offering unique features such as Navigation, Maps Indoor and 3D view.

The main problem with Google Maps is whenever you want to use it you must connect your Smartphone to data network. Even after all the optimization it consumes lots of data for its operation. Mobile broadband is an expensive service in most of the countries. Due to this using Google Maps has become expensive though it comes for free.

Recently news went viral saying Google is planning to offer an offline map service. But this is nothing new and most of the offline features were there in Google maps for a while. They will be very useful for you to save your mobile broadband bandwidth and lots of money. Let’s take a closer look.

google-maps-offline-4768831

Automatic Caching

This is the easiest way for you to use Google maps offline. Before you start using this, you have to do some configuration. Go to Settings -> Cache and enable automatic caching. There you have the option to select cache only using wi-fi or use mobile networks as well. It’s recommended to go with both.

Below that it will show you the space consumed by Google map cache. If you face any problem with storage space, you can clear cache anytime.

After enabling this when you are browsing through the Google map all map details will be cached automatically. Whenever you open the same area in the map it would not re-download the map. Instead it will retrieve the details from cache.

PreCache Map Area

This is a Google Maps lab feature. Before you start using it, you have to enable it at your own risk. For that you have to go to settings -> Labs and enable it by checking it in. Now you are ready to preCache a map area.

Go to required location and tap and hold the place you want to cache. It will pop up the address of the location or other relevant information. Click on that and it will take you to an option menu. There you can find option to precache map area. It will show you a pop up with a progress bar saying its caching map within 10 miles around the given location. If the area is already cached with automatic caching, the process will take lesser time.

Once this is completed you can access this map area without any data connection. For that you have to go to settings -> Cache -> Precached maps. There you can access them, edit name and delete them if they are no longer needed. Once you access Precached map, it will show in black color outline.

Forthcoming Google Maps Offline

There is a news stating that Google is about to release an offline version of Maps for Android Smartphone. This feature is nothing but the PreCached maps from Labs. This is not a new thing for Google products. You may remember sometime ago Gmail didn’t have the ‘Star’ option. But it came in as a Lab feature, and then it became an official feature. Here it’s happening again. Soon you will be able to enjoy offline Google maps as an official feature.

Tags: #Android #Google

LG Optimus 4X HD – Ice Cream Sandwich in Quad Core

LG is the company who introduced dual core Smartphones to the world with LG Optimus 2X back in 2010 December. It changed the whole Smartphone industry and lots of manufactures came up with dual core processors powered products. This hardware improvement helped the world most popular mobile OS, Android to expand itself as well.

lg-optimus-4x-hd-ice-cream-sandwich-in-quad-core-9180234

And now they have done it again! LG Optimus 4X HD, a Quad Core Smartphone. This was announced in 2012 February and will be coming to market soon. The appearance of this mobile giant on Mobile World Congress 2012 attracted everyone’s attention.

Special Features

Processor

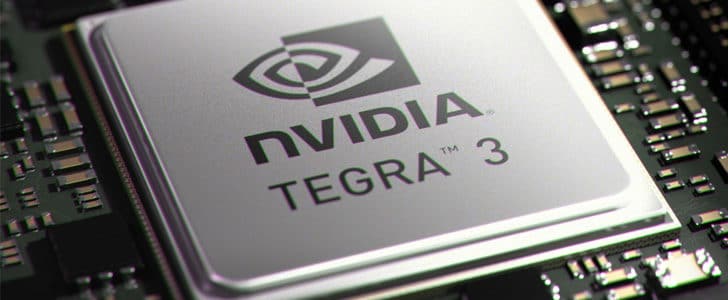
The hook in this Smartphone is of course its processor. It’s powered with 1.5 GHz, Cortex A9 Quad Core processor running on Nvidia Tegra 3 chipset while GeForce GPU is there to accelerate graphics. There is no much improvement in RAM which is still 1GB.

This setup not only gives this device amazing performance but also efficient power consumption due its latest 4-PLUS-1 Quad Core Architecture.

nvidia-tegra-3-9399208

This will give the users a more fluid Android experience like never before. Not only that, it will open new opportunities for application developers and various other advanced multimedia applications.

Storage

The device is coming with internal 16 GB storage. However it’s not clear what type of expandable storage this device is having. I will update this article once the confirmed information comes.

Operating System

LG Optimus 4X HD is one of the very first devices that come with latest Android Ice Cream Sandwich. Therefore the device will inherit all the cool futures of ICS and power of massive application store.

android-ics-3712769

Display

LG Optimus 4X HD is coming with true HD display. It’s having 4.7 inches LCD capacitive touch screen with 720 x 1280 pixel resolution. The sharpness of the display is an amazing 312 ppi.

The creative possibilities of this kind of screen are unlimited. It’s a perfect platform to run any kind of portable multimedia application, especially movie playback. The sharpness of the display will deliver a better web experience as well as turn this device in to an effective eBook reader.

Multimedia

The device comes with 8MP rear camera and 1.3MP front facing camera. This will let you to shoot photos with 3264×2448 pixels. If you want to shoot photos in low light conditions there is a LED flash.

When it comes to video recording, it’s capable of capturing 1080p full HD videos at 30FPS. There are unique features in video player such as playback speed selector and zoom the video while payback which adds extra color to this device.

Other than these it’s equipped with all the general features in any Smartphone such as TV out, DivX playback, flash video playback etc.

Web Browsing

Web browsing is one of the critical success factors in any Smartphone. Since this device is having an amazingly fast processor and super sharp display, nothing stops it by giving great browsing experience to users with 3G connectivity.

According to most of the reviews at MWC 2012 this device is having super fast web page rendering and fluid performance unlike any previous Android device.

Since it comes with ICS you can install Google Chrome on this device as well.

Final Wrap Up

No doubt that this device is a monster. It’s a great achievement for LG as well as Android Mobile OS. Further it will give a good competitive advantage to LG to fight with Samsung in Smartphone world since Samsung doesn’t have any quad core android phone yet. (Smartphone world is dominated by South Korea, Hats off for that!)

Recently I talked about Ubuntu-Android Friendship which let you to carry a desktop CPU in your pants pockets. Hardware muscle in LG Optimus 4X HD will accelerate that trend for sure.

The device will come to market probably after April 2012. There is no confirmed information about the pricing yet. I’m sure it will come with competitive price and probably take away a significant market share from Samsung. The Smartphone war is on!

Tags: #Android #Ice Cream Sandwich #LG #Nvidia #Smartphone

Show Your Face to Login to Your Computer with Blink

Frequently we are using either a webcam in our computer or Laptop for video calling. But there could be more creative usage of a webcam. Previously you got to know how to set up a Video alarm system using the conventional webcam. Today I am going to introduce another innovative usage.

Here we are trying to use webcam as a face recognition device to verify user logins in your computer. The piece of software we’ll be talking about today, which let all those happen, is called Blink. It’s developed by Luxand, Inc a well known company researching on artificial intelligence and biometric identification technologies. The current version of software is 2.4 and it comes as a trial version which let you use it only for 20 times.

show-your-face-to-login-to-your-computer-with-blink-2198901

Installation

  • Click Here to go to download page
  • Click on the button Get Yours Now to start download
  • Run the installation wizard and complete the installation
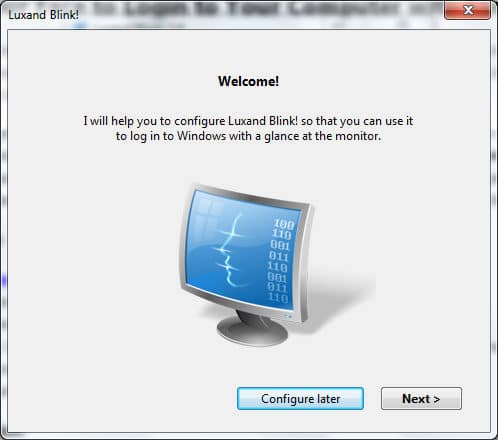
  • As the last step of installation it will ask you to Configure the application. You may carry out as explained in the Next section or click on Configure later

configuration-3135914

  • Installation is done and you can access the application in Start menu

Configuration

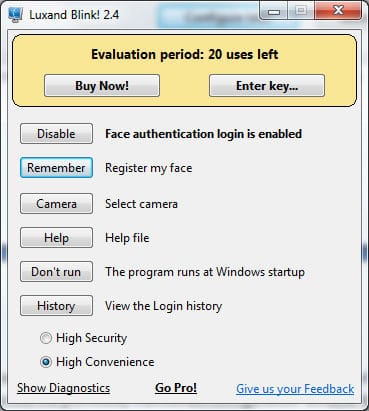
  • The application installation will prompt you to configure it at the end of installation. Even if you skip it you can access the previously mentioned configuration window by clicking on the button Remember.

main-panel-6722161

  • Once you get the configuration window click Next to proceed
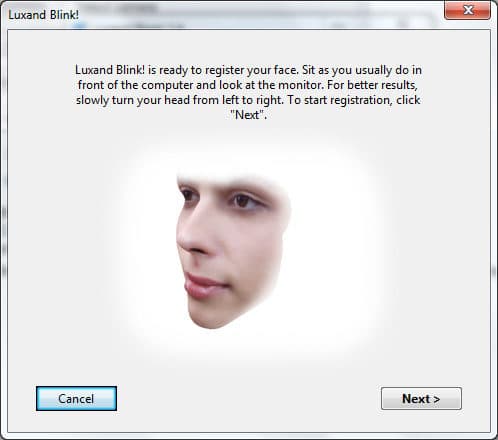
  • Then the software will explain you how you should show your face to webcam using an animation

face-registration-3439216

  • Click Next and show your face to webcam as explain in the previous step. You have to turn your head from left to right slowly.
  • Once that’s done, in the next step you have to enter the password of the current user account.
  • Voila! Configuration is done. Restart the computer to see the result.
  • On the login screen you will see a new window and the view of webcam will be reflected there.
  • Show your face to webcam for instant login.
  • If by any chance Blink could not recognize your face, you can always go back to the conventional way, enter Password!

Advanced Configuration

Through the main window of application you can access an array of configuration options as mentioned below.

  • You can Enable or Disable face authentication login
  • Delete existing face template
  • Select a webcam if you have many connected to your computer
  • Help file
  • You can choose not to run the application on startup
  • History which will show you a picture log of people who logged in to the computer. There you can save shots of logged in people or clear history
  • Finally there are two options for High Security and High Convenience. If you select High Security, it will take longer time to identify the face but it will be highly accurate. With the option High Convenience it will identify you in a blink, yet subject to identification errors.

Special Feature

Blink is capable of identifying your face even if you have a new hair cut or wearing your new aviators.  Luxand’s advance biometric identification algorithm is ready to filter out your face with any personal appearance change.

The history section keeps photos of every login attempt. Therefore you can easily identify who logged in to the system and whether there is any unauthorized access.

I was talking about advantages of having a Strong Password and how to remember it easily. With blink you don’t have to worry about that in Windows login. Still you have to follow the same rules for your online accounts.

Currently application supports only Windows Vista and 7. Try out the application and if you like it or want to use it continuously you have to buy it from Here for $29.95.

Tags: #Webcam #Windows