Self Sustaining Smartphone with Movement Charging

Smartphones are getting smarter day by day and getting stronger hardware muscles and sophisticated software. But the major problem you always have to face with Smartphone is its battery life. Practically you have to re-charge it every day and there is no other solution.

Previously I was talking about attaching solar panel to Smartphone to support the battery and increase the battery life. However if you apply the existing technology you won’t be able to find much improvement since  solar panels are generating small amount of electricity which is way lesser than the power consumption of a Smartphone.

self-sustaining-smartphone-with-movement-charging-2944134

Quick Catch-up

So far solar panel is the best shot we have, yet it’s insufficient to achieve the ultimate goal which is a ‘self sustaining Smartphone’. Still there is hope as technology always gives us hopes and in future there will be solar panels which can generate greater amount of electricity even with lesser surface area.

I have no plan to stop dreaming and another solution came in to my mind suddenly. This is a narrow shot and need lots of polishing up before applying as a power source for Smartphone. Let’s take a close look and here we are trying to look in to possibilities where we can convert kinetic energy to electricity.

How to Convert Kinetic Energy to Electricity

You might have seen self winding wrist watches. Rolex is a very popular one. If you are using such a wrist watch, most of the cases you won’t have to wind it manually. What is the secret behind self winding?

Those wrist watches are having a mechanical components inside which can convert kinetic energy to potential energy in the main spring. Your watch is on the move most of the day and it will never run out of energy.

Of course there is a possibility that engineers can apply the same technology to Smartphone. Same as wrist watches, most of the time Smartphone is also on the move, when you are walking and even when you are using it hand held.

In wrist watches they store the motion of the gadget, the kinetic energy as potential energy in the main spring. In Smartphone, instead of potential energy it can be easily converted to electricity stored in the battery.

How Practical is This?

Wrist watches need very lesser amount of power to function, may be electricity or potential energy in a spring. But Smartphones need greater amount of energy which is incomparable with a wrist watch. Therefore, as same as with the solar panels, amount of electricity generated with movement of the device would not be sufficient to achieve the ultimate goal, a ‘Self Sustaining Smartphone’. Compared to solar panels, subjected movement to electricity method would generate way lesser amount of electricity.

Wrapping Up

If you consider the capabilities of existing motion to electricity converters, the technology need lots of polishing up to blend with a Smartphone. The issue was same with solar panel, even though we have transparent solar panels already available.

Basically, this technology needs to be optimized to convert the kinetic energy in movement of Smartphone to electricity with maximum efficiency. I don’t see any problem of having battery, solar panel and motion charging in same Smartphone. This kind of hybrid approach would be ideal to achieve the ultimate goal of our discussion.

The answer is in future! Engineers will have to work on Smartphones which work with lesser electricity first and there is an improvement with the technologies such as 4-PLUS-1 technology. Along with them there will be a high capacity battery, high efficiency solar panel and motion-to-electric converter to function the whole system.

In addition there is another probability for us to generate electricity from variable magnetic fields. I will talk about that in next article.

Tags: #Smartphone

Self Sustaining Smartphone with Variable Magnetic Field Charging

So far I was talking about possible alternative power source for Smartphone having the objective of solving the major problem they face which is the battery power. Ultimate perfect solution would be self sustaining Smartphone which you never have to recharge.

My previous ideas were solar panels and motion charging. Applying existing technology it’s going nowhere near the ultimate objective, yet they are good leads to work toward that.

self-sustaining-smartphone-with-variable-magnetic-field-charging-7155241

Quick Catch-up

Today, I’m going to talk about another narrow shot same as previous motion to electricity conversion. This is already existing application in spy bots. The concept is to generate electricity using variable magnetic fields.

How to Generate Electricity with a Magnetic Field?

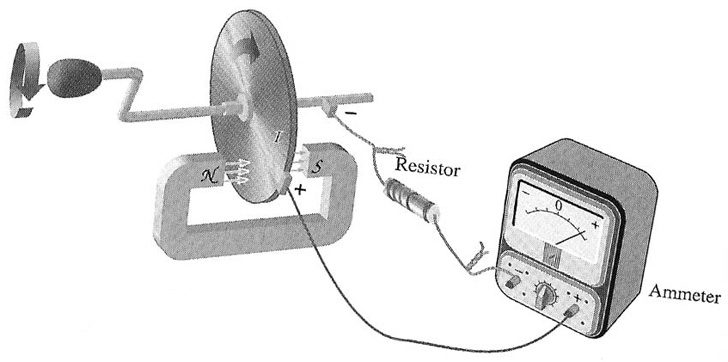
Back in 1831 Michael Faraday invented the Dynamo. It’s a device that generates electricity using constantly moving conductor in a Magnetic field. The very first dynamo was having a copper plate rotating in between two powerful magnets.

Today whole human civilization is powered with this invention. In hydro power stations, diesel generator and most of the electricity generating device, the base technology is dynamo.

To generate electricity with a magnetic field and conductor, there are two ways. Either you can move the conductor in the static magnetic field like Faraday’s original design or you can keep a static conductor in a variable magnetic field.

first-dynamo-7355433

How to Apply this to Smartphone?

We are always surrounded by lots of magnetic fields. Some of them are static and more of them are variable. Air conditioner, Computer monitor, fluorescent lamp and many other devices generates magnetic fields, mainly variable magnetic fields.

Though they are not variable magnetic fields, when you are using your Smartphone it’s moving. Best part here is you will never find a environment without magnetic field, why earth is a huge magnet.

In order to generate electricity using those variable magnetic fields all what engineers should do is embed specially designed copper coil in to Smartphone. Then it will generate electricity and store them in battery.

In a ideal environment where you can find strong variable magnetic field, such as near a monitor Smartphone would be able to generate significant amount of electricity. Though the magnetic field is static, still it Smartphone can generate electricity when it’s moving relative to that. In the worst case, it will generate small amount of electricity when you are moving with the Smartphone in earth’s magnetic field.

Wrapping Up

This seems a great idea, yet same with Solar panel and motion charging this also generates way lesser electricity which is nowhere near sufficient to achieve the objective of “Self Sustaining Smartphone”. The answer is still in future technologies. No matter what this is a good ground to start innovating.

As I mention before, if we can think of hybrid power sources, battery, solar panel, motion charger and magnetic field charger in one Smartphone that might show some significant improvement to battery life. The main problem would be this will add extra weight to the device which is a greater minus point.

In next few years most of the Smartphone manufactures will focus more on battery power rather than hardware muscle improvement. I believe we will be able to witness amazing technological outcome in near future.

Tags: #Smartphone

How to Find Distance between Two IP Addresses?

When you are dealing with internet, IP addresses contain lots of information. Every computer directly connected to internet having its own unique IP address. However in day to day operations IP addresses are not exposing. They are hidden with Host names for better user experience.

There are lots of online tools where you can collect information about IP addresses, their related host names, owners and geographical location. In the case you want to find distance between two IP accesses all you have to do is get individual IP’s location and measure distant between them.

This information could be very useful for a webmaster to performance optimize hosting insfrastructure and make strategic decision about infrastructure improvements. However, manually meaning distance between IP addresses won’t be that simple though you know their actual location. There are very lesser mapping tools which will let you measure distant between two different points.

In order to solve this problem I could find few online tools which is letting you compare two IP addresses and measure distance between them. Among them ipdistance.com is the tools which game me quick response and clear details.

how-to-find-distance-between-two-ip-addresses1-1341849

How to Use Ipdistance.Com to Measure Distance between Two IP Addresses?

  • Go to IP distant tool in ipdistance.com
  • There you have two text boxes to enter IP addresses.
  • If you enter a Host name instead of IP address, it will translate it to IP address and give you the result.
  • Then click on get the distance.
  • It will open up network information panel and display information about IP address including their latitude and longitude.
  • Down there you can see a map marked with locations of IP addresses.
  • At the bottom of network information panel you can find the distance between two IP address.

You could use this to measure distance between two web servers or may be find distant from your location to another server. If you want to know your IP address to give it as an input, you can see it in the header.

Tags: #Online Tools #Web

Highlight Web Content and Share with AwesomeHighlighter

Every day you must be sharing many web pages with your co workers and friends. It could be a web journal or may be a Wikipedia page. But most of the time, only part of page is important to you and the one you sharing it with. Is there any way for you to mark the content and then share it?

You can always convert the web page in to PDF format, highlight the important part and share it. This is too lengthy process and once you send it the web page is not responsive. If the recipient wants to explore more, he has to manually open the page in Browser. To solve all the problem there is a simple online tool, Awesome Highlighter. It’s allowing you to highlight web content, add a note of you need and share it as a shorten URL.

highlight-web-content-and-share-with-awesomehighlighter-4559093

How to Use Awesome Highlighter?

  • Go to Awesome Highlighter Home page.
  • There you can enter the URL of web page which you need to highlight and share. Proceed with that.
  • Then it will take you to given web page.
  • There you will notice that mouse pointer turn in to highlighter. Select required text to highlight them.
  • In top menu bar you can change the color of highlighting and add sticky note.
  • Finally click on the button Done.
  • It will take you to another page where you can see the short URL.
  • There you can directly share it via email or social media.
  • Once you share the URL, recipient will be able to see the highlighting and sticky notes you added on top of original website.
  • In addition he can jump to highlights and pass the page on to someone else.

Awesome highlighter is truly simple tool and serves it purpose like magic. Best part, you don’t have to visit their website to perform highlighting and sharing. You can use this Bookmarklet. Drag and drop this in to your bookmark menu, and then you can access all the operations instantly by pressing it. If you are using Mozilla Firefox browser, there is a plug-in which you can install to get the same thing done.

Awesome Highlighter developer, your tool is really awesome yet it could use some polishing up and your backbone needs to be strengthened. Few times I got database errors and reliability of tool is below my expectation. You may pay attention to those issues and make this tool perfect in future development.

Tags: #Share #Web

DropBox Web Hosting with DropPages

DropBox is well known for cloud storage service which is giving you wide array of features. Most of you guys must be DropBox users already. I wrote many articles about DropBox here in Notes Of Genius. But DropBox is getting bigger day by day and offer you many more features.

Previously I told you DropBox could act as a web host or extension to it. Today I’m going to tell you more details about how to use DropBox as a fully featured web hosting service. You will be surprised to know that it could do lot more thing that a usual web hosting service.

In order to use DropBox as a web hosting space we are using 3rd part service call DropPages. It’s providing the entire domain name mapping and other related background service.

dropbox-web-hosting-with-droppages-5356763

How To Use DropPages For Dropbox Web Hosting?

  • For a start download basic theme at DropPages.
  • You may like to start with other available theme as well.
  • Extract it and put in any location in your drop box.
  • Rename the folder in format [YourDomainName].droppages.com. (Ex: notesofgenius.droppages.com)
  • This naming is very important since this is going to be your web sites public URL.
  • Now right click the folder -> DropBox -> Click on Share this folder. It will take you to DropBox online interface.
  • There you should share this folder with [email protected].
  • It will take some time to approve the sharing request. Once it done you will get an email.
  • After successfully completing all the above steps you will be able to access your web site in given URL. (Folder name)
  • Go to www.notesofgenius.droppages.com see an example.

Usual Webhost vs DropPages

Whenever you want to update your web pages, you have to access them through FTP client, update them and upload to server. With DropPages, all you have to do is open the files in your DropBox folder, edit them and save it. No need of FTP clients, sign in to web servers or anything.

If you need collaborative editing for your web site, you will never have to share login details. If your friend wants to edit your website, all you have to do is share website folder with him. Then he also can access and edit it right in his DropBox folder.

In usual webhosting environment, if you need version control, you have to purchase those services separately. With DropBox you have no such worries. It keep version of entire files and you can easily access them, restore them in DropBox web. And you have no reason to worry about back up procedures. You have one copy at your computer and it sync with DropBox as well.

Those are the benefit comes with DropBox features. At the same time DropPages also adding value to this service. They minify, Gzip and enable Cache for your pages. And it rewrites URLs too. So you will have super speedy SEO friendly website.

If you take a closer look in to their template structure, it has clear separation between design and content. So you can simply edit content without even touching the HTML design.

When Not To Use DropPages?

This system works perfectly as long as your web pages are having static content. If you want to change the content only option is to change txt files which contain your content. You can edit the template manually too. But if you need dynamic content in your web page, this system won’t work. You have no way to execute server side scrip here. So you won’t be able to implement any functions in your web pages such as login and registration.

If you have that kind of advanced requirement best way is the enterprise webhosting service and an appropriate content management system.

Wrapping Up

DropPages is great service to host web pages with DropBox. It provides most of the background services such as URL rewriting, caching and GZip. It manages your domain name related activities as well. In the free version it’s giving you only a sub domain. If you need to use a top level domain, you must purchase the PRO version.

A must try service which proves creative application of DropBox. It would be a great hosting environment for your personal website. Try it and never forget to share your experience with NOG community.

Tags: #Dropbox #Web

How to Find Technical Specification of Your Computer?

Few decades ago computers were limited for very specific usage and only computer scientist had access to them. With the introduction of personal computers, everything turned upside down within a few decades. Now computer has become an essential part of everyone’s life.

When you purchase a computer you have to pay very close attention to its technical specification. Especially what type of CPU, RAM and GPU it comes with? Normally you can find all those details in computer’s technical specification booklet. But is there any way for you to confirm you really got the computer with exact same technical specification.

how-to-find-technical-specification-of-your-computer-4344690

If you are on a Windows platform, one option is to right click on my computer and go to properties. There you can see details of processor type, RAM etc. But it’s only a higher level overview. What if you need in depth details of hardware? Here comes the solution!

How to Use CPU-Z?

  • Click here to download CPU-Z and install it.
  • It’s a small piece of software which you can use to retrieve computers hardware specification with just one click.
  • It will take few seconds to retrieve your computer’s hardware specification.
  • Then it will open a small window where you can find all the details about your CPU, Main board, RAM and GPU.
  • If you take closer look, you will figure out it’s not only displaying the type of hardware. It’s showing about your hardware and current functional status in detail.
  • In the about section you can dump entire technical details in to a txt file of html file.
  • Hardware: Intel Core i5 2nd Gen // 4GB DDR2
  • OS: Windows 7 Home Premium // 64 Bit

Now you can cross check the provided technical specification of your computer with CPU-Z. Not only that if someone ask you details about your newly bought computer, you can simply dump the CPU-Z details in to HTML file and share it.

Tags: #Tools

How to Control Android Smartphone via Web Browser?

When you are at office working in front of your computer you have no time to even touch your Smartphone. It will probably rest in your pant pocket or charging dock. If you are getting many calls you might be using a Bluetooth headset. But what if you get a SMS? Or you came across with a nice song you need to copy to your phone?

In that case you have no option. You have to get the phone out of your pocket, handbag or charging dock and do what’s required. This is not really smooth. I want to do all those stuff without even touching my phone. If you are a busy professional I’m pretty sure you are looking for such a solution as well.

There is a free application in Google Play, AirDroid which solves the entire above problem and more. Let’s go a take a closer look.

how-to-control-your-android-smartphone-via-web-browser-8253816

Setting up the Environment for AirDroid

On Android Smartphone

  • Go to Google Play and install AirDroid.
  • Open the application and it will take you to main dashboard.

airdroid-android-dashboard-4544183

  • This app is letting you to connect to your phone through your browser and do many things with it.
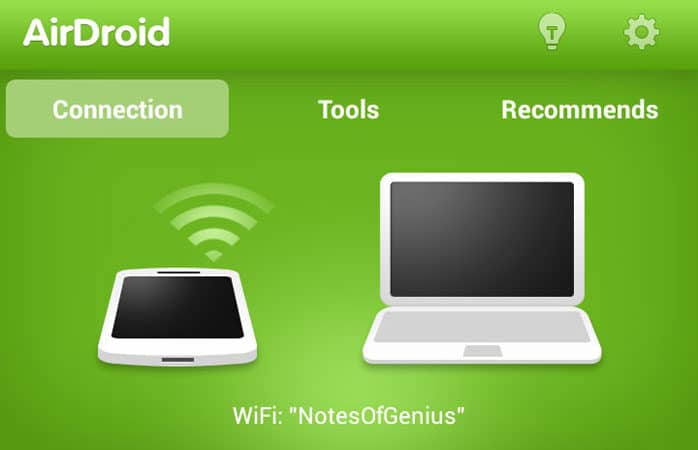
  • There are two ways to connect. Via Wi-Fi or AirDroid web. You will be able see those 2 options in app dashboard.

airdroid-android-open-web-address-7386755

  • Rest of the stuff will continue in your browser.

On Computer

  • Install a latest version of Chrome or Firefox. I’m using Chrome for testing purpose.
  • If you like to use web access, go to the URL web.airdroid.com. It’s displayed in app dashboard.
  • There you can enter the pass code which you can find in app dashboard or scan the QR code.

airdroid-android-qr-pass-code-8609749

  • Within few seconds it will open web control panel for your phone.
  • For Wi-Fi you have to enter the given IP address and port. Same as web you have to enter the pass code. There you don’t have the QR code option
  • Once you open the AirDroid web control panel you can put your phone away and control it in your browser.

Tip: If you are using AirDroid web it will consume data in your Smartphone as well as in computer. So try to use Wi-Fi access as far as possible.

Getting Started With AirDroid

  • At the top of web control panel you can find search box. There you can find and install apps on your Smartphone.

airdroid-web-search-box-5230187

  • There you have options to view multiple desktops, send message, upload file etc.
  • In the message section you have full access to SMS on your phone. Now you don’t have to touch your phone to send, receive and manage SMS on it.
  • In the contact section you have full access to your phone book. There you can create SMS for any contact, see info, browse call logs, create new contact, delete them etc.
  • Call log section gives you access to whole call log in your phone.

airdroid-web-message-contact-call-log-6572206

  • If you want to upload file to your phone maybe music, ringtone, photo, video etc. you can do all those right there.
  • In the app section you can install new apps as well as remove existing.

airdroid-web-files-apps-1318605

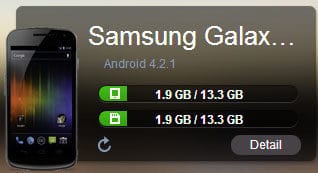
  • In top right corner you can see details about your connected device.

airdroid-web-device-details-9032460

  • Below that you have a box where you can enter a web URL and automatically open in your phone.

airdroid-web-url-push-4044613

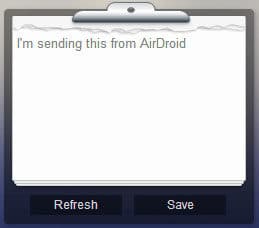
  • Down there you can find a note pad. You can write some text there and push it to phone clipboard. Once you go to phone you can paste that text anywhere you need.

airdroid-web-clipboard-push-3856636

  • At the bottom right you will find status of Wi-Fi connectivity, Mobile signal and battery status in your phone.

Advanced Usage

  • If your phone is rooted you can capture a screenshot of your phone via AirDroid
  • If you have given permission to install application from unknown sources, you can push APK files to your phone to install via AirDroid.
  • Make AirDroid a desktop application with Chrome application shortcuts. It will definitely improve the user experience.
  • DesktopHardware: Intel Core i5 2nd Gen // 4GB DDR2
  • Desktop OS: Windows 7 Home Premium // 64 Bit
  • Desktop Browser: Google Chrome Version 23.0.1271.91 m
  • Mobile Device: Samsung Galaxy Nexus
  • Mobile OS: Android Jelly Bean 4.2.1
  • Mobile Browser: Google Chrome Version 18.0.1025469

Wrapping Up

AirDroid is a complete solution for you to control Smartphone right in your browser without even touching it. When I’m working I keep the phone in charging dock, plug the Bluetooth headset and open AirDroid in a browser tab. It’s a perfect setup and I’m pretty sure it will save lots of time in your busy office life.

One major thing I missed in AirDroid is there is no way to make phone call or get incoming call notification. It would be great if AirDroid developers could come up with a feature to initiate a call right in the browser and continue it with a Bluetooth headset. It will make this app complete.

That’s about AirDroid! It’s a great must-try application in your phone. Install it right now and it will change your life style for sure. Never forget to share what you think about this app as a comment below. Subscribe to our email list and stay connected.

Tags: #Android #Browser

Roadmap to High Performance WordPress Blog [Hosting]

You have already optimized software infrastructure in WordPress blog to maximize performance. Now all you have left to do is optimize hardware infrastructure, in other words hosting environment. This plays an important role to make your WordPress blog highly performance optimized.

Hosting server is doing lots of work to present your blog to its readers. It executes PHP scripts, prepare HTML files, link images and push the web page to browser. In order to make this process faster there are few factors you have to pay attention to.

Web hosting server is a very powerful computer running specific software. Same as any other computer, for faster operations it should have faster and bigger Processor, RAM and Hard Disk Drive. But in practical situation, it’s not that simple

Roadmap

roadmap-to-high-performance-wordpress-blog-hosting-5504411

Types of Web Hosting

Web hosting is money making business. Most of the hosting service providers are trying to host as many as web sites in one server. The way you share your hosting server with others decide how much you pay and what sort of service you would get.

Shared Hosting

Here you are getting a control panel to manage your websites in hosting server. You will get specific amount of disk space and bandwidth. In some cases they are unlimited. However, you have no control over processing power and it’s shared with all the websites hosted in same sever.

Generally hosting service providers are hosting many number or web sites in one shared server. The number could be as high as many hundreds. Lesser the number is better.

Most of the bloggers would like to go for shared hosting plan considering cost factor. When you purchase a shared hosting plan, you have to pay attention to uptime, number of sites you can host, disk space and bandwidth. Other than that, security is also an important factor.

Tip: Reading reviews for different shared hosting plan is not a good idea. Most of them are biased and sponsored by different hosting service providers. I am on HostGator and its working fine for me.

Virtual Private Server

If you need more power and control, to handle large web traffic, you need to move to a virtual private server. Here most of the factors are same as shared hosting. But your plan guarantee you a specific amount of processing power and RAM.

Dedicated Server

Here you are getting your own separate web server. You are free to do anything with it. All the computer resources are guaranteed and dedicated. You will need this if you are using advanced web technologies in your web site and handling large web traffic.

What Is The Best Hosting Plan For A WordPress Blog?

There is no single answer for this question. You have to find your own way. In most of the cases shared hosting plan would be enough for a blogger till you get a significantly large traffic. Make sure your hosting service provider is giving you unlimited disk space and bandwidth, or it will be a problem for your growth.

You have to pay attention to number of SQL databases you can have, number of FTP accounts and email facilities. Make sure they are adequate for your requirements. When you are getting a large traffic you might have to move to a VPS (Virtual Private Server). Very few bloggers will need a dedicated server.

Make sure your server is having lesser ping time and near 100% up time. If your server is less responsive, no point of doing all the software optimization we discussed so far. If your site is frequently going down, it will be very bad for your reputation and search engines also will punish you for that.

I believe now you have a clear picture about how to select a good web hosting service provider for your WordPress Blog. However, having a very powerful server in one location is not enough to have a high performance WordPress blog.

All your users around the world will have to access the same server. Of course it will be a performance bottleneck. In order to solve this problem you have to distribute your static content worldwide and deliver only dynamic content from the server. It’s coming up next.

Contact me @MalindaOnline to claim your Free Website Performance Review. I’m giving you a detailed report with identified performance bottlenecks and optimum cost effective solution.

Subscribe to my FeedBurner to get latest articles right in to your inbox, follow us @NotesOfGenius to get latest updates in NOG. Stay tuned!

Tags: #Blog #Performance #SEO

Roadmap to High Performance WordPress Blog [Database]

So far you have taken all the primary steps to make your WordPress blog rocket speedy. Your theme is optimized, images and videos are in good shape, CSS/JS compressed and loading fast, finally we enabled browser caching, so your browser is not bothering server for each and every content.

By now you must be experiencing at least 5 times better performance in your WordPress blog. Very importantly, we were trying to do each and every step manually, so you know it in and out. At the same time I gave you the relevant plug-ins to automate it as well.

Today we are trying to optimize MySQL database in your WordPress blog. This is a very important part in WordPress blog. But most of the bloggers have never even seen it. That’s where your blog save all the data including, posts, pages, comments and configuration.

Roadmap

roadmap-to-high-performance-wordpress-blog-database-3124935

What are The Reasons for Laggy WordPress Database?

WordPress database is carefully engineered for maximum performance following appropriate database design principles. So you don’t have to worry about its structure. But you have to pay attention to data that gets stored in it. More data leads it to lesser performance in operations. So you have to make sure it’s not storing unwanted and irrelevant data.

You might ask “How come irrelevant data go in to my WordPress Database?” actually there are no totally irrelevant data. This is how it happens. When you are writing a post, WordPress engine is saving periodic revisions. So you can go back to previous version if you want to. And you could save your post as drafts and sometimes it’s happening automatically. When you have spam comments and unapproved comments, still they are getting saved in database. All of those add new records to database and you rarely use them. They are just making your database slower and bigger.

How to Remove Unwanted Record from Database?

First I’ll tell you the manual way. Go to hosting control panel and then go to PHP MyAdmin. There you can see your wordpress database. Open it and see the tables there. Before we go to next step make sure you back up database.

Go to wp_posts and see records there. See the posts status and you will find values such as published, draft, auto-draft, inherit and revision. Delete everything except the records with post status published and inherit. And you have to do the same in wp_comments table. You have to remove unapproved comments. However this will require some SQL knowledge and it’s not that common. This could be a risk as well, since you could accidently remove good records.

So here my recommendation is to use a plug-in. The best and simple plug-in I have ever come across with is wp-optimize. Once you install the plugin, it will give you new main menu item. There you can check things you need to clean up including revisions, drafts and spam comments then remove those with one click.

Ok, now your database is also optimized, having lesser records and smaller. If you have taken care of the entire previous aspects, now you are an owner of a high performance WordPress blog.

You can test the speed of your blog using YSlow browser plugin, Google Page Speed online or Pingdom full page test.

However, to complete the picture you have to pay attention to hosting environment and its hardware as well. It’s coming up in next article.

Contact me @MalindaOnline to claim your Free Website Performance Review. I’m giving you a detailed report with identified performance bottlenecks and optimum cost effective solution.

Subscribe to my FeedBurner to get latest articles right in to your inbox, follow us @NotesOfGenius to get latest updates in NOG. Stay tuned!

Tags: #Blog #Database #Performance #SEO

Roadmap to High Performance WordPress Blog [CSS/JS]

We are walking down the road to make your WordPress blog super speedy. So far we selected good looking as well as high performance themes and optimized images and videos. This will make your page size smaller and of course it will lead to better performance.

If you have already taken those steps, you must be already experiencing better page load time and smooth navigations. Today we are trying to take it further by optimizing JavaScript and CSS.

Every WordPress theme would be using JS and CSS to style it. With time JS and CSS has improved to give lots of styling options. So you can reduce the usage of images drastically. In a general situation CSS add style to HTML and JS add behavior.

Roadmap

roadmap-to-high-performance-wordpress-blog-css-js-8399191

Writing JS and CSS

When you are writing CSS and JS you have several best practices to follow. It will ensure maximum performance and better browser compatibility.

  • Comment your code
  • Make it organized with proper indentation
  • Use consistent and meaningful naming
  • Limit line length and lines of code
  • Organize CSS properties in alphabetical order

Check your WordPress theme’s JS and CSS file whether they meet above requirements. If not, go to Dreamweaver, access your site through FTP and do necessary changes. As a result you will get optimum and smallest JS and CSS file.

Linking JS and CSS

Using inline and internal JS/CSS is not a very good practice. You have to include all of them in an external file and link them to required HTML file. The objective is better organization and ultimate separation of data and style.

If you have separate CSS/JS files, move all the code to one file and save it in your server. Then link CSS file in html head. Styles need to be loaded before HTML, if not during the page load time all your design will be out of place.

Your JS file needs to go as the last thing before HTML tag. If you link JS in you whole page loading will be blocked till JS file loads. However if you have JS image slideshow in your page, you have no option but link JS in tag.

This will minimize HTTP request you page will make. Lesser the HTTP request, higher the performance. And file size of CSS and JS should be lesser, because of the steps we have taken. As a result everything will load super speedy.

Minify and Compress

After writing JS/CSS and you are completely happy with it, make a back up and compress the deployed JS/CSS files. That means you have to remove all the spaces and line brakes. It will reduce the file size further since line breaks and spaces consuming. You can minify your HTML code too. Make sure you make a back up before you minify them, or it will be very difficult to edit minified code.

Finally you have to compress your JS/CSS and even HTML code. The best way to do this is by editing .htaccess. Go to Dreamweaver, access remote website, open .htaccess. Then put the below code there.

# BEGIN GZip

AddOutputFilterByType DEFLATE text/plain
AddOutputFilterByType DEFLATE text/html
AddOutputFilterByType DEFLATE text/xml
AddOutputFilterByType DEFLATE text/css
AddOutputFilterByType DEFLATE application/xml
AddOutputFilterByType DEFLATE application/xhtml+xml
AddOutputFilterByType DEFLATE application/rss+xml
AddOutputFilterByType DEFLATE application/javascript
AddOutputFilterByType DEFLATE application/x-javascript

# END GZip

Checklist

  • JS/CSS code is well written following best practices
  • You have one external CSS file and once JS file
  • Inline or internal JS/CSS not used
  • CSS file is linked in Header.
  • JS file is linked in footer.
  • JS/CSS/HTML files are minified and compressed.

Now you have highly optimized JS and CSS files in your WordPress themes. If you try to compare the size and number of JS/CSS files before and after you will see the difference.

If you don’t want total control and if you like to automate the process you can install wp-minfy plug-in. It will automatically do all the below work for you. Manual full controlled way or plugin, choice is up to you.

Our next step is browser caching which is letting the browser to load static content from local cache without making request to server.

Contact me @MalindaOnline to claim your Free Website Performance Review. I’m giving you a detailed report with identified performance bottlenecks and optimum cost effective solution.

Subscribe to my FeedBurner to get latest articles right in to your inbox, follow us @NotesOfGenius to get latest updates in NOG. Stay tuned!

Tags: #Blog #Performance #SEO