Nokia Lumia 920

If you take a look at Android and iOS, both are having pretty similar features. Both are inspired by each other and continue to add new features to gain more market territory. While everything is going on like this Windows Phone is walking on a different path.

They have different UI, different way to handle internal functions and different market approach as well. This uniqueness is the key for them to be growing in exponential phase. Windows Phone 8 latest version released sometime ago along with accompanied set of devices. Among them two main manufactures took my attention. They are Nokia and HTC.

Today I’m going to take a look at most advanced Nokia Windows Phone 8 device, Lumia 920.
nokia-lumia-920-6767960

Device Configuration

Design

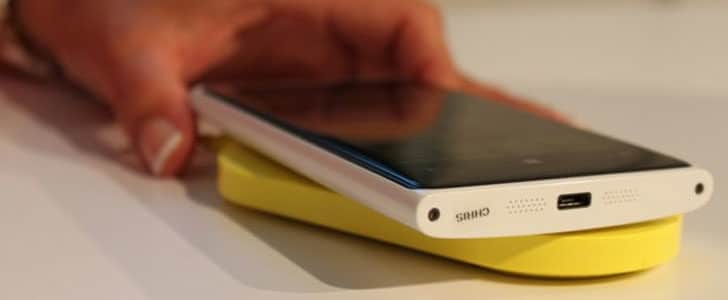
Lumia 920 comes with a single block design with wide range of color choice. Thickness is 10.7mm, not so impressive compared to other competitors. Wight is 185g, again heavy above average. In front panel there is a huge display, capacitive buttons and front facing camera. Back panel is holding camera and LED flash. Edges are clean and right edge has the power button, volume rocker and shutter button.
nokia-lumia-920-design-6286682

Display

The display is 4.5 inch IPS panel protected by Corning Gorilla Glass 2 with 768x1280px resolution and 332ppi of pixel density. I like to have a big screen on my Smartphone, but not too big one. 4.5 inch is my personal favorite and good for one hand operations as well. And resolution and sharpness is at its best. It’s definitely a one of best display you can find on a Smartphone.

Processor and Storage

Windows Phone 8 is using consistent hardware configuration throughout their accompanied handset line and they have made the right choice. Lumia 920 powered with Qualcomm Snapdragon S4 Plus (MSM8960) platform with 1.5 GHz Dual Core Krait CPU and Adreno 225 GPU.

I would not call it a powerhouse since there are plenty of Snapdragon S4 Pro Quad Core handsets on the market. But even Windows Phone 7 had a great level of performance optimization, smooth operations and fluid touch. So I believe this would be a good platform for Windows Phone to work with.

RAM is 1GB and internal storage is 32GB non expandable, pretty much standard configuration.

Camera

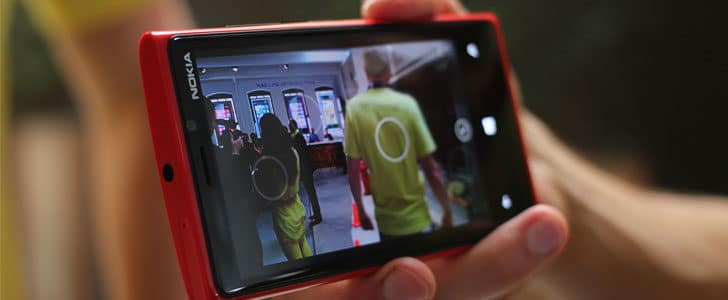
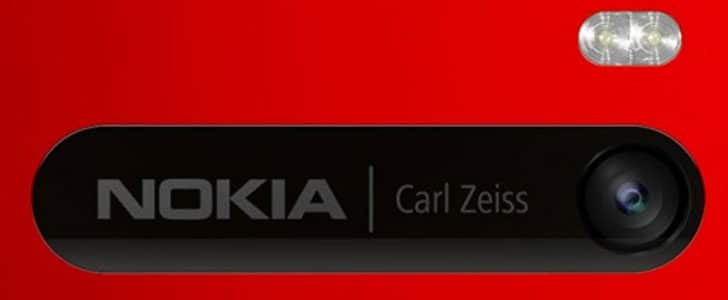
Primary shooter is 8MP one with 1080p@30fps video recording, dual LED flash and other standard features. Secondary camera is 1.3MP for video calling.

One thing I love about shooters in Nokia is Carl Zeiss Optics. My old school Nokia N85 could capture great snaps with excellent quality.
nokia-lumia-920-camera-5009818

Connectivity

It has all the standard connectivity technologies such as 2G, 3G, Wi-fi, Bluetooth 3.1, NFC, GPS and microUSB 2.0. The device comes with LTE radio and it would depend on your carrier.

Battery Life

Device holds a 2000mAH Li-Ion battery which will give it up to 10h 3G talk time. With Snapdragon Dual core platform and IPS display this device is supposed to have a decent battery life.

Wireless charging is a hot topic in Smartphone world these days. Nokia Lumia has wireless charging off the shelf. You don’t have to go through the hassle of purchasing special batteries.

Wrapping Up

Nokia Lumia 920 is a great device of course. It might not be excellent in hardware specification, but with Windows Phone 8 it will be able to do magic. It’s not only a fancy face with metro UI, there are lot more interesting features wrapped in such as City Lens.

Device thickness and weight is above average and it would be one major drawback for it to compete with devices from other platforms. Apart from that built quality is decent and has used good materials.

However I have no clear justification to leave iOS or Android and go for Windows Phone. But I can’t deny the fact that they are growing so fast and offering incomparable unique features. Will it be able to beat Android and iOS? The answer is in future may be with Nokia Lumia 920.

« Previous Post

Next Post »

Asus PadFone 2

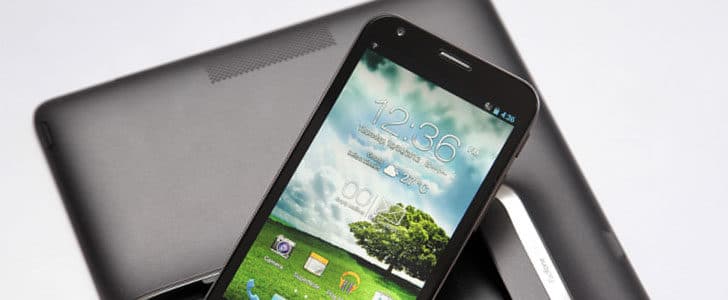
Asus is very popular for their unique hardware design in mobile computing. Previously they introduced Asus Transformer, an Android tablet which can transform into a Netbook. The success of manufacturing Android tablet gave them opportunity to be the hardware partner in Nexus 7.

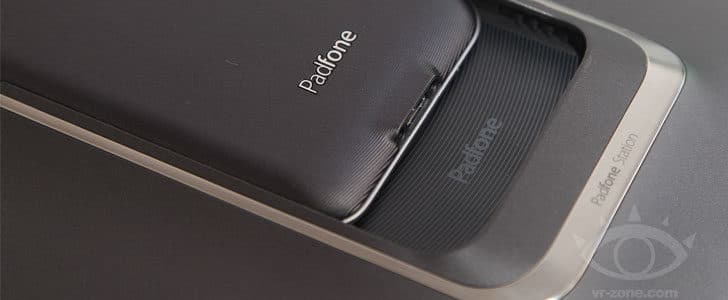
Asus was not doing so good with Smartphone, yet there was one unique device they had. It’s Asus PadFone, an Android Smartphone which can transform in to tablet, then to a Netbook as well. Recently they announced Asus PadFone 2 and it’s under NOG spotlight today.

asus-padfone-2-4601697

Device Specification

Design

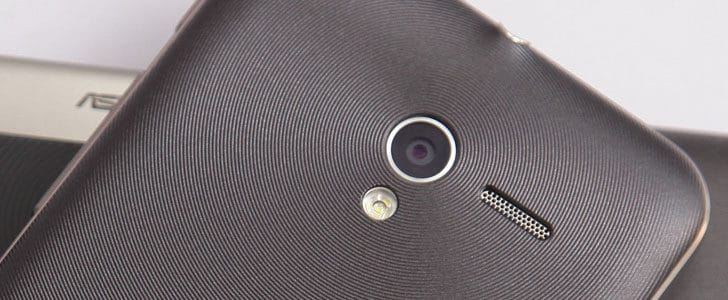
The phone has usual single block design with 9mm thickness and 135g weight. Front panel has display, sensors, camera and capacitive buttons. Back panel is populated with camera and its LED flash. Unusual design, yet power button and volume rocker both in right edge. 3.5mm audio out is placed on top edge.

Display

The display is 4.7 inch IPS panel with 720x1280px resolution and 312ppi of pixel density. For a display it’s the right technology, right size, good resolution and optimum sharpness with protection under Fit glass. And it’s a good upgrade compared to previous PadFone.

Docking station has 10.1 inch IPS panel with 1280x800px resolution and 149ppi of pixel density. It’s standard spec for 10 inch tablet and same as previous version as well.

asus-padfone-2-dispaly-9710246

Processor and Storage

This is one of the major upgrade in Asus PadFone 2. Now it’s Qualcomm Snapdragon 4S Pro (APQ8064) platform configured with 1.5 GHz Quad Core Krait CPU, Adreno 320 GPU. This will definitely give it enough power to be a good multimedia device as well as gaming station.

Operating System

The device originally comes with Android 4.0.1 Ice Cream Sandwich. UI is customized by Asus to cope up with device transformation. According to Asus, latest Android 4.1 JB is also coming soon.

Camera

This is another big improvement. The primary shooter is 13MP with 1080p @30fps / 720p @60fps video recording LED flash etc. Secondary camera is 1.2MP for video calling. 13MP camera is definitely a plus point for this device to stand out in tight competition.

asus-padfone-2-camera-6959735

Connectivity

The device has all the standard connectivity features such as 2G, 3G, HSDPA, Wi-fi, Bluetooth 4.0, NFC, GPS and microUSB 2.0. As a major upgrade it has LTE support.

Battery Life

Battery that comes with the phone is 2140mAh one which would give it 16h talk time according to official spec. With the battery in docking station it will go up to 36h. However with active usage, battery life would be same as previous version which is 6h only with phone and 16h with phone and dock.

Wrapping Up

The concept is amazing! A phone which can transform in to tablet so that you will have to buy only one device, one data plan for all your mobile computing work. The design is greatly improved from previous PadFone. Now you don’t have to go through any trouble to dock the phone, it’s just one step and no hinge as well.

There is sad news as well. Previous PadFone had docking stations as well as supported keyboard dock with further extended battery. Seems that PadFone 2 doesn’t have supported keyboard dock.

asus-padfone-2-dock-9092923

The relevant software also appears to be optimized than the previous version. Dynamic display switching is working good and built in applications are working great with both display sizes. However, same as with the previous device, there could be issues with 3rd party apps.

If you need a good Smartphone and a tablet with big screen, yet don’t like to transfer and sync data between devices, here is the solution you were looking for. End of this year, during the shopping season you might be able to make this yours.

« Previous Post

Next Post »

LG Nexus 4 – Rumors Round Up

We are only a week away from the most anticipated Google event. It’s expected to launch the next version of Android OS, probably be named as Key Lime Pie and accompanied handset, LG Nexus 4. Yesterday I was rounding up the rumors about Android 4.2 Key Lime Pie.

It’s a high time to round up rumors about LG Nexus 4 as well. It could be one of most rumored, leaked and faked Android Smartphone. Seems like it’s going to be a brother of LG Optimus G. Android lovers are so excited about this device and they are expecting an amazing device with stronger hardware muscle and latest software to make all the other Smartphone looks like antique.

lg-nexus-4-rumors-round-up-9591139

Without further a due, here I go with LG Nexus 4 rumors round up.

Expected Specification Spotlight

Design

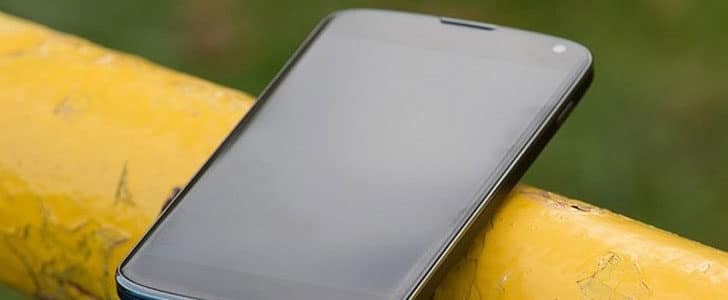
The design will be pretty much similar to previous Galaxy Nexus which is a clean single block. Front face will be populated with huge 4.7 displays with on screen button and other sensors. According to the leaked images back panel is glittery plastic and has primary shooter, LED flash and loudspeaker. Power button is in right edge and left edge holds the volume rocker.

Display

The display is expected to be 4.7 inch True HD IPS panel with 1280 x 768 px resolution which will give it 317 ppi of pixel density. Size, resolution and sharpness is almost same as previous Nexus. But display technology is changed to IPS.

Processor and Storage

LG Nexus 4 expected to come out with most powerful Snapdragon S4 Pro platform configured with 1.5 GHz Quad Core Krait CPU, Adreno 320 GPU with Qualcomm APQ8064 chipset. Definitely a powerhouse and will be a one of the most powerful Android Smartphone.

It’s RAM would be 2 GB and Internal storage would be 8/16 GB. No signs of expandable storage options.

Camera

The primary shooter is expected to be 8 MP with 1080p video recording, LED flash and other standard options. The leaked pictures show a secondary camera which probably will be a 2 MP one for video calling.

Connectivity

Snapdragon S4 Pro platform support all the general connectivity technologies such as 2G, 3G, HSDPA, LTE, Wi-Fi, Bluetooth, NFC, GPS and USB. So you will be able to enjoy them all. If Google releases an international version it would be a 3G one same as previous Nexus.

Battery Life

The next Android 4.2 Key Lime Pie would have project roadrunner which will save battery life. But still this device will come out with 2100 mAh battery same as LG Optimus G. I’m pretty sure this will serve for more than one day.

My Stand

LG Nexus 4 will have a powerful processor and bigger RAM. Other than that everything else would be pretty similar as previous Galaxy nexus, even the software and OS.

I’m using Galaxy Nexus and loving it. It’s a perfect companion for my day to day work such as email, web browsing, social media, music and gaming. If this is the spec which is going to be there in LG Nexus 4, I have no reason to justify and upgrade. What I’m really looking for is a high resolution display, may be 1080p on my palm top with extended battery life.

If you are a heavy mobile gamer, this is the device for you. Power of quad core CPU and 2 GM RAM will rock the show. This would be great if you are planning to buy your first Android device as well.

Google always surprises us and I believe there is more to come. For that you have to wait till October 29th.

« Previous Post

Next Post »

How to Get More Twitter Followers?

Twitter is a “Micro blogging” service which changed the face of online social networking. Most of the social networks were trying to add more and more features to their web applications while twitter removed most of the features but kept only “text update” limited to 140 characters like in SMS. This became a blast all over the globe and became one of the top 10 web sites within a very short time.

The simplicity and text based nature of twitter opened many windows for surfers such as bloggers, researchers, and marketers and politicians. For a general user you can express yourself with short text message using web interface or may be using your mobile phone. Researchers can see what the hot topics are right now while politician used “tweets” to develop social behavioral models to support their campaigns.

how-to-get-more-twitter-followers-2024930

If you plan to do massive online promotions using twitter, you came to the right place. But main thing is, before you proceed you have to have a considerable amount of “twitter followers” who are interested in what you are going to promote. Here I’m trying to give you a few tips on getting more targeted twitter followers to get the maximum benefit out of your online promotion.

Make Your Profile Visible

The main thing, everyone on internet should be able to see your twitter profile even before they sign in to twitter. It’s not only your profile your tweets also should be publicly visible. To get this thing done you can follow below path.

Twitter -> Settings -> Account -> Uncheck “Protect My Tweets”

Now your tweets are publicly visible. If you insert a appropriate “Username” it will further increase the search engines visibility. To make your profile looks cool, brand it with your logo or relevant content. For that you have to go to below settings page.

Twitter -> Settings -> Design -> Change background image ->Upload a custom branded background

Now you are ready to tweet.

Tweet Interestingly and More Frequently

After setting up the twitter profile correctly, you should start tweeting. When you tweet make sure you tweet interestingly to the target crowd with targeted keywords and with good frequency. Additionally, if you tweet in peak hours, there is a greater probability that many people will see your tweets in “Public time line” and through Searches.

If you have a blog you can setup automated tweeting of your blog posts using TwitterFeed. If your blog is running on WordPress platform, you can use the plug-in WordTwit.

Following Targeted and Relevant Twitter Profile

Now your twitter profile is filled with relevant, interesting tweets which will lead your target users towards interesting content. Then the main target is getting more twitter followers. Once you have followers your tweets will be visible in their home page.

Easiest way to get followers is to find the relevant twitter profile and follow them. There is a higher probability that they will follow you back since you have relevant and interesting tweets.

To find relevant twitter profiles you can try searching targeted keywords. In the search result, go to the profiles and follow them.

Follow Back Your Followers

After sometime, you will figure out that you are getting followed by people whom you are not following. Make sure you follow them back to return the favor and keep them as followers in the long run.

Sometimes they might not be the targeted crowd you need. But it would not cost you any to keep them in your profile as followers. More the followers you have more the value it will add to your profile.

Automated Profile Following

There is some software developed to automate the above mentioned steps. However you have to use them with the risk of getting banned from twitter. To minimize that risk avoid excessive usage of the particular software.

My suggestion for such software is TweetAdder. It automatically finds relevant twitter profile based on given criteria such as geographical location, bio, keywords in tweets etc. Then you can configure the application to automatically follow the profiles which you already listed. Further you can automatically un-follow the people who didn’t return the favor within a given period of time.

This software will help you to increase the number of followers drastically with in short period of time. Use it very carefully following the Software guidelines. If you use its default configuration, there will be a minimum risk of getting banned.

Paid Service to Get Twitter Followers

If you need to further speed up the growth of followership, you can go for a paid service and buy twitter followers. There are lots of services providing targeted guaranteed twitter followers to your account in a short period of time.

Some of the services ask for your username and password which they need for following and follow back in order to get more twitter followers to your account. In that case make sure you go for a trustworthy service. “BuyTwitterFollowers.org” would be a good choice if you need to pay to get more twitter followers in a short time.

Additionally there is another service who doesn’t ask for your twitter account password, yet they take a long time to give the expected results.

Through this post I am providing an organized set of techniques to acquire more Twitter followers in both less time consuming and more time consuming, yet secured ways. It is now your call to make a good use of it according to your business requirement.

« Previous Post

Next Post »
How to Find Your Way Around with Gmail New Look

Sometime ago Gmail came up with a new look. It’s having big tool bar buttons, adjustable line spacing for email list and new side bar for email folders, chat and SMS.

Millions of people use Gmail as their primary email application due to its versatile performance. Once this change goes permanent lots of complaints raised against this. But when I take a closer look in to this problem I realized that the major contributing factor for those complaints is resistance to change.

how-to-work-with-gmail-new-look-4897157

Personally I’m a big fan of this new interface, yet I accept that there are some serious problems if you won’t configure it properly.

Few Common Problems

Few of the major problems are listed below.

  • Once you open your chat list, you can’t see your email folders, labels etc properly. Same with SMS.
  • In order to see email folder, you can drag and resize the chat list. But in that case you can see very few contacts in the chat list.
  • There are too many items in left side bar, circles, labels etc.

I know that they are annoying, but could be solved by simple configuration.

Things to Do

Move Chat to Right

One major problem is you can’t see the chat bar and labels etc at the same time. Today most of the people are using widescreen monitors. If you can move the chat bar to right hand side, it will solve this problem perfectly.

  • Go to Settings -> Labs
  • Search for Right-side chat
  • Enable it.
  • Click on Save changes.
  • Then Gmail will automatically reload.
  • Now you can see your Chat and SMS in a right side bar.
  • Plus, now you can see labels and chat at the same time.

Clean up Left Side bar

In the Gmail side bar there are lots of items such as Email folders, circles from Google+ and Lables. In order to see all those items at the same time you must have a full HD monitor. But the general case is 1600 X 900 monitors. So you have to keep scrolling.

Best thing you can do to solve this problem is clean up the left side bar and keep only the highly required items.

  • Go to Settings -> Labels
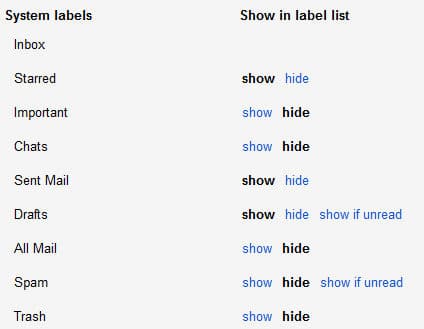
  • There you can Select only the highly required items to be showed in the left sidebar.

system-labels-7334207

  • Even if you hide some items, you can always access them by pressing More link in left sidebar.

Configure Labels

Label is the best way to categorize emails in your inbox. Gmail is having facility to automate labeling for incoming email as well. So there must be lots of labels in your sidebar. So again you have to keep scrolling down to see them.

But do you need all those labels in your sidebar all the time? I like to hide all the labels in more tag to save space. But if there is an incoming mail which is labeled, I’ll probably miss it.

In order to solve that you can ask Gmail, to show the label, only if there is a labeled unread mail. Here is how to do it.

  • Go to Settings -> Labels.
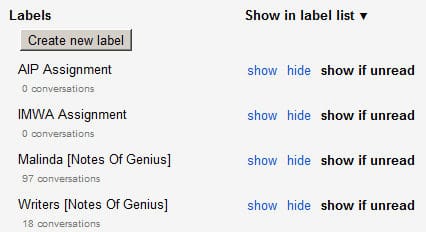
  • Skip System labels and Circles. Go to Labels at the bottom of page.
  • In front of each label you can find an option named “show if unread” which you can’t find with System labels and circles.

labels-8626520

  • This is your savior, select it for each label.
  • Now you can see a label in left sidebar only if there is an unread mail under that.
  • You can always access the rest of the labels using More link.

Display Density

You can select a comfortable display density from Settings -> Display Density. Comfortable would work for most of the people.

display-density-1192528

Wrap Up

Most of your Gmail new look related problems will be solved by these tips. However, still you have to get used to Mystery buttons in main tool bar. It’s just matter of time and they give you tool tips as well.

buttons1-4913640

The Gmail new look is not only about look, it’s about performance as well. Once you start using you will notice a significant performance improvement. After you get used to the new look you can do all the operations effectively than the previous layout.

In the case none of these tips work for you, ‘Revert to old look temporarily’ option is still there under settings.

« Previous Post

Next Post »
How to Link YouTube and DropBox with ifttt.com?

When you are surfing on WWW you have to manage many online accounts. In most of the cases they are not connected and you have to manage integration manually. If you can integrate them automatically, creative possibilities are limitless.

Just think, you add one video to your ‘watch later list’ in YouTube. At the same time in background, the selected video link is getting downloaded to your DropBox folder. So you will never miss any of your watch later videos.

how-to-link-youtube-and-dropbox-with-ifttt-4036056

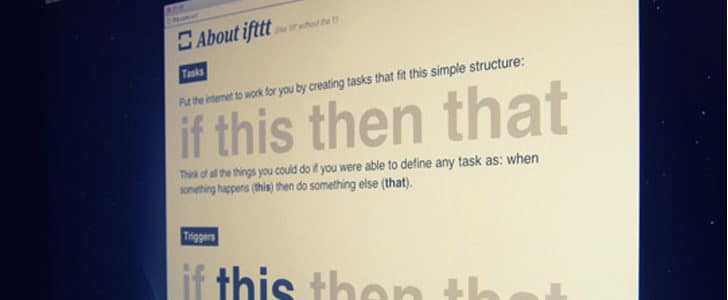
To get this done and many more other tasks, there is an amazing online service named ifttt.com. ifttt stand for If this then that. It’s letting the internet to work for you.

Today we are trying to configure IF you add a video to watch later list in you tube THEN download the link to DropBox folder.

How to Setup?

Create a ifttt.com Account

  • Go to ifttt.com.
  • Click on the Join button in top right corner.
  • It will take you to a registration form.
  • Fill the details and click Create account.
  • That’s it. Now you have an ifttt.com account.
  • You will get a confirmation email. Use that to confirm your account.

Connect YouTube and DropBox

  • Sign In to ifttt.com.
  • It will take you to your Dashboard.
  • In the dashboard, in the section Tasks, you can see the Create a Task button.

create-a-task-2347736

  • You can find the same link if you click on Task in the top navigation bar.
  • Click on Create a Task.
  • As the first step you have to configure the trigger.
  • For that in the next page click on This.

this-1131873

  • Then you have to select trigger Channel. Here you have to select YouTube.
  • It will ask you to grant permission to activate the YouTube channel. Proceed with that.
  • Then Continue to next step.
  • In there you can see YouTube is having 3 triggers which are New favorite video, New watch later video and New video upload.
  • Select New watch later video as your trigger.
  • Then click on Complete trigger.
  • Now you have a trigger. Then you have to configure the action.
  • Click on that to proceed.

that-9662498

  • The action you need is related to DropBox. So select the drop box Channel.
  • You have to Activate DropBox channel same as YouTube.
  • There is only one action related to DropBox which is Add file from URL. That is exactly what we need. Click on that.
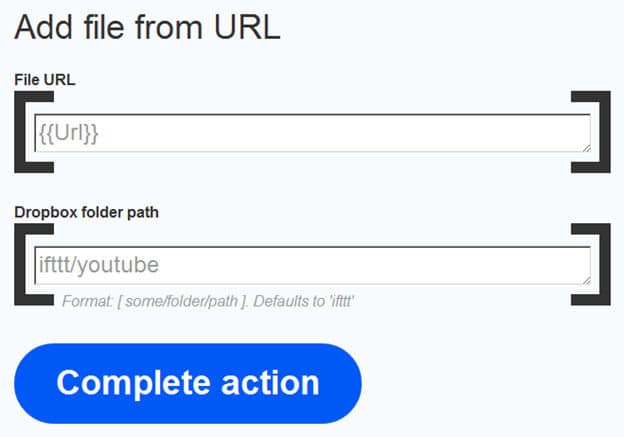
  • Now you are at the final stage. You will get a page like below.

complete-action-5971284

  • There you have to specify required DropBox folder and URL.
  • You won’t have t change URL unless you need to pass any parameter.
  • Change the DropBox folder structure the way you want.
  • Finally Click on Complete action.
  • Now you have a correctly configured IF-THIS-THEN-THAT. It will take you to below page.

if-this-then-that-6038471

  • There you have to enter a description for the task and click on Create task Button.
  • Your task is now Complete.
  • You can always visit your tasks from Dashboard or from top navigation bar.
  • Your task page would look like this after this configuration

final-2827568

  • Your task will be checked in every 15 minutes.

Check the Outcome

  • Go to YouTube.
  • Add a video to your Watch Later list.

watch-later-8816550

  • Wait for 15 minutes.
  • After that you will be able to see downloaded HTML file in your given DropBox folder to the above task.

dropbox-notification-6162907

  •  Go to the folder and click on the downloaded file.
  • It will take you to the YouTube video.

Advanced Configuration

  • You can always the change the behavior of your task or completely delete it from the You Task Page.

edit-task-9693741

  • You can manage the channels which are connected to ifttt.com account by going to the section channels from top navigation bar.
  • Deactivated channels will appear in black and white.

channels-3964844

Wrap Up

IF-THIS-THEN-THAT is astonishing online service which comes for free. It’s having almost all the online services that we use in channel list and most of the common actions we do in triggers and action. Using them and applying your creativity you can make the internet work for you.

However, you have to be careful since you must give full permission to ifttt.com to access data in your other online service. Anytime you can deactivate them from channel page.

It’s following a very simple procedure to configure a task which is If This then That. So any one from any background can configure a task the same way I explained here.

If you don’t like to go through this lengthy configuration procedure you can try few Recipes from top navigation bar. Recipes will give you once click configuration for most of the common tasks.

Try ifttt.com with many combinations of channels and share your experience with us.

« Previous Post

Next Post »

How to Use Gmail Offline?

If I ask the question what is the most popular online email service today, I will get the answer as Gmail from most of people. Gmail is one living example of what a Rich internet application can do replacing conventional desktop applications.

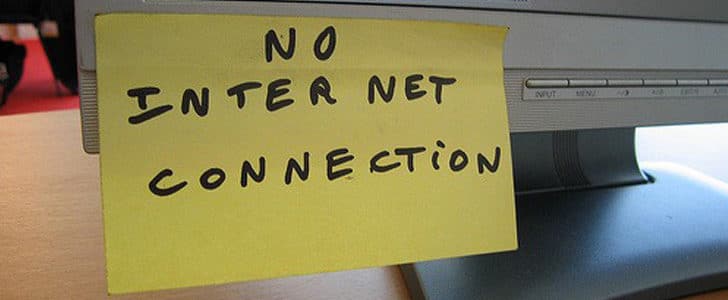
However, if you have a weaker internet connection and it keeps getting disconnected, of course you will face difficulties when using Gmail. Not only for Gmail, this would be the same with any other Rich internet application.

how-to-use-gmail-offline-5205543

In order to solve this Google Inc. has developed a background application for Google Chrome which is letting you to use most of the functionality of Gmail even when you don’t have an active internet connection.

How to Install Gmail Offline?

  • Go to Gmail and Sign in to Google Chrome browser.
  • Go to Settings from the settings button at top right corner in New look.
  • Navigate to the Offline Tab.
  • There you can see the link Launch Gmail Offline.
  • It will take you to download page in Chrome Web Store.
  • Add the application to Google Chrome.
  • Once the application installation is completed you will get a System tray Icon with a notification.

notification-5249116

  •  Now open a new tab in Google Chrome. There in Apps tab you will be able to see a new Icon for Offline Google Mail.
  •  You can access the application from right click menu in system tray icon as well.
  • Finally, it will take you to Offline Google Mail interface.
  • It might take longer time to open in initial run.
  • You will have to allow Offline Google mail to access your mail box.

What Will You Get?

Streamlined Interfaces

This is actually something similar to offline email clients that we used before Gmail comes. So this is kind of a step back to history. However, this Chrome application is specifically optimized for Gmail. Its interfaces are streamlined and carefully designed to perform Gmail related tasks.

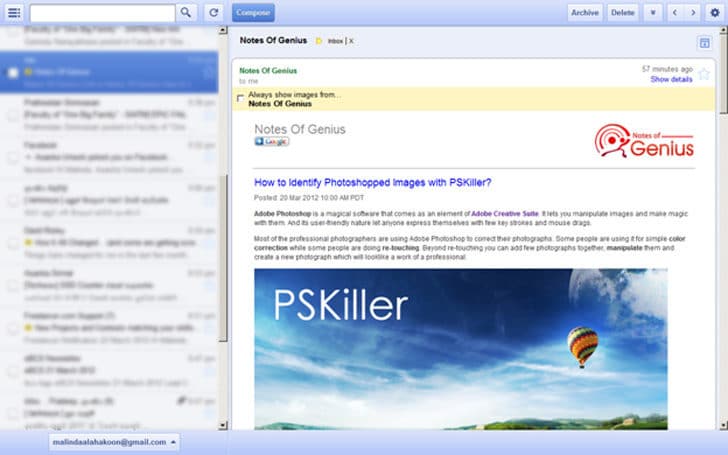
There you will have split window type interface. In the left hand side you see the list of emails in the inbox. Right hand side, you can see content of the selected email. In addition there are several buttons to access other email folders and perform other tasks.

interface-5916835

Performance

The very first thing you will notice is that the application is really fast. It opens in less than one second. When you click on email the time it takes to display is also less than Online Gmail. Whenever you add or remove a label for a mail again it is happening in a matter of milliseconds.

Sometime in Gmail you have to deal with email conversations. There, to make it clear it collapses most of the emails in the conversation except the latest reply. When you try to expand conversation, it takes kind of a long time. Here in Offline Gmail, you can do it instantly. All these are happening because you have the data in your local computer.

Offline Access to Your Email

The best part in Offline Gmail is, you can view your email, with expanded conversation view even when you don’t have an active internet connection. In addition you can perform other operations such as labeling, moving emails and deleting them. All the changes will be synchronized with Online Gmail once you get an active internet connection.

Most importantly, you can even send an email without internet connection. But, it will be delivered only once you go online. Till that offline Gmail will keep it in local outbox. When you are trying to send an email when you are offline, still you have full access to your contact list.

Since this is a Background application, it will keep downloading emails from your Gmail account. So you don’t have to worry about updating it. Whenever you want to stop the application, you can exit the system tray icon.

Wrap Up

Offline Gmail is a great Chrome application and it serves the purpose correctly. However, it’s not a replacement to Online Gmail we are using always. It’s only a Backup plan as it’s not providing all the facilities in Gmail such as Drag and drop file attachment, access to settings, remove signature manually, and many more.

If you have a weak internet connection, install Offline Gmail and let it run in the background while you are using online Gmail as your primary email application. If you got your internet connection disconnected, you can go to Offline Gmail and view your mail.

Try this application with Google chrome and share your experience with us.

« Previous Post

Next Post »

What You Can Do With Gmail Filters?

As the best online email service Gmail is continuing to offer lots of cool features for you. All those wrapped up in highly performance tuned internet application and power of Gmail made us say good bye to the installed mail client such as Microsoft Outlook and Mozilla Thunderbird.

what-you-can-do-with-gmail-filters-5897841

Email filters are one of the amazing features that come with Gmail. It’s letting you filer email based on different criteria and separate them using labels. If you are handling hundreds of emails every day this is a ‘must use’ feature to save lots of time.

How to Create Filter?

  • Go to Gmail and Sign in.
  • Then go to Settings -> Filters
  • Click on Create a new filter.
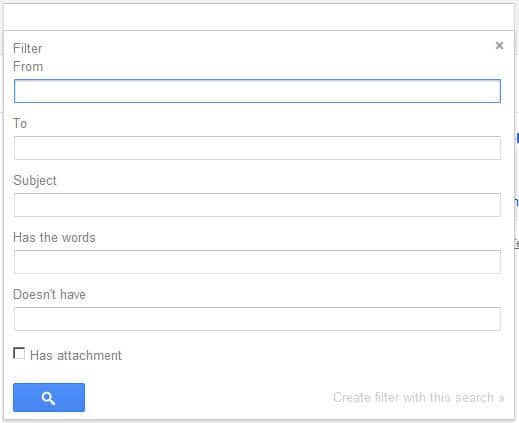
  • If will open the below filtering panel.

search-5882715

  • You can access the same panel by clicking on drop down menu in search box.
  • Here you can define your filtering criteria providing various factors.
  • After entering your filtering criteria you can press on the Search mail button to make sure its filtering desired emails.
  • Then click on Create filter with this search.
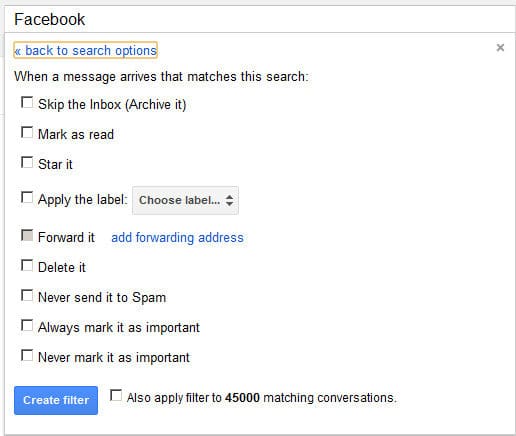
  • It will take you to below panel.

action-2241046

  • There you can see a list of actions you perform for given filtering criteria.
  • If you want the action to be performed for entire matching email including past emails, check in Also apply filter to xxxx matching conversations.
  • Finally click Create filter.
  • Now Gmail will Automatically apply the filter for incoming emails and perform the given action on them.
  • You will be able to see a list of created filters in Settings -> Filters. There you can Edit or Delete them.

Things You Can Do With Filters

Auto Apply a Label

If you are dealing with several people in a professional project you need a way to separate emails coming from each person. This is what you can do.

  • Create a new filter.
  • Set the senders email address to the box from.
  • Next panel set action as apply the label.
  • Create an appropriate label with meaningful name and apply it for this filter.
  • Then create filter.
  • Same way you can create filters to any number of people you work with.
  • Once an email arrives from one of those people it will be automatically labeled.
  • Now you can easily separate mails came from specific person through the label.
  • Using Gmail new look, you make the label visible only when there is unread email. You can use this facility as well to make these operations smoother.

Clear Sent Items

For Spam and Trash email folders Gmail provide facililty to delete all. But it’s not there for sent mails. But with filters we can have a work around as below.

  • Create a new filter.
  • Set search to Sent mail using drop down menu.
  • Leave all the other boxes empty.
  • Then click on Create filter with these search.
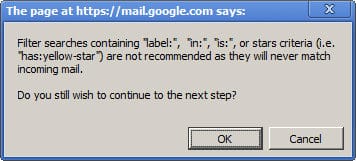
  • Once you click it will give you pop up message as below.

popup-4596208

  • It says that this type of filtering won’t be applicable for incoming mail, but only for existing mail.
  • Click ok and proceed to next panel.
  • Check in Delete it as the action.
  • Check in Apply filter to xxxx matching conversations.
  • Click on create filter. Once you click it will start filtering your sent items and delete them all.
  • You can periodically manually run this filter to empty your sent items.
  • Give it few seconds and visit the Sent Mail folder. Now it’s empty.

There could be lot more other things that you can do with Filters in Gmail to make your life easier. Try different creative things with filters and share your experience with us.

« Previous Post

Next Post »
Samsung Galaxy Note 2

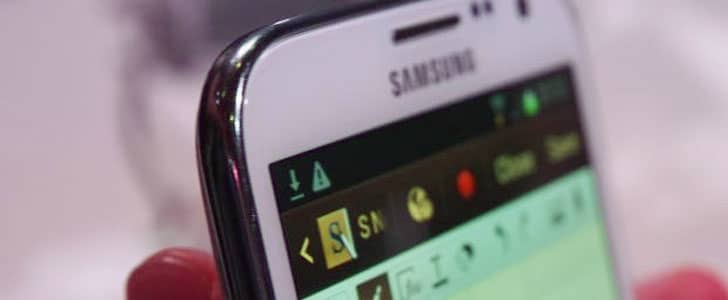
Samsung Galaxy Note gained an unbelievable popularity in Smartphone market. It was a new experience to users. It’s bigger than a phone and smaller than a tablet. This hybrid approach opened a still unnamed new category in mobile devices. You may call it a “Phablet”.

The huge display and smart-pen that still fit in to your pocket made Galaxy Note very popular among multimedia professionals. Lots of Galaxy Note lovers expected Samsung to release next version this year. And they did it. Few weeks ago in IFA, they introduced new Galaxy Note 2 to the world.

I was talking about Samsung Galaxy Note 2, before the release. There I tried to filter out rumors and express what I expect for next Galaxy Note.

Quick Catch-up

  • Shape of Forthcoming Samsung Galaxy Note II

Last time I checked it was under FCC approval. Soon you will be able to buy your own Galaxy Note 2 with all major mobile carriers. Before you go for it, let’s find out what are the attractions and disappointments in Samsung Galaxy Note 2.

samsung-galaxy-note-2-9753727

Attractions

Design is sleek and much better than previous Galaxy Note. If you have used a Galaxy S III, Galaxy Note is following the same design concept. Still it’s using physical capacitive button and having improved smart-pen.

Hardware muscle is essential to this kind of device. Understanding that Samsung packed, 1.6 GHz Quad Core Cortex A9 processor on Exynos 4412 chipset. Surprisingly they added another GB to RAM and made it 2GB. Storage options are 16/32/64 GB and expandable via microSD as usual.

This amazing hardware are powered with the latest and most advanced mobile operating system, Android 4.1 Jelly Bean. This combination made Galaxy Note 2, the most powerful android device ever released.

Battery life, one of the critical success factors for any phone. I expect them to pack Galaxy Note 2 with 2750 mAh battery. But Samsung took it further by packing 3100 mAh battery which is amazing.

Connectivity and multimedia features are almost same as previous Galaxy Note. No much surprises there and nothing to be disappointed as well.

Disappointments

The major disappointment in Samsung Galaxy Note 2 is it’s display. True, its 5.5 inches and Super AMOLED. But resolution is same as previous Galaxy Note. No point of having bigger screen unless it’s having bigger resolution. All you are going to get is less pixel density which leads to less sharper images.

Previous Galaxy Note was having 800 x 1280 px resolution in 5.3 inches screen which gave you 285 ppi of pixel density. In Galaxy Note 2, there is a bigger screen, but same resolution dilute down pixel density to 267 ppi.

Wrapping Up

Samsung Galaxy Note 2, a great Smartphone/Tablet hybrid device. Hardware muscle is amazing and it’s combined with latest Android. This would deliver a great Android experience like never before. This combination will take its multimedia application possibilities to next level.

Camera is same as previous version, display is only bigger not having higher resolution might disappoint users. But still Galaxy Note 2 will be a good upgrade to its previous users as well as new adopters.

« Previous Article

Next Article »

Amazon Kindle Fire HD

For the last few years most of the Android Smartphone took the lead in market, yet tablets couldn’t do the same. Samsung released a wide range of tablets and many other manufactures did the same, but did not succeed as expected. However, one Android tablet changed this picture and dominated a significant tablet market share. It’s Amazon Kindle Fire.

Quick Catch-up

  • Amazon Kindle Fire – 7” Android Tablet Trend Setter

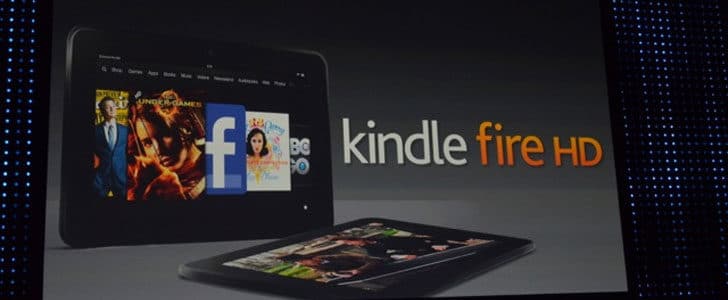
It’s the initiator of 7 inch tablet trend. This was the basic inspiration to Google Nexus 7. This popularity motivated Amazon to come up with better Kindle Fire and they did it. It came to market with the name Kindle Fire HD with much better features as well as competitive price.

amazon-kindle-fire-hd-3425500

Features Highlight

Display

Display is the major upgrade in Amazon Kindle Fire HD. As name says, display goes HD with resolution 800 x 1280 px. Same as the previous Kindle Fire, it has 7 inch IPS panel and giving you 216 ppi of pixel density.

Processor and Storage

Processor is the next upgrade. Now it’s, 1.2 GHz Dual Core Cortex A9 running on TI OMAP 4460 chipset. GPU is very popular PowerVR SGX540. The device comes with 16/32 GB internal storage options and RAM is 1 GB, another major upgrade.

Operating System

Previous Kindle Fire was powered with Android 2.3 and this time they have wrapped Kindle Fire HD with Android 4.0 ICS. However, you won’t be able to experience pure Android on Kindle Fire HD. It’s heavily customized to deliver Kindle branded experience.

Camera

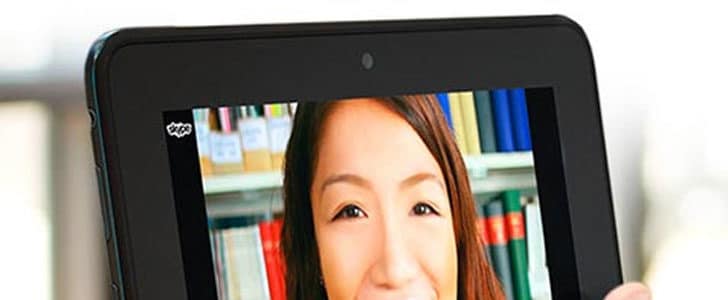
Another attraction is, Kindle Fire HD comes with front facing camera. Now you make video calls with it. However this 1.3 MP camera won’t allow you to record video. Although it’s allowed, it won’t be practical since its front facing.

amazon-kindle-fire-hd-camera-3408127

Connectivity

Kindle Fire didn’t support GSM or LTE connectivity from the first day and it continues to do the same. The primary connectivity in Kindle Fire HD is Wi-Fi and Bluetooth. Wi-Fi is using dual band dual antenna technology which will give you super speed data transfers. For PC connectivity there is a micro USB port.

Battery Life

Specified battery life is 11 hours but the battery capacity is not given. However battery life is highly subjective and totally depends on your usage style. Given value in specification would be true for most of general users.

Wrapping Up

Kindle Fire HD is an appropriate upgrade to previous Kindle and improved most essential features in optimum ways. High resolution display is a wise move and processing power is also in its sweet point. It’s very light weight, only 395g. Design is also great and highly portable.

If you are doing lots of web browsing, eBook reading and you need portability this is a good choice for you. If you are a big fan of gaming, Kindle Fire HD would work for you just great. It’s having decent processing power and great GPU to support it.

Kindle Fire gives you many Amazon specific features as well. It’s giving you unlimited free Cloud storage space for entire Amazon content. There are many other services such as Kindle FreeTime, instant video and lending library.

You can buy Amazon Kindle Fire HD only for $ 199, amazing price for amazing device. This would be a great upgrade for previous kindle and great choice for people who are looking for 7 inch android tablet, for web browsing, eBook reading, multimedia and gaming.

« Previous Article

Next Article »